Tuesday, November 27, 2012

Donations

I've written before about our role as knitters, when it comes to donating.  I think it's an ingrained, psychological need of knitters to donate.  If you've never knitted a pair of mittens or a hat to donate, then please do!  It is SO appreciated by the recipients.  There are tons of places and ways to donate...NICUs, homeless shelters, churches, animal shelters, First Nations reserves, teen mom centres, cancer care centres....whatever sort of item you like to knit--you can find a place to donate to.

The machine knitting group that I'm in is actively involved in providing items for a couple of different places.  I didn't contribute anything last year, so wanted to make sure I got some items in this year!

(Still having trouble selecting more than one photo at a time.  Anyone else?)

 The stockings get donated to a group/resource centre that fills them (sorry I don't know more!).  The burgundy one was made on the Singer 155 with the standard punchcard from the basic set.  The burgundy is an old Mary Maxim yarn.  It weighs 119grams, which is less than the green one, made from an unknown yarn and Bernat Satin for the cream (126gr).  The green one was made on the LK150 and Meg (who just turned 7) helped with all the straight parts (except the foot).  She loves helping out with the machine!
I also made two pairs of mittens.  They are both with Patons Decor and done on the LK150.  The other pair is a greyish blue and I finished them at the meeting, so no picture.  About size 8.  The blue ones I did a "star decrease" top so I wouldn't have to graft them LOL.  I wish Patons had a superwash worsted weight yarn. I know I was asking for a superwash DK weight last spring and they came out with that (can't get it local though), so maybe they'll hear my pleas for a superwash worsted weight!  I just find 25% wool to not be enough wool, esp. for kids that are playing in the snow.  But for donation mitts, I don't want handwash wool.  These mitts were 33gr, so I'm going to assume the blue ones were too.  However, there was a lot of ends trimmed off so I'm going to round them up to 35gr :)

Yarn In:  19 015gr
Yarn Out:  315gr + 15 468gr = 15 783gr
Balance: 3232gr more brought IN than used up
Costs:  $468.34/338 days =  $1.39/day

Sunday, November 25, 2012

C'Mon......

I know at least 10 people viewed my last post....yet there's only one comment entry for the book give away!  :(  It's an adorable book, would make a great gift, or make great gifts from the designs!

Edit to add:  I tried the link in the last post, and it worked for me, but here's the Amazon link too. 

Friday, November 23, 2012

Cuteness and Contest

Wow, what a week.  It was going fine until I got a call on Wednesday that my son got hurt at school and I needed to come.  Ended up taking him to a walk in clinic for stitches, and while they were setting up for that, I get a call saying my daughter had been hurt.  When I went in to get her, I told them that if child #3 gets hurt to just call daddy cause I was at my limit, LOL.  This disruption wouldn't have been too bad, but I had plans for the day because I was going out of town on Thursday.  Got home to the typical post-school madness, running kids to friends, dinner, band rehearsal, etc.  Today, I've got a lot on my to-do list again, since I will also be away on Monday! 

Anyway....Contest first!  I've just past my 600 post!  I'm going to give away a copy of "Long Legged Friends", a totally cute Japanese crochet book!  You can see it, and a project, over here.  Isn't that adorable?!  So, leave me a comment and I'll make the draw next Tuesday, Nov 27.

And now for the cuteness (you thought that was the cute part of the post?  LOL).

Two baby "Thorpe"s!  I crocheted several baby blankets with donated yarn in the summer, this Sear's "Giselle" yarn.  I knew I had some of the green one left over, and while digging around, I found I had two balls of this pink/white/grey.  I started with the one on the right, using 8 sts less than the smallest size in the pattern, and a few other adjustments.  In the end, it turned out too big for my newborn ball.  So, what to do with the second ball?  I don't think the larger size would need a diaper cover for photo prop use, so I tried sizing the pattern down even more.  It's still a little big on my "newborn head ball".  More like a 6 month size, I think.  I used up every last bit of the yarn for the pompom.  It's huge.  Love the huge pompoms on tiny hats. But it means the bigger hat doesn't get a pompom.  Together, they weigh 103gr.  The one on the left looks lighter, but it's just that it ended up with not much grey on the front.  They are so soft and snuggly.  I want one too!  (For sale on my boutique site!)

That 103gr did not offset what I purchased yesterday (533gr).  Sigh. 

Yarn In:  18 482 + 533gr = 19 015gr
Yarn Out:  15 365gr + 103gr = 15 468gr
Balance:  3547 gr more brought IN than used
Costs:  $19.01 + $449.33 = $468.34/334 days = $1.40/day

Tuesday, November 20, 2012

Football Hat

I was asked to share my pattern for the football hat.  Certainly!  I should link to it on Ravelry too, since there seems to be quite a deficit in (free) (knit) football hat patterns!  I will give you the pattern for how it should be done, not necessarily how I did it, LOL.  I'll include both a handknit version and the machine knit version.


Size: 0-3 months
Yarn:  Loops & Threads "Impeccable", 26gr total, in brown and white (yarn gauge:  18st/24row on 5mm needles)
Gauge:  I didn't measure it, but previously I got 18st and 26 rows per 4" at T6 on the LK150; I haven't handknit with the yarn, so I can't recommend a needle size, but start with 5mm/US8
Finished Measurement:  I didn't measure this but based on previous gauge, 14"

Cast on 66 stitches in dark brown (64 stitches for handknitting).  Work in ribbing (K1, P1) for 3 rows (work in the round for handknitting, or follow the MK instructions to knit it flat).
For machine knitting, start with ribbing, or do an open cast on and handknit the ribbing in the round after the hat is sewn up.  This gives you something to do in the evening, and I think it looks a little nicer than seaming the ribbing.
Change to white, and knit stockinette stitch for two rounds.
Change to brown, and knit (stockinette stitch) 20 rounds.

Decreases will be done in handknitting by slipping two sts at the same time, as if to knit two together.  Knit the next stitch, then pass the two slipped stitches over.  On the machine, it will be done by keeping a "central" stitch and moving the stitch on either side on to the latch with it.

Handknitting (in the round):  Knit 6 sts, dec (as above), knit 13 sts, dec, knit 13 sts, dec, knit 13 sts, dec, knit 7.  Knit 1 round.  Switch to white for two rounds. 

Machine knitting:  Move L21 and 19 onto L20; L10 and L8 onto L9, R7 and R9 onto R8 and R22 and R24 onto R23.  Move the remaining stitches inwards, towards the middle, to fill the gaps.  Knit two rows, switch to white and knit two rows.

Switch back to brown for the remainder of the hat.

Do another decrease row, lining up the left slipped stitch with the prominent stitch of the previous decrease (for hand knitting); machine knitting, line up the prominent stitch and move the stitch on either side onto that needle.

HK:  knit 3 rows
MK:  knit 4 rows

Repeat the decreases again, but HK: knit two rows, MK:  knit 3 rows, and repeat this dec and 2(3) rows. 

Not sure how many stitches are left now :)  You have dec. 8 sts on 5 rows....40sts are gone, leaving 24/26 sts.  If you're HK in the round, do another dec row lining them up, and one round plain, then line up some K2tog. This leaves about 8sts to draw the yarn through and tighten.  You might want another plain round after the last dec. round.  If you're MK, you won't be able to do the double decreases on the edges....so use your judgement to decrease the last few rows.  My notes are not detailed enough to replicate exactly what I did, LOL.

Sew up the seam, if needed, and add ribbing.  For the white lacing, take a long strand, and do two vertical lines, then some horizontal lines over it (the end two lines I went over one strand and under one strand).

If you knit this, by hand or machine, let me know; and please take better notes than I did with the decreases :)

Edit:  I did get a response from a reader who made this!  Her version is at https://www.box.com/s/3vi6egmofrnmi2z1foqj  It looks very well written and I really appreciate the link.  The third page is her "shortform" version of the pattern.

Monday, November 19, 2012

Baby Bits

First up, suddenly I can't use the Ctrl key to select more than one photo.  Anyone else?
 
I've been working on small knitting projects for the photographer I met.  She showed me some pictures she liked, and asked for a few specific things.  I will admit I got a little sidetracked with a photo or two from the "like" pile and got a late start on the "want" list!  I also got sucked into ebay, and etsy, and ravelry a few times!  I posted about the gorgeous multi-textured stocking cap already.  As hoped, she loves it!  I hope to get more orders for that style as I really enjoyed putting it all together.  I can't wait to try other colour combinations!
 
One item she wanted was a fairly basic white set.  The picture she showed was really basic, and I had actually been working on a hat in that pattern already, but in blue/pink/white.  Another picture she showed was from ebay and was a chunky knit hat, with a cable going around, garter stitch top, and the tiniest amount of a brim.  The seller is a Chinese company and the hat is available in several colours, and less than $5 with free shipping.  I looked extensively through Ravelry's pattern data base, and could not find the pattern.  I knew how it was made, but I was hoping for a pattern, mainly just to confirm, or give me the numbers.  Oh well.  I looked through my stitch dictionaries and found a braid cable and started a strip long enough to go around a baby's head.  It turned out to not be the exact cable I wanted, though it still worked.  The problem however, is that the repeat is 1 1/2" and that could take a hat from "too snug" to "too big".  Now, every baby is a different size, so there's not much I can do about that.  The next hat, I will use slightly smaller needles and one more repeat.  Hopefully that brings each repeat to 1".
 
The diaper cover was another issue.  The pattern I had been working from was worsted weight.  So, a bit of math (luckily I had one here to measure as the pattern gave body measurements, but not finished measurements).  I decided to handknit the cover since I needed a project for out and about and it would be quick enough in the chunky yarn anyway.  I got it all finished, the crotch grafted, the ends woven in, and smoothed it out on my lap.  Something was not right:
 Oh man.  Even though I had told myself to make sure I line the leg holes up right....I forgot.  I spent about 12 hours thinking I had to totally re-knit it, and actually started one on the LK150 but it wasn't going well.  Then I realized I could do the most un-knitterly thing and CUT off the short rows and ribbing and knit upwards.  Yup.  Scissors, met the diaper cover!
 Doing this doesn't really scare me, esp. in a chunky acrylic blend.  In no time I had it re-knit the right way!
Then I put the set down next to the ball of white yarn I was using for another project.  Ummm.  The set didn't look quite so white anymore!  I wouldn't call it cream, but it's definitely a soft white.

 A leisurely stroll through Michael's yielded the perfect buttons.  I intended to put them on safety pins so the hat could be changed up, but thought better of that when I got home.  This set weighs 63grams (of course, the yarn comes in 50gr balls).

Many thanks to Jennifer Bel Photography for the pictures!
The next set was to be a football hat and diaper cover.  I will admit I know next to nothing about footballs.  What shade of brown?  Most seem to be a reddish brown, but that doesn't seem to be in style in the yarn world.  And there is a distinct lack of free knitted football hat patterns.  There were a couple crochet ones, but I wasn't feeling the crochet love this week.  Most hats did have a more rounded top, but I saw one that used four double decreases to create the strong seam lines.  I copied this on my knitting machine.  The first hat was more elf than football, but the second one did much better.
 The diaper cover was also done on the machine, though this time I opted to not do ribbing at the legs.  It just didn't seem to need it.  I did however, put stitching on the bum :)
I was so concerned about the stitching, I wanted it authentic.  I figured it was some complex embroidery pattern for seaming the ball.  But no, every football image I found showed a very simple lacing, I guess just for gripping the ball?  This set is exactly 50gr.  I did already have a 50gr ball of brown, but was sure I'd need more.  Guess I can make another set now!

Yarn In:  18 482gr
Yarn Out:  113gr + 15 252gr = 15 365gr
Balance:  3117 grams more brought IN, than out
Costs:  $449.33/330 days = $1.36 per day

Friday, November 16, 2012

Christmas is Coming!

As I mentioned a little while ago, I was making a Santa hat for a photographer.  Here's her shots!
Is that not darling!  I also made a diaper cover, but it had narrow stripes.  If you're interested in your own set, send me an email or check out my Facebook page!
 This bottom one has the diaper cover to match the hat above; I didn't make the hat below.


I've already included the (estimated) yarn amounts in a previous calculation, but I did buy more yarn yesterday!

Yarn In:  128gr + 128gr + 18 226gr =  18 482gr
Yarn Out:  15 252gr
Balance:  3230 gr more brought in, than out
Cost:  $9.02 + $440.31 = $449.33/327 days = $1.37 per day

Wednesday, November 14, 2012

Aaaaaawwwdorable!

When I went to meet the baby photographer, she requested a few more items, and gave me a bunch of pictures of items she likes.  I think I understand her style, but I was so excited I got a little sidetracked with some ideas other than her requested items.  Ooops.  So this week I focused on the biggest of the three items, a multi-coloured, multi-textured stocking cap.  She didn't necessarily want green and red, but likes neutrals and browns.

First, I gathered up all the yarns I thought would work.  I was going to do the ribbing after, using the fuzzy yarn in the lower left.  That ended up not happening.  There's a couple other yarns I didn't use, but this step helps with visualizing the finished item.  I had plenty of textured yarns in the light and dark colours, but not much in the "middle" shades.  I also knew that I wanted more actual knitted texture.  How?
 I got started, on the LK150.  The SK155 would probably have worked a smidge better, but I'm still warming up to it, and since I had recently done baby hats on the LK150, I had a better idea of tension and numbers.  After starting, I went to Michaels to see if I could find a knobbly yarn.  Yes, indeed, there were many.  But they were all multi-coloured!  Bright, contrasting colours usually.  I did get Loops & Threads "Bunny Tail" in off-white.  This yarn is interesting.  It's got mini puffs along a cord.  Like they attached tiny bunny tails to a braid.  Soft!  But how to knit with it?
 I tried doing some tuck stitch for texture, but it didn't show up.  I realized quickly that the purl side was going to be the right side, and thought about turning it a few times to make ridges....but after thinking about it...nah!  The Bunny Tail had to be worked on the "public" side, so that really cemented the purl side being the public side.  What I did was knit two rows with a plainer yarn, then laid the cord part of the yarn over every fourth hook, so the puffs took up the space of three hooks.  Then I knit the row with the plain yarn.  On the first few bands, I think I then did the puffs again (but offset to the first row), but later I did another plain row to space them out a bit more.  They are a little closer together than I'd like, but you REALLY can not space them differently--you have to knit the cord part and the puffs are at regular intervals.  You can see the Bunny Tail yarn end on the left in this picture below:
 I still wanted MORE texture!  So, I knit a row with a plain yarn, then chose a very fuzzy yarn.  I manually knit little bobbles.  I manually knit three stitches, then on the next one, I knit 6 rows on the one stitch.  A little awkward as you have to pull it down (a crochet hook helps).  Then I picked up the stitch of the plain row and placed it on the latch.  This created a tiny loop that passed as bobbles in the fuzzy yarn.  Then I knit two rows with the plain yarn and repeated the bobbles, but offset.  Later, I switched to doing them with only two needles in between.  This made them closer, but the second row was more random looking instead of precisely placed in between the ones on the first row.
 Once I got it all cleaned up and sewn together, it was clear ribbing was OUT.  Would have totally spoiled the look.  Because I started with a double strand, the first few rows were thicker and were really rolling in.  So, I stitched it down inside like a hem.  Sometimes, your knitting really does talk to you.  Listen to it! 
There's also a diaper cover in that picture.  I really couldn't work the colour shading into the shape, so I used the Bunny Tail around the waist to tie it together.  And the purl side is the outside.
 Then I had to make a tassel.  Hadn't done that in a long time!  But isn't it lovely?!  One tip--I took one strand of all the different yarns I wanted to use (could have used some darker ones, there's a few but you can't see in this picture) and held them together when I wrapped.  This made sure it was more random.
 I forgot about the cord.  At first, I thought I'd make mini i-cord and braid them.  Too thick.  I needed to suck it up and face my fear of twisted cords.  I've never had them work.  I started with two 2st i-cords and twisted them together.  They sprung apart a bit, but the mohair boucle sort of made them stick.  But I was afraid they wouldn't stay that way.  I asked in a Facebook group, and was told I have to overtwist, then bring the two ends together and make it twist upon itself again.  Aah!  This made it too thick and short though.  So I re-knit it with 1 st i-cords (really, a crochet chain LOL).  One yarn is a cream fuzzy yarn, the other is a boucle that changes from cream to beige to brown, with a gold strand.  Once it twisted back on itself, the yarns really blended together and almost looks like interlocking loops.

When I started the hat, I didn't have a precise picture in mind of the end result.  That's a little challenging for me.  I knew I needed to listen to my instincts and to my yarns.  If I were to do this again, I'd try putting the Bunny Tail and the fuzzy bobbles really close together so they appear as one band, instead of stripes.  But, I still love this hat!  I'm more than willing to make similar ones, in other colours too.  For the set, $30 if I have the stash yarns, $35+ if I have to buy yarns. 

Thanks to Jennifer Bel Photography!  If you go to her Facebook page, you can see another adorable picture of this hat, in her cover photo right now (Dec 4)!

I also Freecycled 274 gr of baby yarns this week to a woman who knits for preemies!

Yarn In:  18 141gr + 85gr = 18 226 gr (and I still have 74gr of the Bunny Tail!)
Yarn Out:  274gr + 133gr (that's it?!) + 14 845 = 15 252gr
Balance:  2974gr more brought IN than out
Cost:  $3.23 + $437.08 = $440.31/325 days = 1.35/day

Monday, November 12, 2012

Vampire Cocoon

I had been doing so well at posting M-W-F until last week.  Not a normal week at all, even with my life that doesn't have a normal "normal" if you know what I mean!

Recently, I had written here about not getting comments and feedback on patterns.  The cocoon pattern is the most popular post I have written, yet I rarely hear from people that have made it.  Sometimes I'll see it on the Facebook Ultimate Knitting Machine group (the only FB knitting group I'm in), or in a Ravelry or Yahoo group, but not often.  Just the day after writing that post, someone in the Facebook group DID post a cocoon picture.  He said he got the pattern from www.reliefshare.org  I know they link to my pattern there, as well as others.  The picture looked like my pattern, so I asked and indeed, he had used it to create a Vampire cocoon! 
He extended the back (which I think is folded over the front here), in red, to make the collar.  And made a little hat.  Isn't this cool!  I'm nowhere near that creative!
I think if you want to try this, when you get to the back, you can do one of two things....one is like I did when I made stuffed animal sleeping bags.  Short row just like doing the bottom of the cocoon, "up and over" and end up with a double thickness for the back collar.  This doesn't flare out like a vampire collar though.  So, I think I would actually increase on either side, every other row for about 3", then do a turning row (knit looser, or reform to garter stitch, or picot), then decrease back down, even doing seam-as-you-go along the edges.  Join the open end to the inside.  I hope you can visualize this.  It'll wrap around to the front, but not be joined along the top front edge.
Any other cocoon ideas out there?  I've seen footballs, cobs of corn....

Wednesday, November 07, 2012

Mittens

I just thought of a name I could have used for my business..."Mittens and Miscellaneous".  I didn't want a knitting-specific name, since I do sew and crochet.  I didn't want "cutesy" or random.  Oh well, the business cards are already printed!

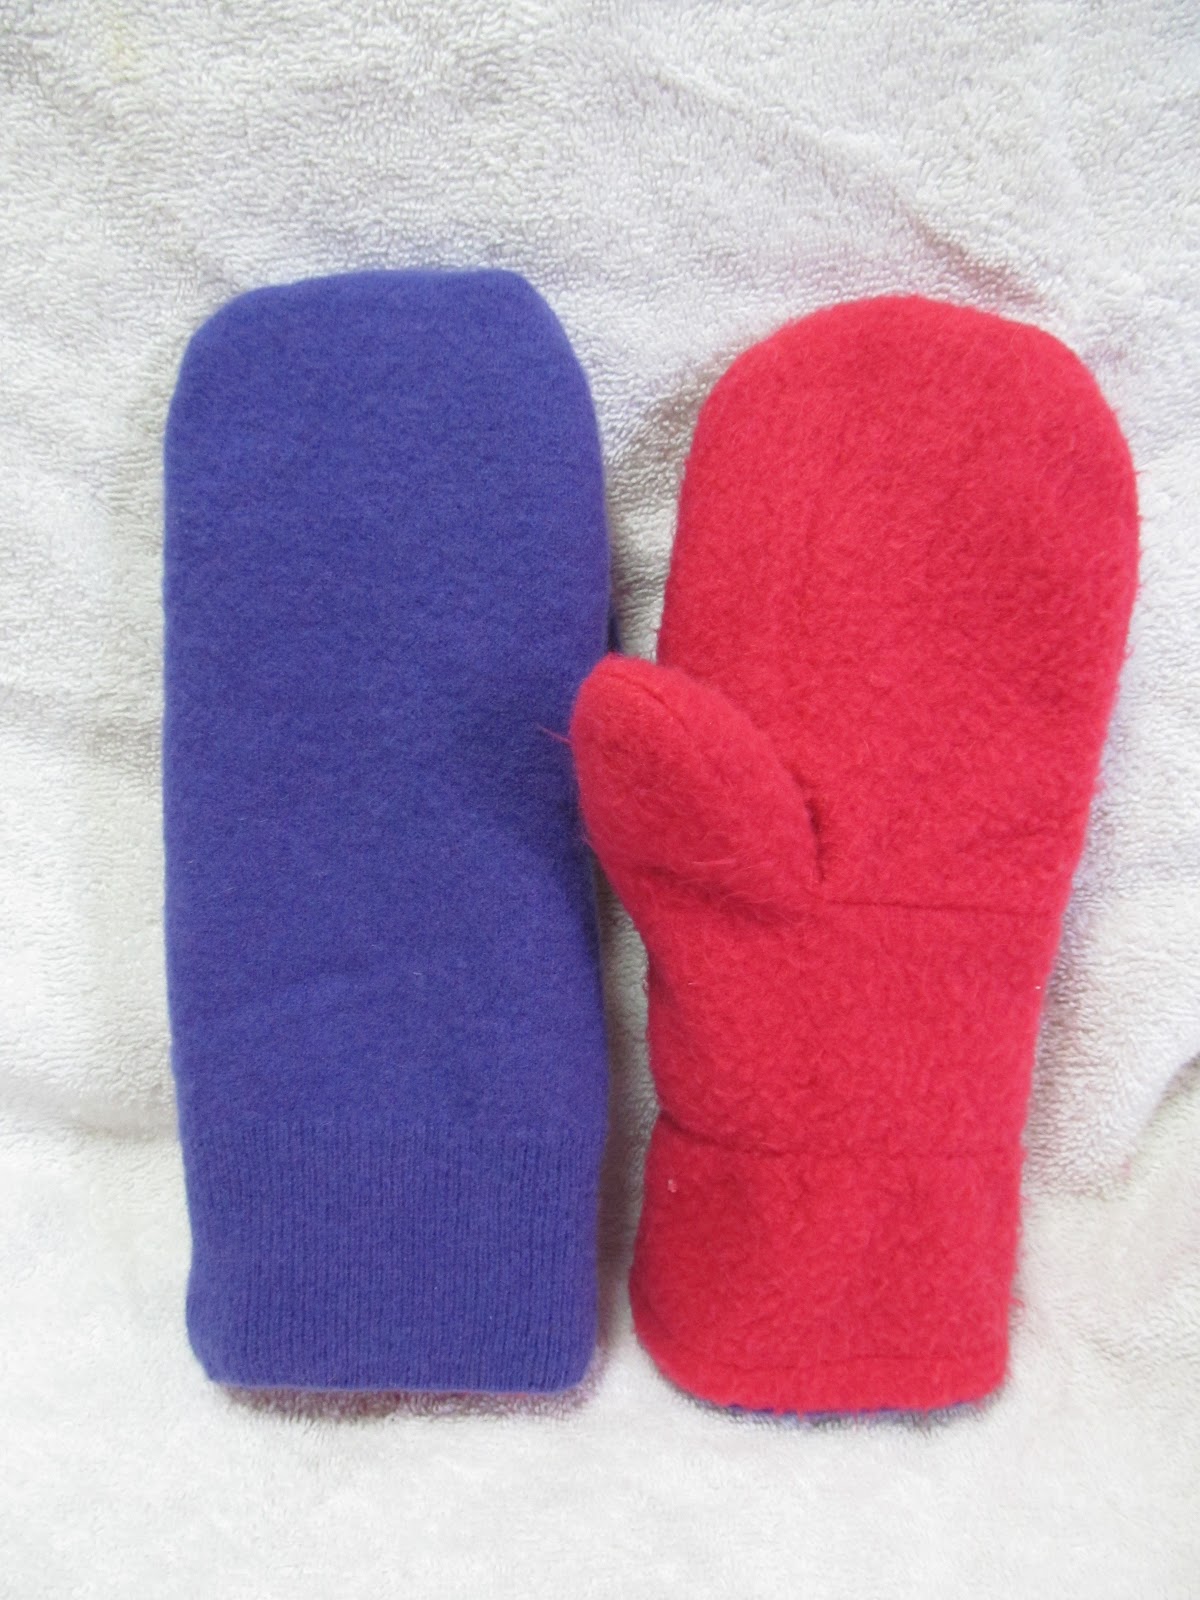
I know I've written a LOT about knitting mittens, both by hand and by machine.  I'm a bit of a mitten snob.  When I first started, I made acrylic mittens.  Yup, 100% acrylic, for here in Canada.  I made them for me, and while I thought they didn't seem very warm, I was an adult and didn't engage in many snowball fights.  Then I made some for my toddler son.  He wore them out one day, it was cold and damp but not snowy at all.  After a while he took the mitts off and his hands were bright red and freezing!  I felt horrible!  I was learning about wool, so I started using Patons Decor because it fit the gauge of the Patons pattern I used (which called for Canadiana--100% acrylic).  Decor has 25% wool and is machine washable.  I made some in Shetland Chunky for me, which is also 25% wool.  I didn't think they seemed any warmer.  When the kids were a bit older, I made more in Decor, and they did indeed complain they weren't warm enough.  I had some 50% wool, and used that.  I did notice an improvement over the 100% acrylic, but still not as warm as we need.  Eventually I moved up to a minimum of 75% wool for mittens.

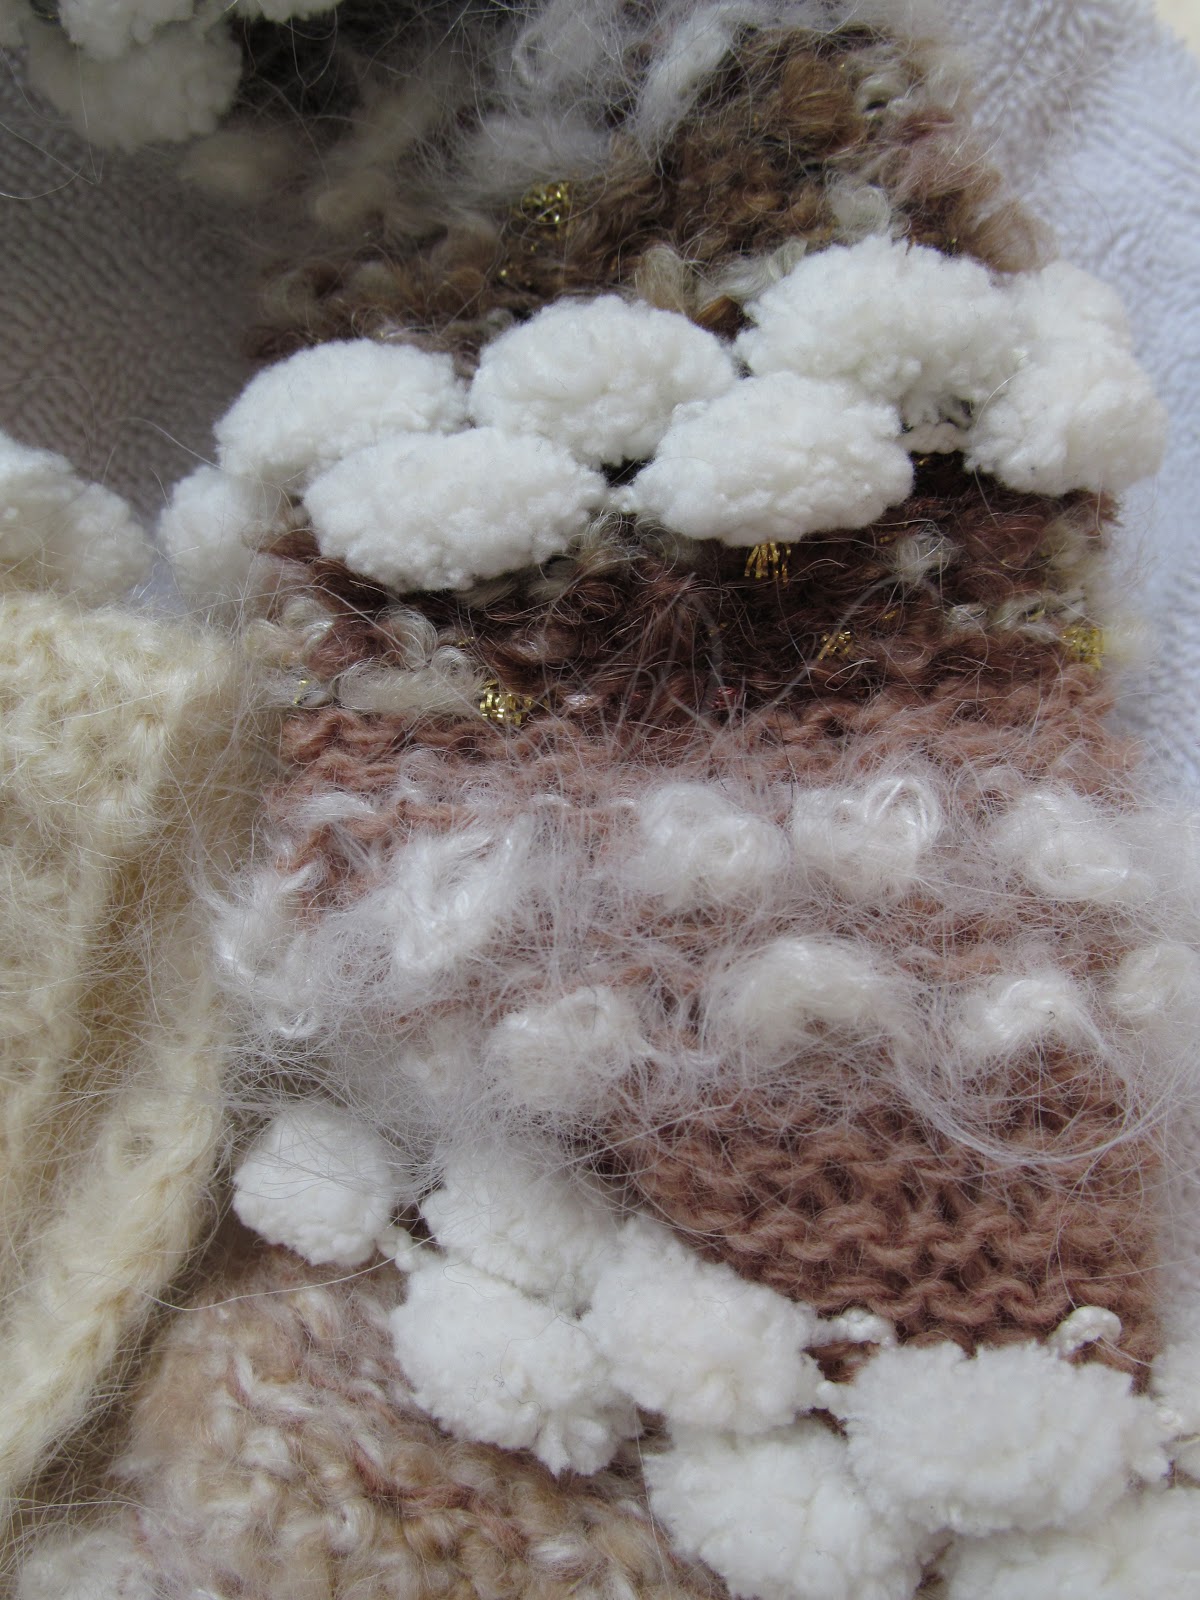
However, knit fabric has a huge drawback. No matter how tight you knit it, there are small gaps between stitches, as well as in the fiber itself. We get told that the loftiness of wool allows it to trap your body heat and keep you warm. Yes, it does this. But with no over-layer, the minute gaps also allow cold air IN! Even the double layer, wool and alpaca mitts I made for Rob were not great on windy or very cold days :( You just can't knit tight enough to prevent this (and you wouldn't want to knit that tight, or wear that fabric either).

I had never thought about sewn mittens.  I knew about sewing with felted sweaters, for making diaper covers....but other than that, I hadn't thought of it.  Then I was reading a blog devoted to wool sweaters and started seeing all her great projects (including running tights).  She shows fabulous wool sweaters on her blog, and I figured I should be able to find some too!

Well, I had a hard time finding cool sweaters like her's :(  Really, I don't know where they are.  Last year, just before Christmas I was looking for a Goodwill but found the Salvation Army instead, and they were having a 1/2 price sale on sweaters.  I grabbed some, but never got around to doing anything until I made the water bottle holders in the summer.  Then this fall I started looking more, and still had trouble finding cool sweaters.  I really wanted fancy ones because I'm not good at embellishing!  I did find that there are nice wool scarves though, so that helped round out my collection.
I had focused on my idea of production knitting mittens over the summer and was disappointed with the results, so I figured I should give sewing them a try.  Of course, this meant hours on the internet looking for the perfect pattern--one that mimics the ones I knit, with the thumb coming from the side.

Here's the other element to my mitten snobbiness.  I have never handknit a "palm thumb" (I have machine knit them).  I have never worn this style.  To me, our thumbs come from the sides of our hands, not out from our palm.  However, NONE of the patterns for a 'side thumb' came with multi sizes, they were all just "trace your hand and add 1/2".  I actually found only two sources for multi sized sewn mittens, and one was just kids' sizes.  I figured I'd just have to trust all the sewers (and other knitters who do palm-thumbs).

I chose a purple sweater that felted well, and one kid size with a printed jogging fleece and one size with bright pink fleece.  I used the sweater ribbing, even though the pattern said not to bother.  However, when I went to sew them together, I realized that I hadn't allowed extra on the jogging fleece to turn under at the bottom.  I sewed some elastic to the bottom of the jogging fleece and hand stitched it in.  I was disappointed because I felt the printed fleece did not feel nice inside, and now they weren't really reversible, unless you want the purple cuff to show.
I started on a men's pair, using a cardigan with front pockets.  I thought the pocket would be neat for holding a bus pass.  Then I realized they wouldn't really be reversible.  I still made the liner so that it pulls out (but is handstitched at the bottom), and they can be reversed, if you don't mind the button.  These got a lot of "ooohs" and "aaaahs" from family.
The brown sweater used for the inner didn't felt much, but is a nice fine merino.
 I finished off the adult purple mitts with the pink fleece.  Again, I didn't leave enough fleece to turn under, so I hand stitched it to the bottom of the purple mitten.  This didn't take as long as I was expecting, but still, I didn't want to do it for every pair!  I made a note to remember this--that if I cut the sweater pieces using the ribbing on the bottom on the pattern piece, to allow a half inch more on the bottom of the liner pieces.  I totally forgot every time.  For these ones, I also added elastic inside.  The patterns using felted sweaters didn't do this, but the other pattern using fleece (and flannel for the inside!  What?!  Diaper (absorbent!) fabric for the inside of a mitt?!), used elastic to snug them up.


Some people really liked the feel of the fleece inside.  However, Lucy pointed out that snow sticks to the wool mittens, so that the fleece is better outside for during snowball fights!
 

After these, I got a little busy, but I kept buying sweaters (and scarves), and fleece. I knew I needed to get started on mass production, but other things kept getting in the way.  Then I had a medical procedure scheduled for in Toronto.  I figured that'd be a great time to take them in to my friends' store directly!  I got to work, but things still kept getting in my way!  Finally, on Friday, I was in work mode.  Going great.  Then on Sat. I woke with a headache!  Since I was having a biopsy on Monday, I wasn't supposed to take any pain killers that can thin the blood.  Finally, after some googling, I decided some ibuprofen would be okay.  I was able to get back to work for awhile, but was way behind.  I got it all done on Sunday, but it was a push, and I didn't get good pictures :(
 I took in 12 pairs (including the large purple pair and the green pair above).  Some have wool inside, some have cashmere, some have fleece, one has Minkee.

I had already put the tags on so I didn't want to disturb them to turn them inside out.  It was fun picking out different fabrics to go together, and I learned a lot from this first run.  Some sweaters felt really thick, and don't need an inner layer (but then aren't reversible either).  The total thickness should be about the same for all mitts, so if it's a thin outer, then a thick inner is needed.  The thicker the layers, the smaller they turn out to be.  I did machine stitch around the bottoms to join the layers, and it's acceptable to me.  None of these have elastic and they seem fine. 
Best of all, Cherie (from Beadle, the store where I took them) really liked them!  In fact, she put two pairs up in her window display!  And people are liking her picture (she shared the one I have above, of the 6 pairs)...people I don't know!  It's nice when family says they're lovely, but the real test is strangers, LOL.  And if they sell.  Fingers crossed!

Tuesday, November 06, 2012

Find Me On Facebook!

I wasn't enjoying using Weebly to make my TracyKM Designs website.  I had created a Facebook "group" awhile ago, but realized that wasn't what I really wanted.  So, today, I spent quite a while and made a "page" for TracyKM Designs.  You can find me at http://www.facebook.com/TracykmDesigns .

And can I say "Wow!"?  I am sooooo excited at the thumbs up I'm getting.  I sewed up a bunch of mittens that I took into a friend's boutique, "Beadle".  I linked to her in a picture of the mitts, and she re-posted it on her store's FB page....and STRANGERS are "liking" my (crappy) picture of the mitts!  I wish I had gotten better pictures, but it was late when I finished on Sunday night, so I was a bit rushed on Monday morning.  It's one thing for my own personal friends and family to say my stuff is nice, but when people who have no connection to me give a thumbs up?  Making my day!  Thanks!

And hopefully tomorrow I will get back to regular posting here :)

Give Away!

Well.....had a little bit of life happen towards the end of last week, just the stuff that keeps things interesting...daughter had an allergic reaction to a drug, I had a migraine while trying to sew up a pile of mittens for a boutique and wasn't supposed to take pain killers because I was going to be having a thyroid biopsy yesterday, but then the doctor wouldn't do it...

But things are back on track now, and it's time for the give away.  To be honest, I was really expecting more than 4 comments last week :(  However, for the four that did take the time to comment, thank you!  And lucky for you, you have a 1 in 4 chance of winning the sewing book!  Without further ado, the winner is:  Izbthmcmullen!  As soon as we link up and I get an address, I'll mail the book off to you!  It really is a charming little book :)

Stay tuned for more give aways over the next few months.  I really have too many books for my bookcase!

Friday, November 02, 2012

Ooops! Sort Of!

Just a reminder that I will make a random draw this afternoon, from the comments this week for a copy of "Posh Pocket Sewing Tips"; a handy little book filled with great sewing tips and advice!

I've been communicating with a local photographer about making little hats and diaper covers for photo props. I finally got to meet up with her yesterday and sell her a few things.  In exchange for a discount, she will let me use (with the parents' permission) her photos of the items.  However, when I was leaving, I realized I hadn't taken pictures for the blog!  Then I remembered the deal.  Then I realized that I hadn't weighed some of the items!  She loved the pink/beige hat with the flower, and I knit a diaper cover to go with it, 30gr.  I also made a dark blue diaper cover to go with the soldier boy cap, a little bigger and denser yarn, 40gr.  She didn't like the hat, particularly the yellow band.  Perhaps if I used proper gold trim....or just take it off.  I wasn't thrilled about it either.  It does appear though that she doesn't like the bold boy type of hat, she likes more neutral and soft.  I also made a long red and white striped stocking cap and striped diaper cover.  Going to estimate 100gr for the hat and 35gr for the cover.  She wants a few more items, and showed me some pictures of what she likes.  Hopefully this leads to even more!

I don't like photoless posts, so here's a little picture (why does it seem smaller than pictures on other posts?  I've even set this at "large" when usually I think I do "medium" and that was definitely smaller than usual).  Taken on Thanksgiving weekend at my parents' almost a month ago!

Yarn In:  18 141gr
Yarn Out: 205gr + 14 640 = 14 845gr
Balance:  3296 gr more brought IN than used up
Costs:  $437.08/313days = $1.40 per day