Friday, April 26, 2013

A Little Dent

Life is busy, what else can I say...except also that the kids keep using up our internet usage amount before we get to the end of the billing cycle, so we have to go on an internet diet, or else go to the library (or the Home Depot parking lot--did you know they have free wi-fi?).
I think I've mentioned before about Dawn, and Hourglass Imaging.  She's the one who ordered the green Epic hat (along with a pink one I haven't shown yet), and the striped crochet earflap newborn hat that I showed on an Angry Birds stuffie.  She's been doing a bit of design/branding work for me, so she can show it on her website.  It's so exciting.  TracyKM Designs is going to have a new look!  Anyway, as a thank you, I thought I'd use up the rest of the yarn from the striped hat, and make a "matching but different" hat, more summery, and also nice for twins.

Not much to show, without an adorable baby wearing it!  I've been using black for my backgrounds lately.  I didn't think I'd like it, and it started by accident (more on that in the next post or two), but I do!
This hat, though, took only 26gr of yarn (of course, that means if you buy a 50gr ball of yarn, you can't crochet two the same...you could knit one, and crochet one though).  This barely makes a dent in my stash!!  I'm so bummed, I'm not even going to tell you about the two spools(?) of #10 thread I bought to crochet daffodils for next April.

Yarn In:  6437gr
Yarn Out:  1672gr + 26gr = 1698gr
Balance:  4739 gr more brought IN than out
Costs:  $173.75/116 days = $1.50/day

Thursday, April 18, 2013

I Found It!

I have expressed my love-hate relationship with crochet.  I love the quickness, the way it can blend tricky variegated yarns, etc.  I hate the lack of standardization in patterns, books with not enough pictures, or just plain lacking the info I need.  I recently got a crochet book by the author of some very popular knitting books.  I really liked her knitting books, so I thought it would be a good crochet book.  Instead, I was told I was holding the hook the "wrong" way and must hold it the other way.  There were no photos, only b&w drawings.  I was trying to do a flat circle, and couldn't find info on when you join the round, where do you start the next round...

Last night I was at the library to learn about geo-caching.  We weren't going to go into the books, but Lucy needed some.  I wasn't going to go upstairs...but the book she wanted was up there.  Since I was up there, I might as well look at the books!  It's hard to pick a couple while keeping tabs on the family, but I grabbed one that had lots of photos.

"Crochet, Step by Step" by Sally Harding.  This is the perfect book (for me).  To start with, she shows two ways to hold the hook, and two ways to hold the yarn!  There are detailed photos, with writing on them to explain everything.  Simple yarns, simple photos, simple text.  Quite a few nice looking stitch patterns too, and i really like some of the edgings!  Of the patterns...I'm not a big fan of that part of the book.  The yarns are mostly Rowan, Sirdar, and Stylecraft, with a few common US substitutes listed.  The hats/baby sweater are not shown on humans, or even on wig heads.  The hats give size as "newborn", not as a measurement.  The section on sewing on buttons--the pictures show doing it on woven fabrics!  But I love that the hook sizes give the letter, number, and mm size!  Some of my hooks have one, but not the other.

I'm going to get started on one of the projects right now.  Although I need to get finishing that Teddy bear!!

Tuesday, April 16, 2013

A Little Redemption

Working on my favourite baby gift for a family member!

What is it?  You can't tell?  :(  LOL.
It's my favourite Jean Greenhowe teddy bear.  I'm using Sirdar Eternity, I've had it in my stash for a long, long time (possibly 10 years).  It's a neat yarn, a mix blend of wool and alpaca and other things, but really, it needs to be knit somewhat loose to let the texture and softness come through.  I made a hat with it, and it's okay, but certainly not windproof!  It's knit a little tight for this bear, and the bear's not as big as I was hoping.  I wish I had double stranded it.  I'm in the process of stuffing and sewing now, but I weighed him before starting, and it's a whooping 95grams.  Yes, it is much easier to bring yarn into the house than to get it out of the house!!

Monday, April 15, 2013

Can't Stop Myself!

Had to visit Value Village to shop for my husband's birthday.  Had to just "check out" the yarn section.  Only two bags of yarn came home with me, but they sure do add up!  As well, I found a sweater to unravel.

 Two balls of Beehive Shetland Chunky to make another slouchy Beehive hat.  It's darker than the picture, a sort of tweedy dark blue (105gr).  "Pow Wow Machine Washable Indian Type Yarn".  It's a thick, single ply, 20% wool yarn, 180gr; teal acrylic (Vanna's Choice?), apple green with glitter (possibly cotton), and fuzzy light grey (Sear's "Giselle" again maybe); 169gr; unlabelled brown that was in with the Classic Wool and I thought was also Classic Wool but doesn't look like it once I actually held it (131gr); Classic Wool (111gr).  The balls in front are from an Esprit sweater (548gr).
 For some reason, I'm really attracted to slightly textured sweaters with a metallic thread.  I'd like to find a more summery looking yarn though.  I'm also wondering if this one is gender-neutral.  I like it, and I think it could be newborn boyish....but I don't have a newborn boy so I'm not 100% sure. 

I lucked out with this sweater.  No weird collars, no button bands, no pockets, just as simple as it could be.  What was surprising though was that there were still knots in the yarn; I would have figured they'd be using cone yarn.  The cowl collar was a little odd...about two rows after the cast on there was a knot.  In the cowl itself, there were probably 4 knots.  For $7.99 and I bit of work, I think 548gr is a great deal!

See, it didn't look like a whole lot, but it's 1245gr!!  And since my finished total is only 1672 for the YEAR....I have knit up more than that, but it's not quite finished yet.  But we're talking a few hundred grams, not a few thousand, LOL.

Yarn In: 5192gr + 1245gr = 6437gr
Yarn Out:  1672gr
Balance:  4765gr more brought IN than out!
Costs:  $15.78 + $157.97 = $173.75/105 days = $1.65/day

Monday, April 08, 2013

This One....

...is definitely my number three favourite. 

I've made a lot of hats over the years.  Simple ones, cute ones, adorable ones, every style and colour.  I've made a lot that I liked for different reasons...the construction, the colour, the compliments, the big eyes peaking out from under the brim.  After making my first Epic Hat (it's new name!) in the fall, I was asked to make two more.  One in sage greens, and one in dusty pinks. 

I was surprised when I went through my stash and didn't find a whole lot of textured green or pink yarns (in the right tones).  I ordered some special yarns from

 Bessie's Treasures and started on the green hat first....just after Christmas while recovering from the flu.  The first step is fun--pulling out all the possible yarns.

I wasn't too excited by my yarns.  Too many smooth, solid coloured yarns.  After I got going on the hat, I decided, late one evening, to dye up some yarns.  I happened to have a package of sage green Tintex dye, which was good for the variety of different fibers, including acrylic.  However..if you're a long time reader, you might remember what happened when I tried using a dark brown Tintex dye and ended up with green.....I was worried that this time I'd end up with brown by using green, LOL.  No worry though, it turned out to be the perfect sage green.
 I added a sprinkle of black dye to some, to get it really deep.
 This hat is different from the original in that it has a ribbed band.  I felt that the green was a little more boy-ish, and a ribbed band suited that, as well as being stretchy.
 Look at all those colours!  And textures!
 My only wish is that I had continued the light colours for a bit longer, though some of them were a bit minty.
 As always, I am over the moon with the tassel.  I've contemplated giving up knitting and just making tassels.  So much quicker (and less yarn) than pompoms.
There's the little "worm loops" on the left, bobbles in the middle, and "pompom" yarn on the right.  I have another idea to make a fringed yarn first, and then use it to knit a row.

As much as I love this hat, and the brown one, the one I truly adore above all others is the pink one.  Which you'll see in the next post.  I already included this hat in my totals last year, it was only 91gr though it was apparently shorter than the beige one.


Friday, April 05, 2013

Layering Blankets

A current trend in baby photography is using layering blankets.  Usually small, about 16x16" to 18"x18", they give a nice frame around the baby when using a simple, all one colour background, or they can "anchor" a baby when using a busier background.  They can fill up baskets or bowls and provide a comfy layer for the baby.  If on the larger size, they can swaddle the baby.  Styles range from primitive (burlap, flour sack, etc) to ornate (antique lace).  I've seen everything from colourful, multi-textured blankets, to simply sweet mohair lace.  As well, there's a great opportunity here for recycling/upcycling.  Cut up sweaters, small pieces of fabric, antique linens that are damaged, etc.  Anything goes, really.

I posted before about my first layering blankets and looked forward to doing more.  I was contacted by my brother's girlfriend's best friend, who is a fabulous photographer about 90 minutes from me.  I've done two boudoir shoots and two family shoots with her and if she were closer, I'd do more!  Jenna was looking for some basic blankets, and we worked through that she was looking for texture, and openness, and not too "repetitive" (she didn't like a basic blanket all done in double crochet, for example).  While I wasn't going to get to re-use the original pattern I created, I was going to get the chance to be creative, and also use up some stash!  I LOVE projects like these!!

I did lots of swatching, but in the end, they didn't really help.  Some of the designing was done "on the fly", like this one:

 I started off with doing a garter stitch bias square.  I had found a super large, 20mm needle in my collection and tried the old technique of one row with it, one row with a smaller needle (I think I used 12mm).  Sometimes, to add a little unevenness, I did more than one row with the smaller needles.  It doesn't really show up in garter stitch.  Then, I was worried it was not big enough, so I decided to drop some stitches.  The ladders do go all the way from corner to corner, it's just harder to see the top right corner due to the angle I was at.  I can imagine little piggies sticking out between the rungs!
 I wanted a pattern that would look good on both sides--either be the same, or be totally different.  I remembered about the wave stitch.  I REALLY like this.
 I was using two different creamy white yarns, and inside, I couldn't see much difference.  But outside, suddenly I could.  It's still very subtle though.
 This is the same pattern, but showing it sideways....at least, to knitters, it's sideways.  To a non-knitting photographer, it's just another look.  And I LOVE it.
 This one was the second one I did.  It was all knit, and every third stitch was dropped.
 This charcoal one, the sand one, and one of the creamy yarns are all Patons Divine.  I love that yarn.
 I went outside for the "artsy" photos.  Even though it was April 2, it was freezing out.

 They also make nice backdrops for finished product pictures.  I have a large stack of these little caps I was working on.  Some need ribbons or flowers though, and then I'll show them all.  I'm working on creating enough product to have a "Twins & Siblings" line, and this Bernat Mosaic is great for getting two hats that look similar, but slightly different.
 I played around with my shipping options.  At first, I wanted to doll the blankets up; nice tissue paper, pretty packaging....but I could save Jenna about $7 if I could fit them into "envelopes".  I used my FoodSaver and created two envelopes that fit within the "large envelope" sizes.  One package weighed 99gr at home, which meant just $1.34 in postage (though at the postal outlet, she weighed it as being 101gr, but let it go anyway).  The second one was a bit more, but still only $2.20.  The hard part was getting the address/stamps on.  Next time, I will put the address inside!  The stamps had to go on paper, and then the paper taped to the envelope, but no tape over the stamps.  These are both less than 2cm thick, if you can believe that!!
 
And now, some amazing shots from the talented Jenna!


One more shot.  LOVING that sand wave pattern!!

Yarn In:  5192gr
Yarn Out:  168gr + 1504gr = 1672gr
Balance:  3520gr more brought IN than out
Cost:  $157.97/94 days = $1.68/day

Wednesday, April 03, 2013

My Basement!

Man, I really miss writing this blog!  The Internet diet we were on sucked, especially since it happened during March Break (Ontario's version of spring break).  Then there's been sick kids, doctor's appointments, and the 4 day Easter weekend.  I'm also trying to get back on track with my other blog.  Some days I really feel tied down to the computer :(

I know I am very lucky to finally have my own work space.  When I first started machine knitting, I used my antique dining room table for over a year.  Then I had a desk for three years.  Then we moved here and I was able to have my own space, and of course, have expanded my yarn and machine collection to fill that space.

That means though, when something happens to my space, it's a complete disruption in my creative life.  And that's another thing that's been messing with my life lately!

 Another leak in the basement.  We had the first one about 8 months after moving in.  We wondered why there was water damage on the bottom of the bar when we moved in.  Then we found out!

The bar was taken out and the wall repaired, though left unstudded.  We were going to do some cosmetic work in the basement, since it was already "finished".  Then my husband started fixing somethings and he couldn't tolerate the poor (and unsafe) job that had been done and it's turned into a total gut.  Bit by bit though.

I've had my studio space fairly well organized, though a little cluttered since it was also serving as storage space.  It tended to be cold and a little damp down there, with not a whole lot of natural light.  We've toyed with the idea of moving my space to my son's bedroom upstairs and making him a bedroom downstairs....but I'm not ready for a teen hermit :)

One day in early March, after a warm spell, I was down in my area getting some yarn.  I noticed that the laminate floor was pouffy and raised in areas near an outside wall.  It had the same look as when the drain pipe came off the furnace and we had a little river.  And, even worse, if I stood in one spot, my foot got damp!
I cleaned up, and moved things around for when Rob got home.  This was not on our agenda for quite some time, but you can't leave a water leak!

 First he cut a hole in the wall to see where the leak was.  It wasn't where he thought it'd be!
 I encouraged him to take up the floor and he had to start over by the back wall (inside wall).  The drain area seemed fine, so it wasn't a back up.
 However, the previous people had put cardboard under the laminate, and it was wet and moldy and smelly.
 The cardboard came up and we found plastic duct taped to the floor.  There was water under the plastic.  And boy, was it stinky.  This is only a small area of water damage, but I couldn't stand the smell.  I can't fathom what a whole flood would do!
 All the wet floor was taken up, and the rest of the lower wall removed.  We found this area that had been patched with tar.  We left it for a day, and sure enough, there was a river soon!
 They had only "fixed" the lower half of the wall, but the crack went all the way to the ceiling!
 Rob had to grind off the tar (smelly!), put in these plastic "nipples", and fill the crack with expanding foam.
 Well, this is where the crack meets the outside!  See the little bit of tar (I don't think that's the right word) they had painted on?!
 Once the foam hardens, the nipples are cut off and the crack is cemented over.
Once this job was done, Rob finished up framing a storage room and most of my bins moved there after I sorted stuff out.
 This is MOST of my yarn.  I didn't include the yarn in the six bins in the cubby unit (the black bags are the yarn that was in the open cubbies).  Also not included is all my cone yarns and my yarn that was already upstairs waiting for work.
I ended up with 6 of those big (86gallon?) bins, and yarn piled on top of them too.  I culled some out, hoping to sell it on kijiji.ca but no takers.  Not stuff I really want to give away free though.

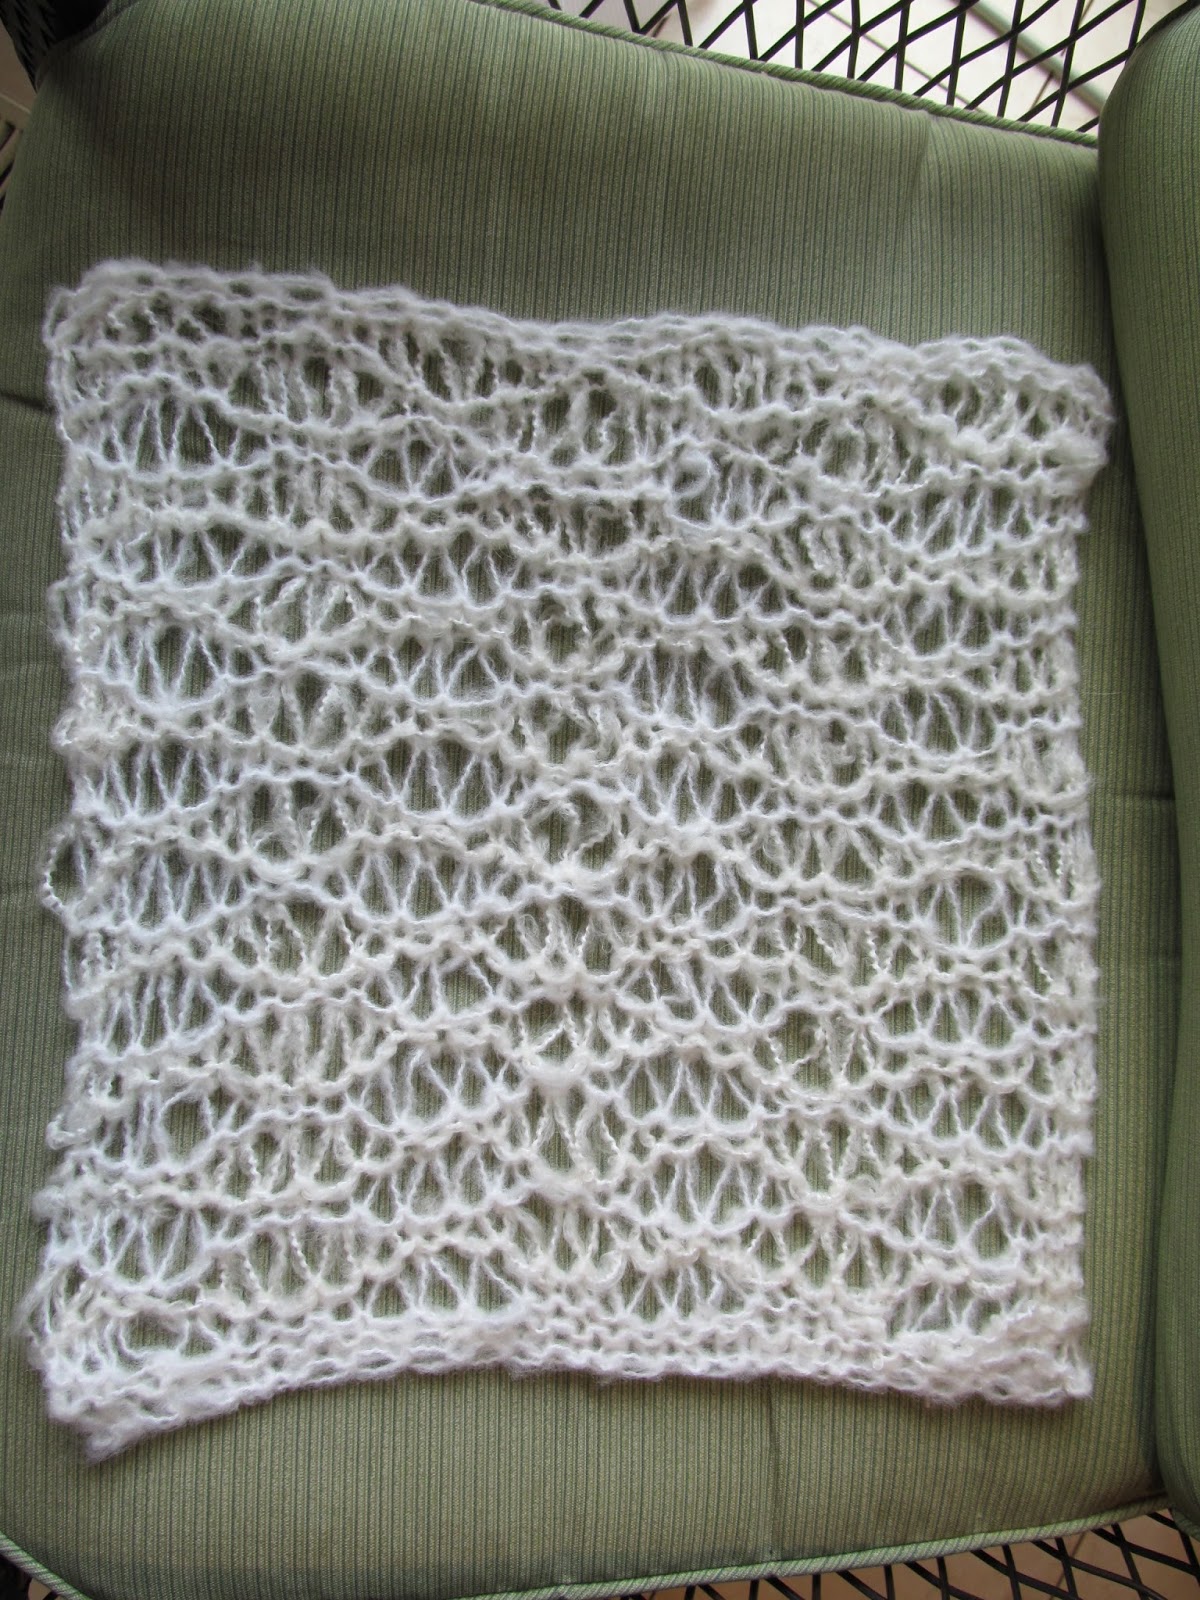
I can finally get back to business down there, though I don't even know what I want to do first...there's so many things I want to do (especially after fondling nearly ALL my yarn!).  There's also some sewing I want to do.  I feel a little overwhelmed.  So, I bought two 50gr balls of cheap yarn at a discount store.  $2.26.  LOL.

Yarn In:  100gr + 5092gr = 5192gr
Yarn Out:  1504gr
Balance:  3688gr more brought IN than out
Cost:  $2.26 + $155.71 = $157.97/93 days = $1.70/day

While I am at about half of what I brought IN compared to last year (much of that was a donation), I am at way less for output.  Partly because I haven't totalled up a bunch of stuff yet, and I've been making a lot of little hats that use only 40-50gr each.  Need to do some more big stuff!