Tuesday, August 28, 2018

Just a Shirt

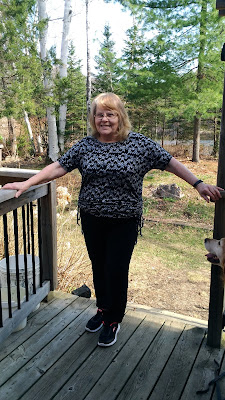
I picked up some fabric from a destash. It was advertised as rayon spandex knit (I think...with being sick so much, a lot of details went poouff). It feels more polyester-ish though. It was supposed to be 2m but before she shipped it, the seller noticed that her daughter had cut it! By her description, I thought it would still be a good amount, but when it came, it was in two pieces and trying to fit this on was a challenge. I went with this New Look 6807 because I thought the looseness would cancel out any polyester. Longer sleeves means less body maintenance LOL. 
 Not a great photo cause I was using self-timer LOL

I tried to carefully match up the pattern on the back seam, but despite how the pattern looks, it's actually got a long repeat and is not flippable/reversible, etc. At least with the looseness, there's movement so hopefully it doesn't show too bad.


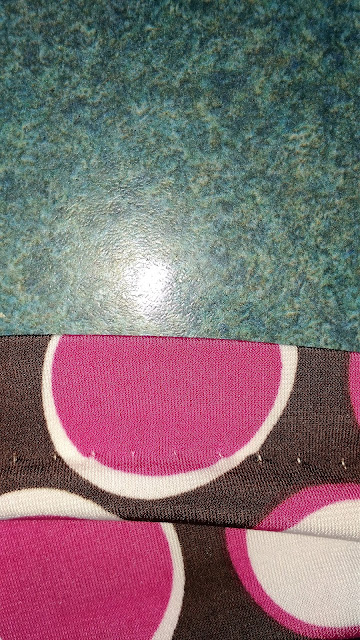
In many sewing groups, people ask about hemming knits. Twin needles is always the standard answer,or a zig zag. I have done lots of twin needle hems, but I realized that for a looser top or dress hem, it's not needed. I don't usually like zig zag hems unless the pattern hides it well. What I've been doing a lot of is blind stitch hems. It takes a bit of head scratching to make sure I have it folded right, but it ends up working out, has some stretch still, and is not distracting. I couldn't decide on what thread colours to use for this one--I think I was running low on the chocolate brown. So the white does show a bit on the right side, but again...it's a flowy top.

The backside. For some reason, even though I have it set to 6 stitch length (the longest stitch on my machine), the individual stitches are quite short. I'm not sure if that's how it should be, but I thought I had done it before with longer stitches. Maybe that was on wovens.

I really like this top/pattern. I have brown pants and shorts, and even bright pink capris. I have a pair of white capris with an animal spot texture...I don't know if that would look right together. I'm not sure I've ever worn the white capris cause I just don't know how to style the textured look and most of my tops are not plain LOL.

Sunday, August 26, 2018

I Sewed Slippers Again!

Yes, I just posted about sewing slippers. The reason I wrote that l wrote that post was a) It had been seven months and b) I knew I was about to sew another pair as that pair had holes in the outer soles.
I had a bit of suede left from when I sewed Lucy's Tinnkerbell costume...2010? It's a good thing suede doesn't have a grain because I had to cut them out however they fit. I used some brown fleece for the inner layer, and for the padding. Such a huge piece of brown fleece that I had. I wonder why I had it. For the outer layer, I used some gold brocade. My BIL works in Toronto's film and TV industry and one year for Christmas, brought me a big bag of scraps. Most of it is upholstery fabric. Or drapery. Not fashion fabric.

I had only been wearing these a few days when I took this picture. That's just from going on the deck and front porch. And suede is not waterproof. I mean, I knew they weren't waterproof, but it still came as a shock.

The kids say these look like shoes from a Shakespear play. Exactly what I was going for.

I did almost all the construction on my Kenmore, but there were a couple seams near the end, and the topstitching, that I did on the Consew. I only have black thread still, but I like the contrast :)


Friday, August 10, 2018

Coveralls

After having my husband ask one too many times "Can you peel these off my shoulder?" and having to pull his gross blue coverall off his shoulder so he can get them off, I decided it was time to make him a pair. I thought I had seen a commercial pattern out there, so I took a look and found Kwik Sew 3389. FabricLand doesn't carry Kwik Sew anymore, but I knew my tiny local fabric store did. However, it was a weekend, and they're closed Sun/Mon and the Kwik Sew website was having a sale and even with exchange, I still got it (and a swim suit pattern LOL) cheaper than if I bought it local. Sad. It did come pretty quick.

There's not a lot out there in the internet world about these coveralls. A bit on Pattern Review, and the only other blog I found was Male Pattern Boldness . He's not exactly built like my husband, nor was he making "crawl under the truck" coveralls. There's more links at the bottom of his post to his finished ones. Those posts helped a bit, but some of the instructions still had me a little befuddled. I've never added a collar like this (Helpful hubby: "Isn't it just two triangles?"), or done a zipper like this (though I did make shorts with a zipper fly last year!). In the end, these weren't hard, but just a lot of steps and pieces! Soooo many pieces. I opted to do all the top stitching on the Consew so I wouldn't have to worry about having enough matching thread (we only have black for the Consew LOL) or re-threading the main machine for each time I need to top stitch. And I wanted to learn the Consew. I knew I could assemble the parts on my Kenmore but sometimes topstitching goes through thicker seam joins. There's no seam guide on the Consew either, so I'm hesitant to use it for seaming.

I measured hubby's torso, and it said he was in the XL size. However, the pattern is drafted for men 5'10 and he's 6'2" so somewhere I needed to add 4". I added some in the legs and some in the torso. Turns out he didn't need either. I guess his extra 4" is all neck and head?!

So many pieces to trace out! Not all had to be traced, but a good number of them. 

This was all the fabric I had. I believe I ended up seaming the back yoke, vertically up the centre, so I would be able to make it all with this fabric. A contrasting yoke would be okay too. The fabric is a brown twill. It's very drapey/stretchy for a twill and I wonder if it has any lycra in it. I think it's twill--the pattern is more raised than say, Old Navy twill. Almost a corduroy feel, but if I remember, it's a diagonal.

Using what ever I've got for pattern weights. I get pattern weight envy when I see sewists with cute, all matchy weights. But I don't like spending money either.

And that's the pile of scraps. I believe I got even the pocket lining done in that fabric. 

First top stitching on the Consew! The outer line should have been closer to the edge. I realized after I started that the foot is not symmetrical--one leg of the foot is narrow and the other leg is wide. So, if using the edge of the foot as a guide, you have to make sure you're doing it the same way each time. Which can result in a lot of fabric being pushed around, as well as snipping each line of top stitching rather than coming back the other direction. I was a little disappointed that there was some waviness going on. I pressed and steamed and it looked better, but I thought the walking foot was supposed to prevent this. Perhaps it's because the fabric had stretch, or perhaps it was actually too light for the Consew.

I was concerned about the collar because you top stitch on the inside to hold the seam allowance down. It shows under the collar on the outside, but really, the collar is laying down over this. As long as the front edges looked good, that was important.
(I've just started painting my nails again. Of course, all nine other nails look awesome)


I think this is the waist band. There's still some waviness in the topstitching, and some of it looks like a drunken monkey sewed it. 

There's the front all done, except the zipper. I had some serious issues with the bottom of the zipper. I don't know if it was my poor marking skills, the fabric stretching, or what, but I just ended up doing the best I could.

See, there's a little ripple on the left side coming from within the zipper area?

I just couldn't get everything to lay exactly flat. I wasn't 100% sure I was doing it right, since  the zipper tape is exposed.  I didn't have any black zippers the right length. But I had this one, and I was really wanting to finish without having to buy anything. However, I actually pulled the zipper off the top after trimming the end! Took awhile to get it back on--I found a few tutorials but one said to take the coil off but leave the cording...which was getting all frayed with my attempts to get the zipper back on. Eventually I trimmed that too and now the zipper is a bit shorter than it should have been, but it works. The top part isn't pretty though. I used a thin yarn to make a zipper stop. I figure, he'll have gloved hands, he's not gentle, better make it obvious!  The other cool part about this zipper is that it opens at both ends! 

 Here he is, in his natural habitat
Lots of give for bending and stretching, and I don't have to peel them off him

And yeah. The back torso  length is too long! But pull the waistband up and he's got a wedgie. Guess I have to do a full butt adjustment, just like on his boxers. 
Two things I would change: A hanging loop on the back neck, and elasticize the top of the back pocket. I could do a snap but I think elastic would be better. 


See how the pocket gapes open? Ignore the threads I somehow forgot to clip.

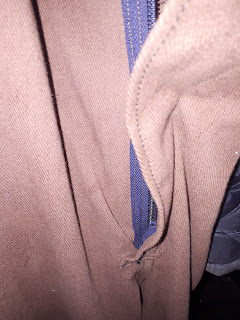
I wasn't sure if this was how it was supposed to be. Why wasn't the edge finished?


 I would definitely want to do something to the edge next time.

So, I think I'm going to see if I can shorten the back a bit. It's seamed and then top stitched. Ugh. Could I just take a horizontal dart and stitch it closed? They're just coveralls! And I have to shorten the legs and sleeves!




Thursday, August 09, 2018

Sinclair Patterns "Sienna"

I sew to be frugal. I know a lot of people say you can't do that anymore. Fabric is expensive, printing patterns at home gets expensive, etc. But there are ways around this. First up, be flexible but knowledgeable and discriminating. Don't just buy fabric because "it's cheap". I try to make sure it's a material I like the feel of, it's large enough for what I'm interested in making (ie--a bottomweight fabric needs at least 2m to make pants and what else would I do with 1m of a heavy fabric?). Is the print or colour suitable for me and my wardrobe? I buy a lot of thrifted fabric.  I sometimes use sheets (like the previous post). I re-purpose maxi dresses. And I started buying from destash groups on Facebook. A lot of that fabric is really good quality. Some people sell it for what they paid (about $30/m Cdn for cotton-lycra, DBP, FT, etc). And some people just want to move it along, or they have smaller amounts. This fabric is a DBP (double brushed polyester). It's very soft and drapey. 

Patterns--I buy some from the thrift store. This can be hit or miss because it can be hard to tell if the pages have been cut already. But I figure, for $1-$2, I can usually figure it out. The other goldmine is independent designers, like Stitch Upon a Time, Itch to Stitch, Patterns for Pirates, Greenstyle Creations and Sinclair Patterns. There are MANY more though! Many of these companies have free patterns on their website, or in the files of their Facebook group. This is a great way to try a company. I don't get too hung up on if it's "no trim pages" or not--I have a paper trimmer, and I can usually muddle through most directions now, but for a beginner, this is a great way to build a pattern library. The great thing about joining their Facebook groups or email newsletters is you get sneak peeks, and they usually have a sale when they release a new pattern!! Sometimes they retire patterns and have a sale on them too!! I never pay full price for a pattern, I always wait for a sale.

I don't know how I heard of Sinclair Patterns, probably in another Facebook sewing group. Suddenly there were all these versions of this top popping up. The pattern was free, for a short time. AND, it came in a petite version! It's the "Sienna" top.  I don't think I realized it was a dolman top, which I normally avoid. Patterns for Pirates has a really popular dolman sleeve top, but being busty, I do not want that extra fabric! This one is much slimmer.

I printed two sizes because I wasn't sure exactly what size. I had some confusion because there are two different types of dots on the patterns, and they didn't line up. I asked for help in their group but the answer didn't really help me. My printer didn't print the very bottom of each page, and apparently there's a separate video tutorial for printing and putting this pattern together. Which I found out too late. What I did like was the little grid, you can see it at the very top of the photo. It shows how to line up the pages and which page this is. So I don't have to refer back to the computer. One other nit picky point. Some of the labeling wasn't' close to the corresponding part (the "Cut here for short sleeves"). This could have been because the layers I printed were on the larger size and the text was set up next to the smallest size. I also had an issue with the wording/layout about making the ties. There's a couple options given, but it's just not laid out clearly. 
I think I did a size 16, maybe graded to a 14 in the hips.
Not sure why I had blue jeans on, but I would never wear it with blue jeans. You can see how low it sags in the front. If you look at the pattern on their website, it should be much snugger across the belly.

I had wanted to wear it with my grey pants, or my leggings since I was having trouble finding tops to wear with leggings. The drawstrings can be let out, making the length longer.

But I didn't like it like this. It's rather shapeless now. Maybe if I let the strings out all the way, but my legs look like toothpicks coming from the flat end of a marshmallow.

So I let my mom try it on. What a difference! It looks awesome on her, very different than what she normally wears but still comfortable. 

Of course the dog had to get in there!


So obviously, I had made it too big for me, despite being in the right size for my measurements. I wanted to give the top another go, since it looked great once fitted right. I had this wild tie-die cotton knit, very lightweight. I thought it would be good because the rouching would smoosh up the print.


I carefully laid it out so I didn't have circles on my chest LOL! I narrowed the neckline. I did a 14 from neck to armpits, then 16 downwards. And  then I tapered the sides in even more. It still could use more but the side seams were getting pulled out of straightness. 

 I love how the pattern lined up on the front. You can see I still have the sagging in the gathered section.
Don't love the horizontal lay out quite so much, but it's not that bad I suppose. Especially with my hair down. The sagging is not as bad on the back. I think because it sits at the top of my butt, so it gets held up.
I didn't want to take the front all apart, so I added two vertical darts coming up from the bottom, to take out some width. That really helped, though I don't have a picture. It's not really a shirt you can wear too often to work LOL. Another idea is to do like a sway back adjustment, and cut it so the sides angle up to the centre fold. Then as it droops, it should lay level. Should. 

Will I make this again? I don't know. I might give it one more go, since technically I have only one top in this pattern LOL. It takes quite a bit for the length and I did have a hard time getting it to fit on the fabric as the pattern showed. There's no back shaping, no real side shaping. Yes, it's a quick sew (more or less, you do have to make the drawstrings and channels). So, we'll just see. 

Tuesday, August 07, 2018

Sequoia Muslin

I needed grey pants. I had been hoping that the comfy pants in my last post would suffice, but they certainly weren't work appropriate. I was having trouble finding grey fabric that wasn't real heavy, wintery stuff. Grey is a great colour year round, looks awesome with bright colours in the summer. Why was it so hard? I had a large sheet in a lovely sort of sateen fabric, 50-50 poly/cotton, but it was a mysterious blue-grey. Next to blue it looked grey, next to grey it looked blue. But it was the right weight so I thought it would work as a muslin for Itch to Stitch "Sequoia" pants. They were on sale for their release, and were quite similar to what I wanted to replace. All those pockets!!


One day hubby was going to Canadian Tire and invited me along. I don't go often but needed a few things. They weren't on sale but since we were in that area of the store, I said "Let's look at ironing boards!". And wow, this one was on sale! Nice and big (though the point end could be pointier), it was a tight fit to get it in the FJ Cruiser, LOL. I have discovered that pins disappear on the grey print, though. And for some reason my iron decided to start leaking and it discoloured the fabric. And, the surface isn't entirely smooth. It's weird, but the front and back are higher than the middle. I thought it just needed to air out and decompress, but it has remained. The ironing board was very helpful with this project--dealing with the large piece of sheet material.

I decided I wasn't going to get crazy with all the pockets, the roll up tabs, snaps, and zipper. Just a quick and easy muslin. I couldn't find any waistband material that I liked, so I just went with black cotton-lycra. I cut out the waistband pieces and got to work.

One nice thing about this pattern is she shows what steps to do if you're doing a muslin. However, her idea of a muslin includes a zipper. I did a mock fly, no zipper. This was fine, until it came to the waistband pieces. I had a big gap in the middle LOL. So I just added a strange little panel. It's okay, as I never tuck in my shirt. Sometimes they get a little loose, and maybe I should add a snap or something. Or not. Love them anyway.


Are those acceptable butt wrinkles? They feel fine! My butt looks huge though and I don't have a big butt. 

The funny gap after putting the waistband on, and before adding the extra centre piece. 
No body takes pictures of me, so it seems I don't have a real picture of the finished pants. I will get on that if it ever gets below 33C here. They are actually really cool. I did find the leg width a smidge wide. I think because I'm shorter than I should be for my waist/hip, that the proportions just get a bit off. On the next pair, I did taper them slightly.

Saturday, August 04, 2018

Comfy Pants

I wanted comfy pants. Simple pants, made from a knit, but not leggings or track pants/joggers. Nice enough to wear out of the house, but comfy enough for chillaxing on the couch. I started with the pattern I used for pants last summer/fall, thinking that because the fabric wasn't really stretchy, I wouldn't have to change much. Umm. Nope. Can we say "diaper butt"?
OMG. I kept taking more and more out of the butt seam, and subsequently, the waistband. The fabric certainly has stretch--what it didn't have was recovery.

They don't look too bad from the front, or when my shirt was pulled down. But over the day, the butt got lower and lower LOL. They are a wear and wash pair of pants. 

I made the pockets with some stretch poplin print I had.  I didn't want saggy pockets. However, they are a little too structured. 

I still have quite a bit of this left. I was going to make Rob some track pants, but he doesn't need diaper butt either. What else can I use it for? It's soft, very stretchy, and grows when worn. It's like a heavier t-shirt, but not a sweatshirt.  

Thursday, August 02, 2018

I Sewed Slippers!

I usually knit slippers, and felt them. Although  I have a huge yarn stash, felting wools are getting low (at least, felting wools that would make good slippers for me). I also have a large fabric collection. And I really needed slippers. I found that Stitch Upon a Time had a free pattern on their Facebook page (in the files). Looked good. I dug out some fabrics.

I used some fleece Lucy had bought to make pajamas for her BFF's Christmas present. I had some matching blue fleece that had shrunk when I washed it and was really thick. That became the soles. I got a little confused with the pattern because my insoles and lining were the same print as the outer. But all in all, they weren't too bad. And much quicker than knitting and felting!

New Year's Eve at my parents.

They also tend to make an appearance in my flat lay photos.

They lasted about six months before I started getting holes in the outer layer of the sole. The inner layer hasn't worn through but it won't be long. I know I need to make another pair. The fabric choices are endless though. I do have some suede left from Tinkerbell's slippers and might see if I can get the soles from what's left. Or even use it as patches over the sole? I might not like the feel though. We have a Consew industrial sewing machine which I want to use for the next pair (though I sewed the suede with my Kenmore before. These have a few more layers). Rob keeps saying he's going to add pulleys to slow it down so I've been waiting. And we have only black thread. LOL.

Hampton Hoodies

Lightweight hoodies (especially with bottom bands) seem to be very popular. So I had to jump on the bandwagon. I went with the Hampton Hoodie by Peekaboo Patterns. Having had great success with my t-shirts and doing an FBA, I got to work. By the end, my pattern piece looked like it had had a run in with a paper shredder. Wait...this is my t-shirt pattern. Why am I showing it? To show what a t-shirt FBA looks like?


 Not sure what I'm trying to show here. I think the fabric is a rayon blend. It faded a bit after washing.
 I had a horrible time with the placket. The instructions seemed fine, but I just couldn't get a good result. It also seems that when I printed it, my printer cut off a bit from each page, and my pieces for the bands might have been off, and where the placket opening is on the centre front.
 Having adjusted the pattern considerably, I needed to adjust the bottom band. I did the math. I quartered and pinned. And this is not what I was going for. Having been washed a few times, it looks better, but I keep thinking I should re-do it. I didn't want it snug on my hips because then it looks like a maternity top due to my belly.
This picture was actually to show the saggy butt of the pants I made. But it shows the back of the top too. I could have done the hood in black, but I didn't have enough width to do the plackets in the print, and then they wouldn't have stood out on the front. So, you see the inside of the fabric in the hood. Suck it up.


Again, a front shot. Because these pants are pouffier, the hanging band issue isn't as bad. 


And while I was at it, underwear to match.


I decided to give the top another go with some fabric I got that I just loved. Sand and sea. My favourite combo!

Again, I had terrible placket issues. I picked out the stitches several times, and ended up with a little hole I handstitched and Fray Checked. 

 Another placket photo. I just couldn't figure out where exactly to line up the edge/point. And I don't seem to have a finished picture. Stay tuned and check back later.