Monday, January 31, 2011

Getting Creative

After the success of the plain blue, doubled mittens, I knew I had to pump up the volume, LOL. Rob really liked his alpaca gloves, but found the cuffs stretched out, and they weren't as warm as mittens, obviously. I thought, what about doing the mittens with the inside in alpaca, and the whole cuff in the outside yarn? He has a red/white/grey coat that he wears, and I happened to have red, white, and grey sock yarns. For the grey, I actually used an unknown ball of yarn from Value Village...it did come with a little spool of matching thread, so I know it's actually Lang JaWoll sock yarn. But not enough for socks, or anything on it's own. But in a Fair Isle pattern...great!

I really haven't done much with the punch cards...rectangular items with no shaping, and with patterns that had only a two row repeat...I could look at the card, and figure out what was going on. However, the row you look at on the punch card while knitting, is not the row that is actually being knitted! It's kind of freaky, actually. I did actually make two tops in a tuck pattern, but never finished up either of them, and I hadn't done anything with fair isle. Now was the time to try. The mitten pattern suggested doing a pattern in the area between the thumb and the mitten top, but gosh, why limit yourself?
First step....swatch! You can see in the first grey band on the right, that it's not centered on the white cross. Oops. That's why we swatch. I also realized that I wanted it "the other way"..what was white should have been red, so that when I switched to the grey, the crosses would be grey.
I've got to say...knitting that swatch was one of the most fun things I've done on the machine! You feed both colours into the carriage (two colour limit, sadly...until I get a "colour changer"), and it knits with both colours across the row, in one pass! The floats are even and not puckering. I'm not sure I can hand knit Fair Isle again!!! I had to do a bit of math for these mitts, although I was lucky that I already had some details from doing the original alpaca gloves. I also had some info on gauge from the blue mitts, although of course, Fair Isle is a different gauge, but the big swatch helped with that. My challenge, after I got hooked on the Fair Isle, was making the pattern match up...I hadn't thought about that. The repeat is 24 stitches....what if I needed 65 st? As it turned out, somehow the math gods were on my side, and I needed approximately 72 stitches, or three repeats! It did mean that they would appear a little 'off center' but strangely, my husband isn't bothered by that.I did stick with the 'after thought' thumb, I thought that would be the easiest way to deal with the thumbs, and he had never stated a preference (although I had never made him this style before, LOL). Looking at these pictures, and how great it looks, I almost forgot about the huge headache they caused me! When I sewed up the first mitt, I found out I had done the thumbs on opposite sides! I tried it on, and I could swivel the inner mitt around so they lined up. I figured that was good enough, and went on to the other mitt, making sure I had both thumbs on the same side. Well, I managed that...but they were on the same side as the outer thumb on the first mitt!!
I ran through a few different options, but I didn't want to unravel the first mitt as the ends were all woven in and trimmed, and I had used exactly one ball of the red, and the remainder of a ball of the alpaca, and I didn't want to break open new balls (oh my!). So...I unravelled the outside thumb and grafted closed the slot, and snipped open a new slot on the opposite side. A little scary, but I think it worked out! I also messed up one row of grey, in one of the mitts...but that's minor!

I stayed up very late, finishing the mitts, and tucked them into his coat pockets before going to bed. Of course, the weather instantly warmed up. LOL. He really likes them, although he says the wind does blow through a bit, and could I line them with something windproof....umm...I do have some polyurethane film, like for use in making diaper covers, but it's just the plastic, it's not laminate to fabric. However, then you're into sewing, etc, and then you can't pull apart the two layers to make them dry quicker...I told him he shouldn't walk so fast that he creates hand wind :)

More Mittens!

Hugh needed new mittens, and said he wanted "bright blue". Well, I didn't have anything bright enough for him, that wasn't 100% acrylic. I opted for some Sean's Sheep "Armytage", a Wal-Mart wool. This colourway has blue, green, and a pale blue in it. Unfortunately, I was past the thumb on the first one and hadn't yet come to the pale blue. I didn't want to suddenly change colours, so I decided to do a 1x1 pattern. This also meant the mitts would be warmer due to the floats on the inside. Although I tried to keep it even, I can see that the patterned section narrows in a bit. He says the thumbs are too tight. It's really hard to measure a child that has the patience of a gnat for being measured. But, even if he doesn't wear them daily, they're still good for back up and maybe for another child. Just after I started them, someone on the Yahoo Machine Knitting group mentioned a mitten pattern that starts at one tip, does the mitten backwards, which becomes the inside mitten, then a long ribbed section, then another mitt for the outside layer. The benefit...I could use thinner yarn and my standard gauge with ribber. Two layers of sock yarn would be like mitts in DK, two layers of DK would be like mitts in worsted, and if I did Fair Isle with floats, that's another layer. Plus, I could use punchcards and get fancy! I had just bought four balls of old Kroy 3 ply from the Salvation Army, for $1 a ball. The doubled mitts took just over one ball!
There were some things I didn't like about these mitts. They have an 'afterthought' thumb, coming out of the palm, which makes the mitts left/right specific. That's okay if there's a pattern on the back of the hand, but when you just grab them out of the box, it's hard to see. I didn't like how the tip of the inside mitt was done using the EON cast on...it didn't pull tight for me. These ended up with a slightly too loose tension, and he says they're not too warm :( And, they're too small. I think this boy's hands are growing in his sleep. Looking at them today, I think they have actually shrunk a little....especially the thumbs. I don't notice this with my Kroy socks.
Since these ones, I have knit 3 other pairs, each one doing something different, of course. Stay tuned!

Tuesday, January 25, 2011

Momma's Got a New Thumb Gusset!

Not quite the same ring as "Momma's Got a Squeezebox" but I tried.

It's terribly head-growing to see your project spotlighted on someone else's blog before you even get to post it yourself. Especially when that person is a well-published knitting designer! I had planned to blog about these mittens yesterday (or last week...) but someone on the machine knitting group wanted an easy MK mitten pattern, so I did that first. But now, back to handknitting, because, yes, I DO still handknit!!
As I mentioned yesterday, I have an old Patons free handout for mitten patterns. I don't see it on their website, which is too bad because it is one of those 'staple' patterns that everyone should have. Prior to using this pattern, I had tried mittens a couple of times, but was unhappy with the results, for a few reasons. The Patons pattern is written for knitting flat, but is easily adjustable to knit it in the round. It is written for a left and a right hand, but unless I'm doing something with a design on the back of the hand, I don't bother anymore. If you don't have a good mitten pattern, I suggest using "The Knitter's Handy Book of Patterns" by Ann Budd, I think it's called.
The Patons pattern has thumb gussets, starting slightly off from the inside edge to differentiate between left and right. When I look at my hands, I see thumbs that angle off from my wrists...I don't see thumbs that suddenly jut out from my palms. I tried on a pair of Norwegian mitts, and they were definitely wearable, but I just didn't feel that they were secure, or would be comfy when trying to make a snowman. Most of the time, I need mittens suitable for activity. A close fitting, gusset thumbed mitt is my preference, but of course, it's not the only option.
In the past, I've tried to "improve" my mitts in a few ways. The first was to stop knitting the thumb before the rest of the hand. It was too easy to maneuver the mitt to make the thumb fit, but then once the hand was done, the thumb would be too short (for awhile I did knit the thumb, but didn't finish it off till the body was done--that's another good option). I tried making a more defined 'crotch' gusset where the thumb joins the body, but if you're doing a pattern, or just not thinking, it's easy to forget to decrease those stitches or not have them work in the pattern. I sometimes found that I had done all my gusset increases, but hadn't reached the 'crotch' yet. I know I could have solved that issue by doing a swatch, LOL, and spacing the increases out further....but a worsted weight lady's mitt is only 40sts.
I also found that the closer I stuck to the pattern.....the better the results :) But, I always had an issue with the thumb side cuff pulling up. The thumb would start to slide off my thumb, the mittens themselves would slide up. I was constantly pushing my mitts back down. I thought the thumbs might be too short (and that was part of the problem). I thought the mitts were too loose (also part of the problem). I thought I needed more rows before the thumb gusset....but if I stretch out my thumbs....they start to angle out almost right at my wrist. But if I started the thumb gusset closer to the rib, I would always run out of increases before running out of rows in the gusset.
When I was making the green mittens recently, I was afraid of this happening again...so I thought...what if I add a short row or two to the gusset? Give it a few more rows, for movement and length compared to the rest of the hand. It needs more length as well as width. Those mitts were for a gift, but when I tried them on, they felt good. Really good.
I needed a new pair of mitts, so I felt like trying this idea out some more. Originally I was going to make some wine mitts to go with my wine jacket, but that just seemed REALLY boring when I held the yarn next to the coat. I have a book of Shetland mitts and gloves and have always wanted to make some, but dealing with charts, and multiple colours is just not practical at this time in my life. I decided on some flip top mitts, with a band of fair isle, picking up the wine colour in my coat. When you see the pattern in the book, it looks like hearts. I chose colours that were very similar, but for some reason, the effect was lost :( I had originally used the wine colour where the burgundy is, but it didn't show up very different from the dark brown.
When I was weaving in ends and trimming them with my new, very pointy, fancy scissors I got for Christmas, I accidentally snipped almost all the way through a float!!! I was trying to be careful!

I rubbed a bit of fabric glue on it to secure it. Thankfully, it was a yarn with several plies, and not just a singly or 2 ply! At least, it's in the body of the flap so it's not against my hand.


After wearing these mitts almost constantly for the past few weeks, I have to say, they are my favourite!! The yarn is Superwash Wool by Moda Dea---discontinued, but I stocked up as much as I could when I found it, $2.99 a ball, less than 2 balls for a hat and mitts. I let Huey wear them to the park, and he did make the fair isle on the palms a little fuzzy, but they are 'activity' mitts, and the back of the hands look good still. They are warm and very secure. The short rows in the thumb really seemed to work!

It didn't take much, maybe 3 sets of short rows, two might even be enough in a worsted wool. My only complaint is that the ribbing bulges, as you can see. The pattern keeps the ribbing in the same size needles, and with the same number of sts as for the hand. I think I might start going down a size of needles, or using fewer stitches. Which do you think? Although, looking at it...if it were a sewn item, I would say it's too long on the inside of the wrist, while the back of the wrist seems fine....short rows are a wonderful tool, and so much easier than doing darts when sewing. Why not use them whenever we need just a bit more length somewhere specific? If we're going to the trouble to make something fit, lets make it fit perfectly (or, as close as we can get because no one's perfect, or at least, shouldn't think that they are!).


Monday, January 24, 2011

More Mitten Mania

A few years ago, when Lucy was in grade 1, I made some mittens on the knitting machines to donate to her class, for spare mittens. They seemed to be well used and appreciated. Recently, her grade 3 teacher mentioned in the newsletter to send extra mitts for your kid as they seem to get wet or disappear easily. I asked if some classroom mitts would be helpful, and the teacher thought that'd be great. So I got going and 'whipped' up three pairs on the LK150. I can't find where I put my notes, so I thought I'd make another mitten today, and take some pictures along the way.


(If you want to see my earlier machine knitted mitten attempts, and my issues with different techniques, click on the KnitSmart label to the right, or look up March/Feb 2009. I'm very picky about my mittens, after having handknit wonderful mitts for years from an old Patons pattern. But, I came to realize that kids, in particular, are not so glued to authenticity; they'd rather have some warm, colourful mittens that fit!).

I start off with waste yarn, then an open cast on. I prefer to use yarns with at least 50% wool, although in this mitt, I used a 100% wool (the light purple), and Patons Decor in dark purple, which is only 25% wool. I figure together, that equals 62.5% wool, LOL. For the numbers, I use my handknitting pattern: Mens 44sts, Ladies 40st, 12 year old 36st, 10 year old 32st, 8 year old 28 sts, 6 year old, 24 sts...for worsted weight yarns. If I'm doing bulky, I go down a 'size', if I'm doing DK, I go up a 'size'. For donations, it's more important that the gauge match the yarn than using a particular set of numbers. For this example, I used T7, but I think it's a bit loose (however, the light purple might bloom when washed, but I don't want to take the time). If you start with a similar waste yarn, you can check the tension by that...I don't measure it or anything, I just go by the feel of the carriage, and how the knitting looks if I take off the cast on comb.


I thought I was going to use a chunky yarn, so I cast on 21 sts...but found during the waste yarn that the LK150 couldn't handle it every needle....ooops...I had used my KnitSmart for chunky yarns before! LOL. So I switched to the worsted yarn, but didn't increase the sts...so these barely fit my (large) 5 year old's hand. They also ended up too long, so I'd take out 4 rows if I do them again.


For the tuck pattern, I knit one row, then put every other needle into D, and knit the row. Then, I switched colours and set the lever on the side leading to II so the D sts would knit. Then, I put the alternate needles from the first colour into hold and knit back. I don't tuck edge sts.
I did 44 rows, ending with the dark colour, and switched to the light, 100% wool colour for the tip (I wanted this crucial part to be warm and water resistant). I knit 6 rows in the light colour, then doubled up every other stitch, and at T5, knit 2 rows (I do like to move some of the needles inwards so there is fewer gaps, and I don't double up the edge stitches). Then I double up again, and knit one row. I cut the yarn with a long tail, and starting with the first st at the side opposite to the yarn tail, I go through all the sts, then once again. Going through twice fills up the loops better than just going through once.


Meg decided that the knit side should be the outside of the mitten. Either side looks great, I think.

The thumb always gets me muddled. I've knit my fair share of thumbs with the wrong side out! To do it right, find where the bottom of the thumb gusset is (about 6-10 rows from the bottom of the mitten). Hold the mitt with the tip pointing you, wrong side up. Take a transfer tool, and put the two loops from the edge st, onto a needle. Leave an empty needle, then two loops from the other edge. Manually knit this row, doing an e wrap on the middle stitch. Knit back a second row.
For the next row, pick up the two loops from the next row up. From where you picked up the first loop, there will be first a 'knot' and then a loop (or, loose stitch really). Use the loop. Some people pick up only one loop, I do both. Put it on the next needle to the outside of the three already on the bed...repeat on the other side of the thumb, so you now have 5 needles in work. To get the stitch with the working yarn to knit nicely, bring it a little forward, and make sure the yarn is under the needle:

If it goes over the needle, it won't knit. Knit two rows. Repeat this, adding a new stitch to each side of the thumb, joining to the mitten sides as you go up. For this mitten, I did this till I had 9 needles in work. Then, for the next two rows, instead of joining to the side of the mitt, I e wrapped a new st on each side (one stitch, the side the carriage is on, knit across, e wrap on that side, knit across). Then I knit another 6 rows, then doubled up the stitches, knit two rows, then doubled up and knit one row. At this point I discovered that I had knit the thumb on T5 as I forgot to adjust after dec. the top of the mitten!

Once I get both mittens done, I do the ribbing by hand, so that I have something portable, and because I like handknit ribbing better than on the machine, and also, I can knit both, at once, on one circular needle. This way, if I run out of yarn, I can still easily make both match, and it looks better than running out of yarn near the tip of the second mitten! To make the whole process even faster, don't do the decrease row at the top of the mitten. Leave a long tail (about 10x the width), and move on to a few rows of waste yarn. Start the whole process again, so you end up with two rectangles. Take it off the machine, and do the top decreases by hand knitting. Or, experiment with the cast on (like in the book, every other needle....) and see how you can draw it up by pulling the yarn end...you can make this the top of the mitt instead.
These blue ones were the first pair I did this year, and I did the first one with the thumb the wrong side out. So I made the second one match, for a design 'feature'.
These are two of the three pairs I made for the class. The third pair was two tone purple in tuck, like in the manual. I made the first thumb right, but the second one wrong....but I left them that way. Kids don't mind---it's better than freezing hands when all your friends are making snowmen!
I'm sorry I don't have more exact numbers for you, but there are lots of mitten patterns out there, esp. if you search on Ravelry. Also, you can use a mitten pattern generator on line (see my post about the machine knit gloves), or "The Knitter's Handy Book of Patterns" (I think it's called) has a LOT of info! Do give machine knit mittens a try. I have found that this pattern is the most 'acceptable' to me, LOL. I did find out that I had to make them a little longer than expected to account for the gathered top, but I like the thumb much better than sewing on a thumb, moving all the sts over to do an increased thumb gusset, or the worst...the type of thumb that comes out from the palm, with no gusset. More on those in the next mitten post!


Monday, January 17, 2011

You Can't Eat Just One!

Every winter, the machine knitting groups go crazy for the "Potato Chip Scarf" (so named because you can't knit just one! And while knitting, you just can't stop at one wedge, it's addictive to just make "one more wedge"), and other ruffled scarves. I decided to finally give it a try. I found this Bernat Mosaic yarn at Zeller's, and couldn't decide if it would be something for me, or something for my colour-loving niece. I started off swatching for a tam for me, but didn't like the amount of math I'd have to do, and it was starting to look a little bright for something I'd put on my head. So, even though it doesn't match her tam exactly, nor her "monkey" hat/gloves she has that are in bright crayon colours, I decided to finally try the potato chip scarf for my niece, Allie.
There are a couple "patterns" on the internet for this, but of course, how likely is it that you have that exact yarn, machine, etc? I'm going to include what I did for this scarf, just in case someone else wants to give it a go.


Bernat Mosaic, 100% acrylic, 18st/4", 5mm needles, 209yds
LK150
Cast on 16sts with a closed cast on. T7.
Put two needles on the edge away from the carriage in hold (make sure carriage is set to not knit needles in hold/D position). Knit 2 rows.
Repeat this, until there are only 2 needles left, and knit 2 rows on those.
Set carriage to knit needles in hold, and knit 2 rows. That's one wedge.
To spread the ruffles apart, knit some plain rows before the next wedge. I didn't write down if I did for this one, but 4 rows is a good number to try (it's hard to tell from looking at the scarf, but I don't think I did plain rows, or maybe just 2).
Repeat until you almost run out of yarn. Cast off and give it a good steaming and patting.
You can see, I did NOT have a lot of yarn left! It's not extremely long but it's not exactly what you'd wear for warmth. However, it is surprisingly warm and bulky. I found that I needed to make it a little more narrow than I thought I would; if I used this yarn again, I'd probably use 14sts, and 6 plain rows between sections (otherwise, the wedges, being narrower, will really bunch up). Or may still stick to 4 rows, LOL. If you make it a lot narrower, use one needle out of work to keep the spiral effect, or 2 needles to make it more ruffly.
The scarf can also be worn so it's just ruffly, and not spirals!
I made that scarf in about 1 1/2 hours on New Years Eve. It excited me so much, I started another one for a different niece, 4 year old Nya who likes pink and got that piece of knitted fabric I made.I used Patons Lacette which is discontinued, but is a slightly fuzzy mohair blend (the never ending cone I used for all the ponchos, Christmas 2009).
LK150, T3, Cast on 24sts. Put 3 sts in hold away from carriage and knit two rows. Repeat until 3 sts left, knit two rows; put needles in work/set carriage to knit held sts, and knit 2 rows.
Again, I didn't write down if I knit plain rows between the wedges and the scarf has already gone. In the picture above, you can see how one side is spiraled, and the other side is ruffly.

Here, you can see how the short rows want to form a circle, but because you keep doing them, it just spirals around and around, like a staircase in a museum, LOL.
And because I felt bad that Allie's sister hadn't gotten anything knitted except the grey fingerless gloves, I went digging in my stash. I knew her coat was purple and grey. When I saw her open her coat at her birthday party, I thought it was a sort of dark plum colour. When I saw it at Christmas, it seemed so much brighter, so I wasn't sure what shade of purple would work and thought grey was a little boring (though I have a huge cone of grey). I found three balls of Bernat Boa that had been hibernating. One was missing the wrapper, so I thought maybe I had used a little to make cuffs on the 'magic stretch' gloves from the dollar store. One ball I had received during a gift exchange with a knitting guild...probably from 2006 or 2007.

It's very dark here, but it is various shades of plum. I thought it was discontinued, but Ravelry doesn't say so.
LK150, 15 sts, spaced every other needle. T12 (could even be looser). Put two needles into hold at a time, down until one st left, knit two "rows" on it, then put all needles into work and knit two rows. Then knit 4 plain rows before starting next wedge. Next time, I'd do only 2 plain rows, if any at all---the spirals are quite far apart. Another remedy could be to put three needles into hold each time.
The scarf feels quite substantial, for being only three balls. Out of curiousity, I weighed it. Somehow, it ended up being 157 grams....a little odd for 3 50gr balls (I had thought some had already been used, and I had a yard or two left over). Again, I think it could have been narrower, since Abby is only 8, but I think this is a scarf that she could use for a long time!


Wednesday, January 12, 2011

Gifts!

I love knitting gifts, although I always suffer from the "What ifs". To lessen those, I try to knit only for people I know will appreciate it, and to think carefully about the item (which is partially why I changed my mind about knitting alpaca gloves for all the men, LOL). One person I haven't knit much for, but would love to, is my little brother's girlfriend. Especially after finding out she got a new black coat...cause everything goes with black, and she's young enough to be able to rock the trends, and she's working part time in Toronto so she needs to follow the trends :)
Shortly before our family Christmas get-together this year (after losing my aunt--the party hostess for over 30 years--no one knew what to do for Christmas. I had always hoped to start hosting, at least for the immediate family, but Rob didn't want a party. He, ummm, doesn't get along with everyone in the family, LOL. So, I decided to host an afternoon get together while he was at work! Perfect for everyone!), I decided to knit Miss C. a slouchy hat. I had several patterns on Ravelry marked as options, but I kept coming back to the Meret by Woolly Wormhead. I had made it last year, with hilarious results but I knew that was my own fault for bad choice of yarn. This year, I had two yarns to choose from, Red Heart Superwash wool, which was a little thick for the gauge, and Georga's "Mercerized Wool" from Wal-Mart, which, despite the gauge on the label, was too thin. I went with the heftier Red Heart as I really liked the mossiness of the green for Miss C who has lovely hazel eyes. I think I knit the small or medium size...made it a bit longer...spread the decrease rows out a bit towards the end as I was stuck in a traffic jam due to an accident, and also because I didn't want to rip out the whole last dec. section just to add another repeat which might have made it too long.
I finished it up the night before the get together, and gave it a wash and tried to stretch it over a dinner plate. They weren't big enough to get tension on the hat, so I just left it to dry. Big mistake. Not only was it still wet at the end of the next afternoon, it had grown, esp. as I removed it off the plate. Now, if I had read the yarn reviews on Ravelry, I would have found this out. I felt bad giving C. a wet hat but then a few days later I let her know she could machine dry it to tighten it back up.
Since C. is working on a career in the legal field, she's cautious about what gets shared on the internet. I asked Hugh to alter her face for me, LOL, but I couldn't find the picture he did. So I did one of my own :)
You might notice she's wearing the hat with the purl side out. It's a more subtle look, and I like it!
I then went on to make her a pair of plain, simple mitts. She said she didn't need flip-top mitts or gloves, just mitts. I did something different though, to keep me interested. I added some short rows to the thumb gusset as I did the increases. I find sometimes, the mitten pulls up on the thumb side and the cuff doesn't lay equally all around. It seems to have worked in theory, and the pair I made for myself are staying put better than other mittens that I constantly have to tug down. I thought I had been making the thumbs too short before, so I had switched from making the thumb before the hand, to doing the hand first...this gives a better fit when trying it on to check the thumb. I also tried making more of a gusset in the thumb "crotch", which did help, but seemed a bit messy and hard to duplicate between mittens. These little short rows are not the tidiest either....perhaps next pair I will try doing them between the sts that get the inc, rather than right to the edge of the gusset. I've been making mittens for over 15 years and just when I think I have it perfected.....


Tuesday, January 11, 2011

Gloves

A few Christmases ago (at the latest, 2004), Rob's sister, Lou, gave me some lovely alpaca yarns that she bought on a trip to Peru. Although some were listed as DK weight, they seemed so fine! I didn't think there would be enough of any one of the colours to make a simple sweater for me, and I didn't want to 'waste' the yarn making small items, or something that I ended up not liking. You need the perfect project for special yarns. I had an idea early this fall that I would make some gloves for the men on my Christmas list, since many of them were about the same size/build, I thought it would be fairly easy. I could use my standard gauge machine with ribber, and knit circularly! I wasn't entirely sure how to go about it, although I had made gloves by hand before. I found a glove generator pattern and got to work.

Well. The first glove was a real test of my patience and devotion! Or my stupidity. Perhaps I should have at least done a test glove in a LIGHT colour! You start off with the ribbing on both beds, like socks. Then, you have to transfer all the sts to one bed, knit some waste yarn, and transfer half the sts to the other bed so they line up and you can knit a tube. The pattern had me transfer the ribber sts to the main bed, doing the waste yarn (after changing carriages), then moving half the sts back to the ribber bed (and changing carriages again). I found it really difficult doing it this way (putting sts from waste yarn onto the ribber needles). I was also having a really hard time as I went on...turned out I had gotten a few sts hung up on gateposts. I did the thumb increasing fine, and continued on. The pattern has you knit the hand, then put each finger onto a string, separately. Then you start with the index finger and knit that finger first. But, the yarn is over at the other edge of the glove. Didn't make sense to me, to cut the yarn, when I could just knit the pinky first. Also, other patterns sometimes have you knit the pinky finger, than rejoin the hand sts, and knit a few rounds before doing the ring (and other) fingers. My pinky (and Rob's pinky) join our hands lower than the other fingers....I found it hard putting the sts back on the needles from the string too.

So I worked out the kinks on the first glove, and knew I could not give it as a gift to the first recipient....Lou's husband! LOL. I set that glove aside and got to work on another pair for him.This shows the glove before starting the thumb. I was a little concerned that the fingers were curving (my RB and MB tensions didn't quite match), and the index and ring fingers were supposed to be the same length. Turned out, because I had cast on sts in the gussets, instead of picking up sts from the neighbour, that the fingers weren't quite laying in position.

I also learned that instead of putting each finger on a string to come back to later, I could put the needles into hold position. Now, the thing it took me a bit of time to figure out was that I had to have the needles set up correctly for the finger I was working on (including racking the ribber bed to best align the needles when the MB had extra sts), BEFORE putting the other fingers into hold position, because you can't rack the RB while needles on both beds are in hold! (Machine knitters are shaking their heads at me, LOL, hand knitters are saying "What?!". Stick out the fingers of both hands...interlock them with the fingers of the other hand, keeping the fingers out straight...now try to move an index finger over to the next position without moving the corresponding finger on the other hand....)The real challenge though, came with the finishing.

Whether you hand knit or machine knit gloves, there is no getting around all the ends to weave in. Let's see...the start (1), five finger tips (6), the start of 4 of the fingers...makes for 10 ends....if you didn't run out of yarn mid-glove, change colours, or wrapped the yarn around an out-of-position needle partway down the needlebed and didn't notice the long loop till much later....

In hand knitting, when I would start a finger, I'd pick up the sts for the fourchette (OMG. I just googled that to find a site to explain it....I had no idea other than it meant the little gusset in between the fingers....google it yourselves....), from the finger beside it. While there'd still be the end to weave in, there wouldn't be a hole to close up. I found I just couldn't see well enough to do this on the machine, and just cast on those extra sts between each finger. I didn't think it'd be too hard to use the yarn ends to close the holes. I just couldn't seem to hold the glove to get tension on it and sew at the same time. The glove was too big for me to just wear it while sewing up. I finally saw my tripod, and used it to stretch the fingers apart!
The gloves were looking a little ratty in the end. I had re-used some yarn, and it was kinked. The increases for the thumb were a little strange. There was the curvature of the fingers....Then, I saw on Mim's Blog a tutorial for making glove blockers using foam core board--which I had because of Hugh's Hallowe'en costume! I traced Rob's hand (he was insistent the gloves were for him!), and had a hard time cutting it out!!! Then, to make it steamproof, I covered it with the leftover self-adhesive laminating plastic film from Hugh's costume. I also had to use some packing tape as I ran out of the laminating film. This was not quite the quick project I thought it would be! Then, in putting the glove over the hand, I found the fingers were too spread out, esp. the thumb (Mim doesn't have a thumb on hers because she used a 'palm opening', while I used a side edge thumb gusset). I had to cut the thumb and pinky off and re-locate them, LOL.
The steam does wonderful things! It's hard to see in the picture above, but the top glove has been steamed, but not the bottom one.
I got these off to my BIL (the father of the girl who got the piece of pink knit lace fabric!) and went back to make a match for the first trial glove. These became Rob's gloves. By now, I was fed up with dark coloured gloves, even though I had made gloves for less than half the number of men I wanted to! In the end, I did one more pair, in navy blue (not in the hand-wash only alpaca, LOL), for my brother. I would have done more pairs (I had changed my mind about giving away all the alpaca, esp. since some people might not want to hand wash, and bought some sock yarn instead) but I was burnt out. Perhaps if people wanted yellow or light blue or red gloves instead!
In the end....the gloves were too small for my BIL. But they fit Lou perfectly!! LOL!!


Tuesday, January 04, 2011

Marlee's Teddy

Back when I took the sock knitting class that started it all (spring, 1999), one of the leaders brought in a teddy and pattern by Jean Greenhowe. I loved it, and she photocopied the pattern for several of us (I know...shame...). Knitting on the Internet was not too common then, and my local library, although great for its size, was lacking in many ways. The few bear patterns I had seen were way too basic and blah. I love the 'real' Teddy Bear look of this bear, although it means quite a bit of sewing up.
Since then, I have made numerous of these bears. The great thing is that you can use any yarn....I've used everything from fingering for a sweet tiny bear, to chunky for a chubby lovey bear. Just use needles a little smaller than normal, and be prepared to be shocked at how much stuffing it takes, regardless of the size! LOL.
According to my Ravelry page I started this July 2009, shortly before we moved. My intention was to give it to my cousin's baby for her first birthday, early October 2009. Well. The move, the tooth infection...losing the pattern, losing the stuffing, finding the pattern, finding the knitting, finding out there was still a leg missing....it went on and on and on. Finally, I got my act together, bought a new bag of stuffing, and got it sewed up. Something wonky happened though with the legs. I think I messed the second one up since there was a long time lag between when I did the first one and the second one. It's almost like halfway up, it switched from being a left leg to being a right leg. Oh well, each bear has it's own personality.This is one of the few faces I really liked! You're supposed to knit a nose and sew it on, but I stopped that nonsense after the first bear. This time, I thought if I used fine yarn I could sew more detail in the eyes...make them more round. But I found that since the yarn is chenille, I could only go between stitches, not through stitches and the thin yarn was too wimpy. So I found some thick black (always keep those small balls of odd yarns!), and it went quickly and smoothly!! This bear is soft and squishy and I hope she likes him/her!....a few months after she turned TWO! LOL.

Saturday, January 01, 2011

Wild Tam pt 2

I had some of the glittery yarn left from the wild tam, but not enough to make a pair of fingerless gloves. I wanted to make something my niece could wear with the tam, or on it's own. But what? I posed the question to the Yahoo machine knitting group and got no response, but someone did email me directly with a few suggestions. I decided on a hairband!

I cast on 3st on the mainbed and 3 sts on the ribber, and knit tubular for about 23-24". I hadn't like the first few colours that came up so as I needed only about 22", I thought I could just cut off the first inch. However, when I fed the (6mm) elastic through, it stretched width wise and lost length! I had to put it back on and knit another 4". In total, 580 rows on the counter!

To embellish it, I knit two 5 petal flowers from Carl Boyd. The first one I did at T5, and the second one at T4 to make it a little bit smaller. I crocheted the tails into a loop around the band, so although it's not removable, it can be repositioned if she wants to cover up another colour in the band. I was not terribly thrilled with the colours that came up, but it was on a cone so I couldn't take from the other end without re-winding it. I thought at first I'd do a couple, so they would be in a bunch, but it came out big!
For fun, I slipped it over the band of the tam! It could also be wrapped around the wrist for a bracelet, or around the hair for a scrunchie.The flower is a little tedious to sew in all the ends and steam it (and it still curled a fair bit, being only 73% superwash wool), and I'd like to find some other ideas...I'm thinking a short row flower, knit sideways...
In all, this weighed 14grams, which included the elastic!


Friday, December 31, 2010

Wild Tam

I have a niece who's 12, and quite fashion conscious. Slouchy hats are 'in' this year, and she loves orange and bright colours. I didn't really have any orange yarn that I felt would make a good hat for her, especially after seeing the tam pattern Diana Sullivan posted. I stopped into my LYS for the first time since we moved here (I was able to hold off for 15 months!), and found some Berroco Sox Metallic that I thought would fit the bill. My only problems were finding the time--I had gifts to make that had to be mailed, and I had a long list of gifts I wanted to make that didn't have to be mailed....LOL. Plus I wanted the hat a little slouchier than what Diana's seemed to be. Although I've read of people on the Yahoo lists making this hat, there aren't too many pictures or blog posts about it. I didn't have much to go on to figure it out.
I don't recall exactly what I did with my first effort....but it resulted in many more rows than the original pattern, which meant when I joined it to the ribbed band, it was very pouffy (lets not go into how on the first try of joining it, I made a math mistake and had to redo it!). It looked more like a wool shower cap than a slouchy hat.
For the second try, I loosened up the tension, and cast on 50st instead of the 45 in the pattern. To work these extra 5 sts into the short rowing and keep the same number of rows per wedge as Diana's pattern, I put a needle into work about every 10 rows, when the carriage was on the left (the pattern has you put the needles into work while the carriage is on the right, and as you do that every time the carriage is on the right, the extra sts have to be worked while COL, or I guess you could put two sts into work every 10 rows when COR....).
I kept the original ribbed band and re-hung it. I had figured out that there were about 33 ribbed stitches per wedge, so I'd pull forward 33 st and hang one wedge. I did the joining and took it off the machine. It still seemed a little pouffy, but I hoped steam would help.
I think the above is the pre-steamed picture. I tried using a dinner plate, but mine were too small. I used a platter, and it was still a little small. I steamed it as much as I could on the platter, then put it on the head. I think I should have let it cool before moving it though, as I think the ribbing got stretched going over the platter as I took it off.It smoothed out quite a bit. I think using a looser tension helped to not get quite a sharp edge to the tam that you can see in others' pictures. I am not a great hat model, and my hair was all pulled up. It's not quite as orange as I would have liked, but I had showed her the failed first attempt, and she did like the yarn...how could she not--it has metallic glitter in it, LOL!
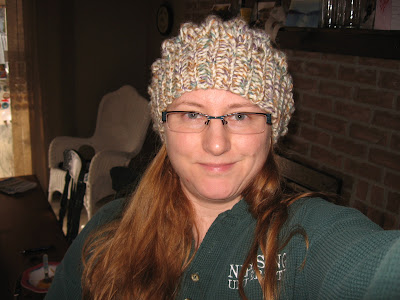
I haven't gotten it to her yet, I was hoping to get something else made with the leftover yarn. Diana says the tam takes just a smidge under 50gr, but this one took 62gr. That doesn't leave me enough to make fingerless gloves, but I have a few ideas...
(More details are on my Ravelry page).

Monday, December 27, 2010

'Shroom Head

I found out my SIL got a new coat this year. The description on Facebook was that it was olive tan beige green, and possibly iridescent. My SIL's favourite colour is purple, and last year I made her the charcoal "Bella Mitts" for her birthday. I did not think a purple hat would go with this coat, despite my SIL's insistence that purple goes with everything. I find that in this sort of circumstance, a multi-coloured yarn is usually the way to go, rather than trying to match such an interesting colour description, LOL. I searched my stash and found this yarn, "Braemar" by Stylecraft. It's either 55% wool, or 55% acrylic, LOL. I chose the "Shroom" pattern from Knitty.com last year. I had tried to make it last year, but it looked so hilariously ridiculous on me, I had to frog it the instant the shutter clicked. This time, I was much more impressed. It's not too terribly slouchy though; I'm not sure that the current trend is suitable for us more .... mature.... ladies, LOL. You can't see it in the picture, but it does slouch at the back.We gave my son Roxio Creator Pro to "play" with photos and videos for Christmas, and I tried it out with this photo. It has a dedicated "blemish remover" and a "wrinkle remover" too! The caption reads "Does this hat make me look like a 'shroom?" LOL!


Wednesday, December 15, 2010

Knitted Gifts for Teachers

I struggle with teacher gifts each year. Even though I know it's coming, I'm usually caught off guard, LOL. For Christmas, I like to give something for the teacher--something personal or something festive or something to help out the season...not a "#1 Teacher" mug. (For the end of school, I like to give something for the classroom...this way, the child has moved on and won't be there to say "That's MY gift"). This year, I'm giving a cute ornament made by a high school friend, and the kids made bookmarks similar to this (though not the fancy bookmark, we could only get plainer ones, but they picked all the beads and did it themselves). I had planned to make MK gloves for the kindergarten teacher, but she came out wearing grey gloves the other day, so I canned that. I was going to make some for Hugh's teacher, but he says he's sure the teacher already has gloves. We saw Lucy's teacher at the Santa Claus Parade, and I saw she had some bright green on her jacket, and the teachers wear safety vests in the yarn, one of them is bright green. So I made her some bright green mitts.Mmmm. The colour is much lighter and clearer and brighter in life, not like pea soup on my monitor.

I used the standard old mitten pattern from Patons, with 40st and 4mm needles. After doing the thumb, I knit the next row on the body and then thread a strand through the 20sts of the back of the hand. Knit the rest of the hand, ending with 1x1 ribbing, instead of fingers like you often see. I find the fingers tend to make the mitts a little bulky. Then I picked up the loops of the 20sts, cast on 20st for the palm side, and knit in the round for the flap, following the mitten pattern. They look a little out of balance because the yarn I used (Easy Knit brand "Georga", from Wal-Mart, 100% "Mercerized" Wool), knit up at 22st/4" and 30 rows/4" instead of the pattern's 19st and ? rows (I can't find that page, but I think it was about 24rows). I had followed the row counts for up to the thumb, which resulted in that portion of the mitt being a little shorter than it should be, so the rest of the mitt--knit to the length requirement--looks too long. As well, the mitts are close fitting instead of loose. The weird thing is, the yarn had a 'ball band gauge' of 18st/24rows on 5.5mm. That seemed outrageous just by looking at the yarn, and I think the gauge I got for the mitts is perfect (however, I wish I had ripped back and increased a few sts for the hand as it is stretched a little on me and I think the teacher is probably a bit bigger).

What's even more perfect is that the yarn was sold in 2 ball packs....for $5. I used just under one ball. Yup. And I picked up a LOT of packs over the past month; many shades of green.
Now, the instructions say to handwash in warm, so I'm going to test a swatch in the machine. AFTER Christmas. And should I make her a hat, or a neck cowl?

Tuesday, December 14, 2010

Easy Gift

Who hasn't known a child to build a fort with a sheet, or wrap one around their neck for a superman cape, or pin one to their hair for a bridal veil? My kids love stealing pieces of fabric from my sewing room, and using them for blankets, forts, costumes, etc. I decided for my 4 year old niece that I would knit her a big piece of lacy pink fabric, to use her imagination with.
Back in the spring, I saw an ad on kijiji.ca for some cones of baby coloured machine knitting yarn. I emailed the poster, and it was one of those "wow, you're just like me!" moments...the similarities in our lives were fascinating, although she had just had her first baby. The yarn had been her grandmother's, and she knew nothing about it. Somehow though, I got distracted, or was broke, and forgot to follow through. A while later I saw the email in my box and did a face-palm. I emailed her, and she said since she hadn't heard back to me, she gave it to a machine knitter from Omeemee. I knew instantly who it was, LOL! I emailed her and teased her about taking my yarn. She wrote back saying that she had good intentions to make baby blankets for the hospital, but the yarn wasn't working the way she wanted. And if I wanted it, I could have it, and in fact, she'd be in Brooklyn in two weeks and could even drop it off. For free. Well. Everything for a reason, and there are usually very good reasons why I procrastinate!!!! Marg is the creator of a very popular circular knit dishcloth, and to thank her, I knit a couple of her dishcloths for a gift--I figure she's either sick of knitting them herself, or knits so many for others that she never gets any for herself (I've shown them on here before, they're quite pretty!).
I chose card 7 (Singer), and started with a swatch. I wanted to do it as a tuck rib so that I wouldn't have to worry about edges. As soon as I put every other needle out of work on the mainbed, chaos happened. This card has every other st knit and the alternate sts tucking, for two rows, then it alternates. I tried different combos with ribber needles, but nothing was working. I looked in the mainbed manual to see if there was something else to try. It showed this card doing tuck lace by putting TWO needles out of work! That was the ticket. I could pretty much use what ever pattern of ribber needles that I wanted to--the more I had, the wider the fabric, however, it did seem that placing them in different spots relative to the out of work needles gave different widths too.
Relaxed the fabric is somewhat boring but it is lacey and stretchy.But stretched out with the weights...It's rather neat. This is now the backdrop on my computer, LOL. Of course, it doesn't stay this taut once off the machine and washed.This is the needle set up I ended up with, I used T10 and I think needles 90L-90R, or at least 85-85. I was concerned about going all the way to the ends of the bed; I don't have extension rails. Because it's every other needle tucking, it didn't matter which needles were sent out of work, as long as it was at least two. I did keep track of the rows, but unfortunately forgot to look at the counter before starting the next project. It was at least 500 I think. I think I weighed it, but again, I don't have the info. It turned into a huge, fluffy, frothy, cotton candy squishy piece of fabric. I would have liked it wider, but I was also limited by the fact I had to mail it!
I hope my niece likes it and has some fun!

Tuesday, December 07, 2010

Super Easy MK Fingerless Gloves for 8 year old

I made two pairs of gloves on the standard gauge machine, and wanted something a little faster, so I thought I'd give fingerless gloves a try. I started with making a pair for Meg's teacher, then suddenly switched to making a pair for my niece's 8th birthday (today!).


Standard Gauge with Ribber
30gr sock yarn (I used old Kroy 4ply, which lists a stockinette gauge of 28st/4")
waste yarn in a highly contrasting colour


Cast on every other needle: MB 30L-31R; RB 29L-30R; do the zig zag row and hang weights, and then the "circular" or "tubular" cast on at T3 (or even a little tighter).
Switch to 1x1 rib and T4. RC=000. Rib for 20 rows.


Now to increase for the thumb gusset. Move the outer stitch at each edge, on both beds, out one position (keep every other needle out of work). Take the heel of the st towards the center of the bed, and place it on the empty needle (so, don't take the heel of the outer stitch that was moved, but from the first st beside it).
Knit four rows.
Repeat these two steps; making increases when RC reads 20, 24, 28, 32, 36. That makes 10 sts increased at either edge. When RC=40, take the 10 sts at each end off onto waste yarn threaded through each stitch (one strand for the MB sts, one strand for the RB sts is fine). Knot the strands!


Continue ribbing till RC=64. This makes a long hand that can be folded back for better finger exposure, or left long to keep fingers warm. Remove main yarn and thread up waste yarn. Set the carriage to knit circular, and knit about 20 rows (10 rounds).


Now, the hard part, which isn't all that hard, you just have to visualize. So far, there is a seam going up the thumb side of the hand, right up to where the sts have been taken off. We will re-hang those sts to keep ribbing, and keep the seam on the outer thumb, but the thumb will be knit in one piece. Start hanging the left side of the thumb (anywhere on the beds), (make sure to hang the original MB sts on the MB...I'm sure most of you would know this, but ahem..some of us need reminders). The 10st is on the RB. Bring the next MB needle in pattern into work, then the RB needle, then another MB needle. These three needles will be empty. Continue hanging the other half of the thumb, starting from the inner part which should be a RB stitch.


Make sure carriage is set to rib, T4, RC=000. Take carriage across, and you can see those empty 3 needles in the middle should now have yarn across them. You can hang a "7" hanger and light weight, or just knit the next row slowly and make sure those sts knit properly, add a claw weight when you can. Rib for 10 rows. Switch to waste yarn and set the carriage to circular, and knit 10 rounds/20 rows. Take it off the machine, cutting the main yarn with a long tail.
It now looks like this, if you fold it to make it look like a glove:


But look closely at that weird thumb:


Here, you can see, sort of, how the outer stitches that were increased, are pulled around and joined in the middle, not joined by the outer edges. If that step was too confusing, feel free to just rib those 10 st on each side separately (and infact, this might make them a smidge quicker as you could leave the hand in hold position while you do each side of the thumb, but it would mean two seams, and you'd have to add one (or more) stitch where the thumb meets the body)To finish off the top, and the thumb, I used the "Smiles and Frowns" cast off from Diana Sullivan's Ribber Course videos. If you haven't seen those, you should, they are awesome. Ribbing is very stretchy so if you want to make them for an adult, I'd try casting on only a bit more, MB 32-33, RB 31-32....keep the MB as the outer sts. The gloves I made for an adult took 50gr, just for reference. 30gr is what I seem to always have left over from a 100gr ball of sock yarn. Diana's adult tam takes 50gr, so you should be able to get a pair of gloves or wrist warmers and a tam from one 100gr ball!