Showing posts with label Singer 327. Show all posts

Sunday, February 16, 2025

Seeing Red

 How many red scarves can I make? I can't even keep track. I have two pictures in my Google Photos that were since the last time I posted red scarves, but no actual "staged" photos.

This one was just double crochet, 20 per row. Super easy, super fast. The first one I did in DC was 18 stitches and I wanted just a bit bigger. A couple times I found out I had gone down to 19 DC, so I had to rip back. One time, it was quite a bit to rip out but it is super fast to crochet. 132 gr. 

This is another ribbed one. It was a bit narrow but I was hoping I could heavily steam it and stretch it looser. That didn't really happen but I'll throw it in anyway. It's more like 4-5" wide instead of 6". 

The school I have a small part time job at has started a "share closet" for extra supplies, donations, spare clothes etc. I'm going to donate the bag of mittens that I had from lunch supervision. Plus, I've made some in the mean time but never found anywhere to donate. I also decided to just grab some yarn and knit some tiny mittens. More on those in the next post. While looking in one of my storage ottomans for something, I found 3 felted but unstuffed mice. So I sewed them up with some catnip.


I also made two more fingerless gloves using the orange/yellow/pink yarn. I needed one to replace the too-yellow one from the last pair. Then I thought I might as well knit another to make that one into a pair, and donate those to the school. 
The too-yellow one on top, the new one at the bottom.


This is the pair I've ended up with for myself.

While I was in the ottoman, I found a fair isle ear flap hat I had made on the Singer 155 many years ago, that I wasn't totally happy with. There was a yarn tail hanging out, so I wove that in and threw it in the donation bag. Apparently I made it in 2011 and there were some issues. I don't know if I ever fixed all the issues....I sort of remember wearing it, but I've had so many hats. I'm not counting this yarn total since I really didn't even do much. I wasn't keep track of yarn back then.

Many knitters do a "Finish it February" theme, and perhaps that's what I'm doing too. I have a Christmas tree skirt pattern I think I bought in 2001 at Spinrite, in Listowel, back when it was still just Patons I think. And a mohair sweater from pre-blog....who knows what else....I have a bag of wool socks that need mending, but I rarely wear wool socks now. I have three Sofie purses from 2002/2003 that need handles (I think I have two of them, maybe even three). 

Yarn In:  0 grams
Yarn Out:  334gr + 206gr = 540gr
Balance:  540gr more OUT than in
Costs:  $0

Friday, January 10, 2025

The Singer is Singing

I'm just not sure if we're reading the same music LOL. 

I wanted to knit up the yarn I mentioned in the last post right away. I had a resource I was finishing up for Teachers Pay Teachers and that took priority, but then I got to it. First, I had to clear some space, find the parts and tools, etc. I took a look on my blog to see the changes I had made when I first made these gloves--Dec 2015! 

I got started, and it seemed to be going okay. Then I moved on to the first thumb and nope. Nothing I would do for the next few days would be simple or easy. Between this pair, a thumb I made for a pair that's been waiting since Jan 2016, and another pair I made, I made every possible mistake and mishap. 

  • forgot to set tension at tightest for zig zag cast on.
  • forgot to hang cast on comb
  • forgot to change settings for zig zag cast on
  • forgot to change to ribbing tension
  • forgot to change carriage settings for ribbing
  • caught yarn around gate pegs
  • dropped stitches trying to fix something
  • forgot to have end stitches on Ribber bed
  • forgot to change settings to Fisherman's Rib
  • forgot to reset row counter
  • forgot to switch settings back for top rib
  • forgot to move stitches from ribber to main bed for loop through loop cast off
  • forgot to do one row at really loose tension before moving stitches for cast off
  • forgot to do ribbing after casting on for thumb
  • forgot to change to Fisherman's Rib on thumb
  • totally messed up thumb decreases
  • sewed thumb on wrong side out
  • tried to set thumb slightly higher on seam but somehow it didn't change
  • shortened cuff to try to get one pair from one ball and it's a little too short AND there was yarn left

I played yarn chicken and lost. I wanted to get both gloves from one ball and this is what I had at the start of the second thumb.

So, you can see...I made 6 gloves (a couple got ripped back) and 7 thumbs (one ended up being a dud, two I ripped back) just to end up with 2 pairs plus 1 thumb.

I couldn't figure out why one thumb was different than the other so I reknit the other than discovered the first one, I had forgotten to switch to English Rib. 


These plum ones were with the new yarn. I thought I had made them the same as the earlier pairs but it took slightly more than one ball.

These colourful ones (on the left) are to replace the ones I've been wearing since Jan 2016 (on the right). I wanted the hands longer, but knew I'd have to shorten the cuffs compared to the plum ones. I messed up the thumbs so bad. I don't like how one ended up with a wide orange section, the top rib AND thumb all in yellow. The seam looks bad because I was trying the pattern's way of outer needles on Main Bed. 


This pair is knit to the pattern's directions and has been on my shelf since likely Jan 2016. It only needed one thumb! I think I had lost the yarn for awhile, and then maybe one of the gloves. I considered throwing them out, but I'm glad I finished. I don't need them, and I find the short length too short for me, though perhaps they are better for driving. I'll put them in the donation bin. 

Altogether, these weigh  133 grams. Not a bad way to start the year! I'm going through my sock yarns trying to find more to knit up but it's either boring solids, or hand dyed 100% wool that needs to be balled.

Yarn In:  0 grams
Yarn Out: 133gr
Balance:  133gr more OUT than in
Costs:  $0

Tuesday, August 10, 2021

Finally

 Last summer I knit some newborn hats on my Singer 327. I cast on for more, got part way into the 4th, and got busy. It was bugging me to see them hanging on the machine, waiting to be finished. I've been thinking about selling my Singer 500, which is on the same table, so I wanted to tidy up to take pictures. I finished up, then sat outside to sew them up.

I don't have details, except that I had jotted down 75 rows, which is too many, I feel. 


The four hats weighed in at 73gr once finished, but I did have a lot of waste because of winding a small bobbin off yarn off the cone at the end of each hat so that I do a couple decreasing rows by hand and sew up. I used a strand of navy and a strand of green. 


Yarn In:  1400gr
Yarn Out: 100gr + 3630gr = 3730gr
Balance:  2330gr more OUT than in
Cost:  $0, $0/day

Thursday, July 09, 2020

More Tiny Hats

I wasn't extremely thrilled with the other tiny hats I made on the bulky machine. They're okay, but DK on that machine is not a great fit. So, we pulled out my knitting machine table so I could access the standard gauge. I do have a lot of cone yarn, though I am seriously just about out of suitable DK yarn! A lot of the cone yarn I have though, is not baby colours. Not even in a non-traditional way. Like, grey, dark burgundy, tan...

But I had this pretty teal, and purple. One of these tiny hats takes about 12gr. The teal ones are single strand, one or two of the purple ones are single strands, but then I decided to double strand it. For the single strand ones, I believe I did 60-60 in K1 P1 rib, 75 rows, T1, then bring the RB stitches up to the MB, doubling with the stitches there. Knit two rows, double up again, do that again.  
The cream one was from my box of finished items that never sold. The bottom purpley one was actually from the last batch, but when I washed them, it got hidden in a sheet and I missed it. 

For the double strand, I cast on 50-50 in K1 P1 rib. I started at T0 then moved up every row one notch on the tension till I got to T5 (the first one was T3, the second was T4, then I decided to try T5 on the 3rd hat and I liked it the best). Did 75 rows, moved the RB stitches up and place them on the needles with stitches already. Knit a row, moved over as many stitches as I could before I got bored, knit another row. Doubled up again, knit 2 rows, doubled up again, knit a row and take off. 

Even though they were all done differently, they stretch so much so they will all fit. However, I will do the 75 rows, move the stitches up and doubled, knit a row, and then take off on a knitting needle. I will finish the last couple rows by hand knitting. I need more hand knititng projects and I just wasn't thrilled with finishing on the  machine. We'll see how many hats I end up making!

Yarn In:  3344gr
Yarn Out:  6453gr + 178gr = 6631gr
Balance: 3287 gr more OUT than in!
Costs: $42.35/191 days = $0.22 per day

Tuesday, November 01, 2016

Red #2-#6

Red, as a colour, has a lot of things associated with it. Whole holidays, seasons, emotions, etc. And it's so tough to photograph!

I wrote way back in February about wanting to take part in a challenge to knit scarves for World AIDS Day. When Mary Anne posted the next scarf in the challenge, it was too much of a ...challenge. Then I don't know what happened.  I'm pretty sure she has not posted as many patterns as she was going to. I sort of put it aside and thought it's too late. Then there was an article in the paper, and we have until Nov 23 to hand them in, I think. I took a look at my red yarn and got to work. A nice little diversion from custom Christmas orders.

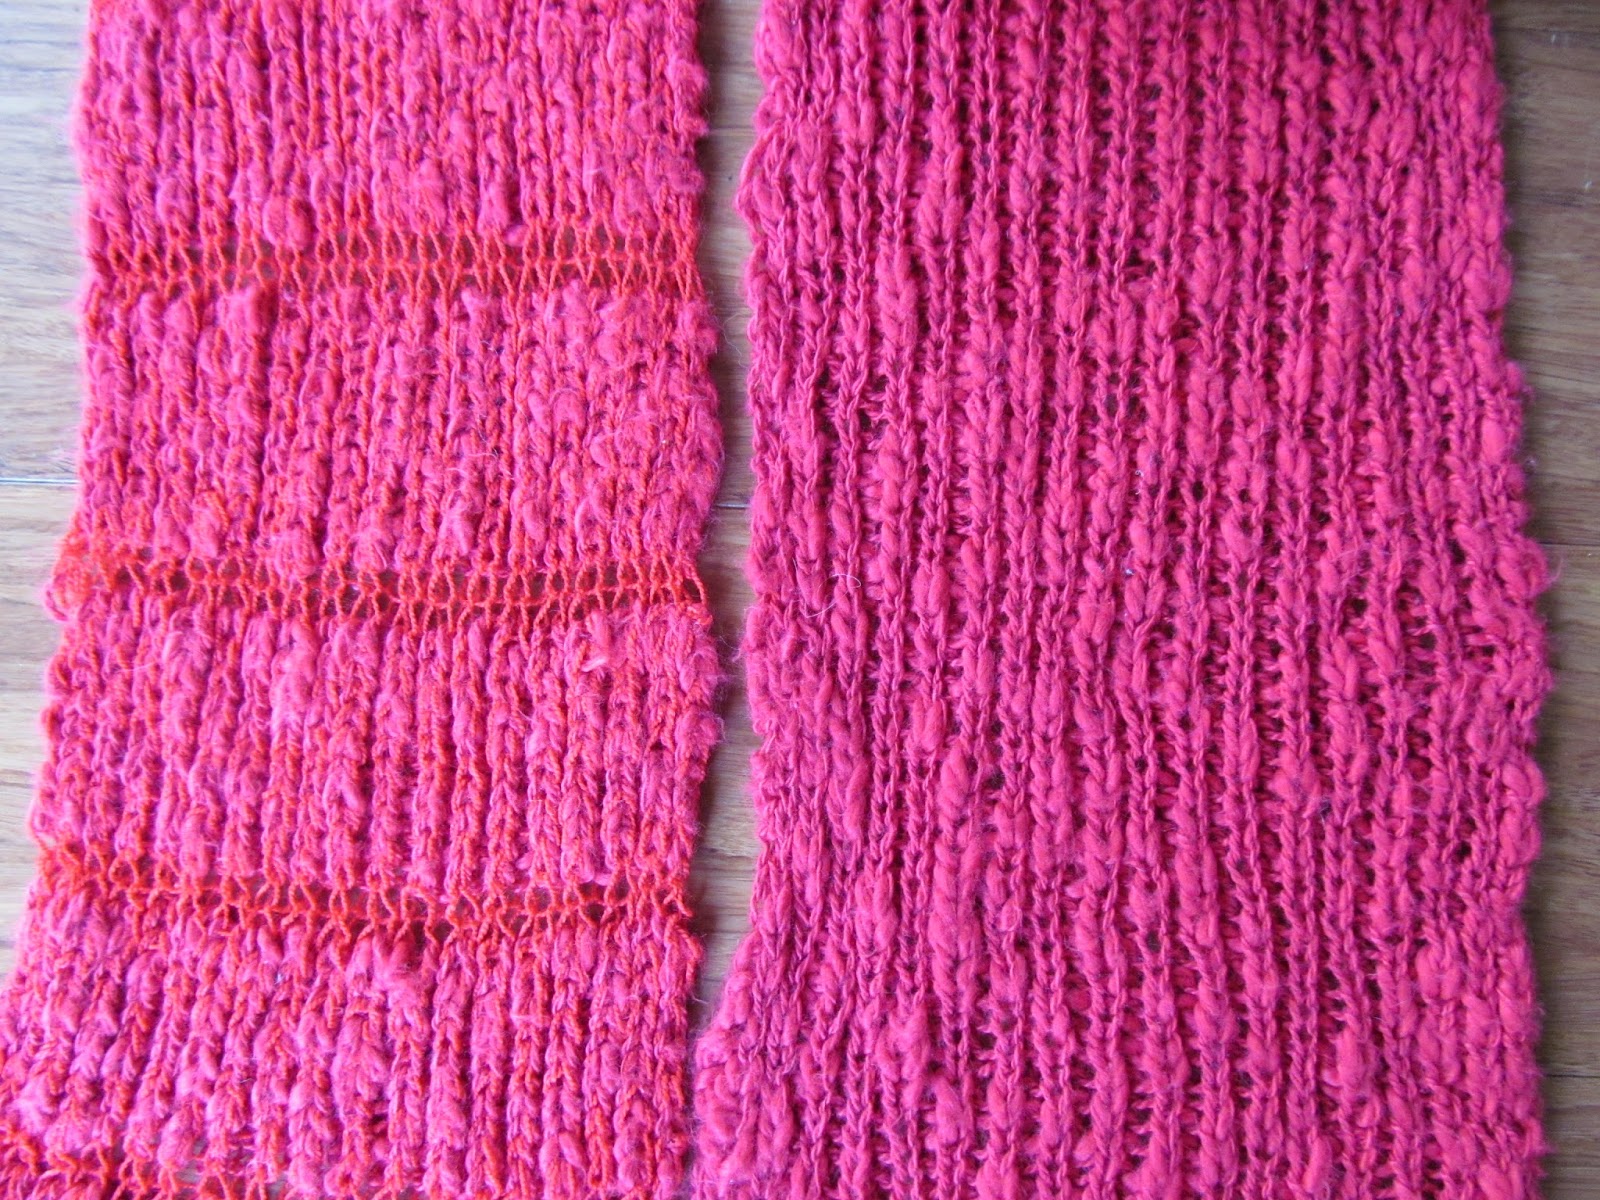
There are three different yarns used.  The second from the left is the one I did last February.  It's a very fine red yarn. The one on the left is made with ten rows a red slubby cotton (what I made my red Waterfall in), and two rows of the fine red, all in rib (92gr). The second from the right is Bramwell 4 ply, left over from a scarf (but was a left over to begin with LOL) (106gr). I talk more about its pattern in a minute.  The right most is straight up red slub in a rib (81gr).
 So.  This one was an accident.  I started out using the Bramwell and two strands of the thin red.  It had some issues so I restarted several times, the fourth time using one strand fine red.  However, I noticed after I had done a few repeats that I had not changed the settings correctly after the cast on and I was knitting it in some sort of bizarre rib.

It was knitting both beds one direction, and the main bed on the return trip. Whatever. I didn't really care by this point. It looked cool, it was laying almost flat, it was working out, both sides were nice. Etc. Time to move on!

 I got out the red slub and cranked out a plain ribbed one quite quickly.  After washing, I was a little disappointed with the red slub as it went a bit fuzzy.  Should've dried it longer in the dryer but I didn't want it to shrink. The one on the left is similar to the mistake one above, except that this time I did the ribbing correctly. In the basement, the two yarns looked much closer in colour, but outside? The red slub is not magenta like it's showing on my screen, but there was still quite a difference!

 I don't know which one this was...I think the Bramwell one (above).
 Four fat scarf sausages!
 I swear that red slub was not magenta.
When I went to drop them off, she told me at the yarn store that she is selling Bernat "Satin" at cost, in red only, to those making the scarves.  So I bought three more skeins. I had hoped it would be one skein per scarf, but I ended up needing almost 1 1/2 per scarf.

 I made the right one first. I started with a racking design but I didn't have the manual handy and I left needles out of work on the mainbed, which wasn't needed. I ended up making a big mistake so took it off and thought it out a bit more. The pattern still isn't quite symmetrical, but it's nice. The other side reads as stockinette, but if you stretch it out, you can sort of see the ribbed stitches.
The one on the left is the tuck lace rib design in the SK155 manual. T2 for both these, on the SK155 (all the scarves were on the SK155 except the original one from the winter, it was on the Memo-matic 327).  Both of these needed quite a bit of steaming.  There is a somewhat big error on the tuck one, right in the middle, I did 4 rows of plain  knitting instead of two. It's not that big of error, I suppose, many would never notice. But I did. We're not perfect.  No one is. 

Yarn In:  300gr + 6523gr = 6823gr
Yarn Out:  590gr + 5195gr = 5785gr
Balance:  1038gr more BROUGHT IN than used
Costs:   $6.75 + $220.79 = $227.54 /306 days = $0.74/day

Friday, July 15, 2016

Functional

I needed new dishcloths.  I don't know what happened, but the pretty ones I crocheted up this spring (or maybe it was last spring actually), they got moldy and stained :( That never happens with my knitted ones!  I grabbed a bin that had what I thought was some ends of cones of cotton yarns, but it had only a green and a white, I think size 10 Handicrafter Cotton.  I wanted to do the circular one I usually do, on the LK150, and thought it would be cool to plate it (plait).  That's putting one colour in feeder 1 and one in feeder 2, so the knit side shows one colour and the purl side shows the other.  They do both show on both sides, but one is much more prominent.

I struggled with tension.  I struggled with just getting the carriage to move.  I dusted, I lubed, I upped the tension.  And after doing six wedges it was not going to be a circle like it should.  I decided on a couple more wedges.  Then I realized I had cast on twice as many stitches as needed.  Ooops.  Picture on Instagram!


Started up again, and it went a lot better, even though at this point, all I changed was the number of stitches.  I should have listened to my machine earlier on!  I did a second one, reversing the yarns in the feeder.  Then I opted for a rectangular one in tuck but it gave me headaches too, so half way thru I changed it to single strand.

Then I decided to move to the standard gauge and try single strand and some punch cards.  A few issues, but I just wanted dishcloths, so I just did what ever necessary to get the yarn used up.  Ended up with more green than white.  Whatever.  A few are nice enough for when company comes.
This one was supposed to be a slipped stitch pattern, with the card locked on row 1.  It didn't work.  It worked when the card wasn't locked, but of course, made a different design.

I weighed them with the waste yarn because it was truly waste yarn this time.

This was another one, I think card 3 (Singer), that was to have the card locked on row 1 to create vertical columns of tucking.  I use card 3 a lot, it's so versatile.  I liked the vertical look to it, but again, it didn't work.  The card was not rotating, it was definitely locked.  So I don't know what the issue was.

Yarn In: 1586gr
Yarn Out: 159gr + 4360gr = 4519gr
Balance:  2933gr more USED than bought
Costs:   $74.87/197 days = $0.38/day

Wednesday, February 03, 2016

Red #1

When Mary Anne Oger ("MAO") posted the pattern for a red scarf for AIDS Awareness Week, last fall, I didn't really pay attention.  I was busy!  Then she posted about challenging herself, and her readers, to create 10 scarves for this year's campaign.  Mmmm...that seemed interesting!  I have a cone of a fine red yarn that just hasn't found the right projects.  I tried a tank top, back in my earlier days of using the standard gauge machine, but got bored and ripped it back into balls.  I thought it might be the perfect thickness for this new scarf.  Or, I could use it doubled, since I had a cone and several wound balls.  I started with it single strand, and that seemed to work fine.

I worked through the first ball, struggling with the cast on instructions, and changing all the settings so much!  I would forget one of the four things each time I got to the zig zag row--if I remembered to stop for it when the row counter was at multiples of 20-2!

I got to the end of the first ball, and the knitting was not the prettiest, but I felt like I was getting it.  Somehow, half the knitting dropped off!  It was an omen to start over and do it better!

 The yarn had been used previously, obviously, and although it had been balled up for quite a while, it still knitted with a bit of a waviness.
I steamed the ends, just to see how it would look, and there was much improvement.  I decided to wash the scarf in the machine, as I was doing laundry and the basement is a dust bowl right now.  Once it came out, I was a bit surprised to see it wasn't totally smooth (above).  I even hung it before it was fully dry, hoping for gravity to help.  Plus, I thought I did my calculations based on it being 6ft long and now it was only 62" long!  I stretched and steamed and got it to 64"  Then I went back to the pattern and the blog and saw it was supposed to be 6x60".  Phew!


 I decided to steam the whole scarf, and it looks so much better.  Almost "commercial"!  This picture shows the bottom half steamed smooth and the top half just with being washed.  My edges seemed uneven but I noticed that it was just where the zig zag rows are.  This is a clever design for scarves...knit as a tube, but with zig zag rows that connect both sides, every 20th row.  So, it can't twist and will always lay flat.

However, it barely made a dent in the red yarn (which isn't a soft and snuggly yarn, but a more dressier yarn)!  Good thing there's 9 more scarves to go!!

Yarn In: 918gr
Yarn Out: 68gr + 1216gr = 1284gr
Balance:  366gr more USED than bought
Costs:  43.09/34days = $1.27/day


Thursday, January 28, 2016

Lucy's Turn

Megan is my one child that is often requesting items crafted by momma.  Lucy asks once in awhile, and Hugh...well, not anymore and when he does, it usually something obscure and/or obtuse.

Lucy is playing in a jazz band made up of students from across our region.  She got a "band coat" that is, of course, black.  I don't get this.  Musicians are supposed to be creative people.  Yet our folders are black, our cases are black, or uniforms are often black, our jackets are black....

We were at Wal-Mart and of course I had to pass by the yarn aisle.  I stopped at the small selection of Red Heart "Heart and Sole" sock yarn.  This yarn feels thin and stringy.  I hoped it would wash up nicely.  She picked out this grey/black blend to make some of the fingerless gloves to go with her new coat.  I hoped she would help make them, but she wasn't interested :(

Before I started though, she determined she wanted an accent colour.  Perhaps bright green or purple.  What do I have?  We went through my sock yarn bin and she declared them all "boring".  I found a few yarns but they weren't really suitable.  I finally found a ball of Patons "Lace Sequins" but she didn't want the sequins!  Then I found two balls of a cheap, fake mohair from Dollarama (our big dollar store chain).  It's very fine, but with two balls, I could double strand it easily.
The white hand is cut from foam board and was a tracing of Rob's hand, Man's XL.  So you can see the stretch of these gloves!

I got to work, making random stripes in the cuff.  Got the hand part done, then it dropped a bunch of stitches.  I took it to show Lucy and she said she didn't want stripes on the cuff and wanted fewer stripes in the hand.  Whatevs.  I restarted, got the hands done quickly.  Worked on the thumbs.

I found with the other pairs that the "gusset" part of the thumbs don't seem long enough (not surprising since the length for the hand doesn't seem long enough and I add 8 rows), and it pulled up the wrist.  Not too noticeable in the multi coloured yarns, but if you did the cuff in one colour and the hand in another, it'd show.  I had experimented with changing the last couple decreases working down to the point, and that helped, but this time, something went wonky.  The first thumb worked out right (could still be longer) but the second one...I don't know.  I ended up finishing it up by hand.

She's been wearing them!  Yeah!  These gloves took only 36gr total (33gr of RH is left), which leaves me with some more boring yarn to add to the sock bin LOL.

Yarn In: 50gr
Yarn Out: 36gr + 1145gr = 1181gr
Balance:  1131gr more USED than bought
Costs:  $7.90/27 days = $0.29/day


Monday, January 25, 2016

Black Hole

"Make me a slouchy beanie, close but not tight, thick ribbed but not double layer, exactly like this one" she says as she hands me a commercially produced Toronto Maple Leafs beanie, knit with yarn so fine it must be thread, and is full needle rib made into a double layer, cut and sew shaping at the top, and a true beanie.

Sure.

Expressive language is really challenging for Megan.  I  wasn't 100% sure what to make!  We found a soft, fine-enough black yarn first up.  "Bebe Luv" by Easy Knit, found at Wal-Mart.  I had bought it to make a Pocket Puppy, but after making a Pocket Kitty with a white version, I was second guessing this choice.  So I welcomed the opportunity to use it up before I could get going on the Puppy.  The yarn says it has a gauge of 22st/4" on 4mm needles.  I'm not too sure about that.

Bad choice.  This yarn, while soft, is a nightmare.  I took it downstairs to work, and when I finally found a bit to pull out, a big huge glob come with it.  I knew better than to try to just work straight from the glob, so I went back upstairs to wind it with my old electric winder.


I'm not sure now if this is from the initial glob, or from later when I ripped the hat out.

Oh lord.  The yarn was tangled, not just a simple blob.  The yarn is very, very soft.  It took a few tries and then I realized I should change the simple gear on my winder to make it wind slower.  The worst thing though was the static!  I know it's winter, and I assume it's dry in here...but this yarn stuck to me like glue.  And to the cupboard.  And it picked up every speck of dust and dog hair.

I spent a long time looking for a simple, shaped, beanie in 1x1 rib for the standard gauge.  I asked on Facebook.  I should have taken this as a clue.  There is no pattern out there because it is a BAD IDEA.  I swatched, I let it rest.  I thought a bit, I let myself rest.  I was going to conquer this.

I should have given up.  A sane person would have.  Problem after problem.  The first attempt at a decrease row and moving all those stitches over made me realize this was a bad idea.  I kept going.  Something went wrong and I had to totally start over.  Got a ways done, had a problem, got it fixed, kept going...and thought, "wasn't I at 32 rows last time I looked?".  Indeed, the tripper for the row counter had somehow been turned and wasnt' tripping the counter.  Ever tried to count rows black ribbing on the standard gauge while it's still on the machine?

I tried dividing the hat into four sections and decreasing each side of the first section, to make a triangle and sew up the seams later.  This probably would have worked, but as I got closer to the first point, there was too much strain between it and the section next to it.  I realize now I should have moved those stitches of the first triangle over, closer to the next section in hold.  Duh.

I ripped that back (fun!  Ripping back decreased stitches in black ribbing on the standard gauge machine).  Somewhere around now I discovered additional lights in our basement, but they were causing a lot of glare off all the metal parts of the machine.  I searched the house and found a headlamp.  That helped a lot.

I went back to the original idea of shaping, but this time I would just decrease a bunch of stitches and move some over.  Random.  This sort of worked, and as I got less stitches, I was able to get more into a pattern.  I had no idea how it would look though.  I was up to the row count I had wanted, but still had stitches left, so I started decreasing every row to flatten out the top.  Eventually I was left with just a few stitches and gathered it up and off the machine.

I dutifully sewed it up, using the headlamp, even during the day.  I thought it looked best with a bit of a folded hem:

But no, Miss Megan insisted on no hem.  But it wasn't a beanie then, I said.  But it was slouchy.  But you wanted a beanie?  No, she wanted a "slouchy beanie".  Whatevs.  She did say it needed a pompom.  I complied, and snuck in a few reflective threads that had been separated when I was making other things with the reflective yarn and trimmed the ends.  I don't think I used enough of them though.

I had read that a trick to making sure a pompom stays together is to use thin cotton, and wet it with hot water so it will shrink when it dries.  I tried this.  As I was tightening the tie, it broke.  Ugh!!!  I was able to slide the ends around so I had enough to knot and feed through the hat.  I don't know how it will last though.  The pompom looked better after steaming, though I see some ends that need re-trimming!
 When I tried to take a picture, the pompom was too side-heavy and the wig head kept falling over.  Not even at this point could this hat give me an easy time!!
In the end, Megan really likes it.  She can stretch it over her hair when she wears it up (she has a LOT of hair!).  The only problems--it still attracts dog hair and dust, and it's impossible to see inside her black skating bag!

I do have a yarn in to report, but I can't find the receipt :)

Yarn In: 0gr
Yarn Out: 73gr 1037gr = 1110gr
Balance:  1110gr more USED than bought
Costs:  $0

Sunday, January 17, 2016

Fixing

In November, 2014, my daughter wanted a new scarf, so we made a fair isle one on the Singer 327.  I steamed it, and blocked it, but the curl never subsided.  I was quite surprised, but I guess, since it was a sock yarn, that would actually have been a good thing.

So, it never got worn past the first day.  I always thought I'd get around to making a backing, somehow, for it.  With all the work in my basement though, the Singer 327 has not been used much, until this fall.  Finally, I decided the day had come. I picked up a ball of Loops & Thread "Woolike" since I was pretty sure there wasn't enough of the Kroy white.  I wasn't sure, while I was in the store, if the white was right.  As it turns out, I should have gotten something a bit softer.  Oh well.

I originally took this picture with the scarf upside down, thinking I'd just flip the picture before posting.  But I couldn't do it.  LOL.  It was just wrong to see 1/2 stitches in one colour


I was hoping to do a "sew as you go" and attach the sides of the scarf to the sides of the backing as I went along.  However, I wanted the new backing to have a knit side out to counteract the curling of the scarf (it curls to the purl side, so if I put two pieces together, one wrong side to one right side, it would still curl).  I couldn't wrap my head around this, as when you're knitting, the purl side is what faces you.  I decided I would just sew it together after.


We started one "swatch" and I decided it was too wide, and Megan lost interest, so I carried on without her.  I used Card 3.  I was hoping the tuck pattern would have less curl.  The knit side has a bit of texture.  I made it an inch longer than I thought I'd need---once I started sewing though it wasn't long enough!


I didn't want to mattress stitch it so I used my machine and a zig zag.  Not the greatest job.  A walking foot would have helped.  And, the knit side still rolled in.  I could have made the backing one repeat wider, or I could block it harder and top stitch, but I was done.  The back is quite bright compared to the pattern, but I don't care.  It's done, I wore it in public, and no one laughed :)

Yarn In: 0gr
Yarn Out: 40gr + 699gr = 739gr
Balance:  739gr more USED than bought
Costs:  $0

Friday, January 08, 2016

Just a Few More

I was struggling with Christmas gift ideas this year.  My budget was really tiny.  So tiny, well, it might as well have been non-existent.  So that means things knitted from the stash.  But what?  People can be picky.  Or, I should clarify.  I needed to make things for teenagers.  Teens can be picky.  Yup.

After making the trial pairs of the fisherman's rib fingerless gloves, I figured they be good little gifts.  If I found some extra money in the budget, I could tuck a bill or gift card into the gloves.
I don't recall which of the two left pairs came first.  The left one is from some old yarn...I'm a little surprised just how old!  For laughs, check out this post about the socks I made, and here's the post from when I bought the yarn.  


While this is certainly NOT the oldest yarn in my stash, I think it marinated long enough.  It is disappointing though to see how those socks looked after a few wearings.  On one hand, natural felting will make them warmer, and I love seeing knitted gifts used, but on the other hand, felting will reduce the natural ability of the rib to stretch, which is a key element of this design.


 The first difference I did was to set it up with the edge stitches on the RB.  I made the gloves slightly bigger to do this, rather than slightly smaller.  This did allow for easier seaming, although, as you can see in the blue pair at the thumb gusset, the resulting column of knit stitches created by taking in 1/2 of each edge stitch, does not match the fishermen's rib.

Issue?  I don't know.  Next time maybe I'll do an even number of stitches and seam it up with a purl column.  Megan did most of the knitting of the blue pair, I just set the machine up, casted on, changed the settings when she called me, and sewed them up.  Child labour is so handy!
 I also elongated the thumb gusset a bit by fiddling with the last couple decreases, so I ended with putting three sts on one needle, instead of 5.  I also started with two extra stitches (by having the edge stitches on the RB) so that automatically made it a bit longer.  As well, I used my two stitch transfer tool for the decreases, rather than moving the edge stitch.  That helped A LOT.  A LOT.  And looks nice too.  I did experiment with the grey pair of trying to increase on the sides of the hand to make the thumb gusset that way, but it made a mess.  I might try again, but keep the thumb in stockinette.  But you'd end up with a seam up the middle of the outside of the thumb.  My next trial will be to do the thumb first, then "seam as you go" although I'll probably get the thumb inside out.  I've never done it with the RB in use.


All these totals are in that year end recap.  I did T6 for all three, 40 rows for the cuff, 48 for the hand.  They feel very cushy, stretchier than the orange/purple, but not too 'thin'. This is surprising, because the blue yarn, and the grey/white (it's really a soft, creamy white) are Kroy 3 ply, which is thinner than the orange/purple Kroy Socks.  So, this pattern is quite forgiving of the tension, but I think that if you're using a Singer, just start with T6.  The orange/purple ones could even been T6*.

Wednesday, January 06, 2016

Hey! It's Winter!

One thing knitters struggle with is being prepared for the changing seasons.  We have good intentions:  "I'm going to knit my new winter set in July!  Yay me!".  But we all know how it turns out.  The temperatures suddenly plummet and our numb fingers remind us that our July was spent knitting dishcloths.

We've had a really warm December, here in Southern Ontario.  Really warm.  Like, we just need a sweater outside.  Until Sunday, Jan 3, 2016.  Hello, new year!

I thought knitting the fingerless gloves was maybe going to keep the mercury on the plus side.  They seemed like great gifts when it was 5C/41F out there.  Now, it's more like -15C/5F and fingerless gloves seem like a joke.  The nice thing about them though, is they can be layered over thin gloves!

Someone, somewhere, posted about Diana Sullivan's Fingerless Gloves video again.  Again, they were something I had wanted to knit since the video was released.  I decided this was the year.  Well, technically, last year was the year, but does a flip of a number really matter?  And hey, I have "lots" of Kroy Sock yarn!

 I actually had some real Kroy "Socks", not the old 3ply and 4ply Kroy, so I thought I'd start with it, and follow the video exactly.  You know how hard that is for me, right?

First big issue came with changing from 1x1 rib to Fisherman's Rib.  Diana has a Brother, so I looked in my Singer manual, and it does the FR on the mainbed.  I googled, and I went through all my Knitwords magazines cause I knew there were FR patterns.  I found an article where MAO says yes, this is how the manuals tell you to set it up, but it can be done in reverse.  I don't know how though, there appears to be no way to tuck with the Singer ribber bed carriage.  So, I just followed the manual.  This meant that my end needles, carefully set up to be on the MB like Diana said to do, were now tucking (instead of knitting, like in her video).

I finished the first one, and took it off the machine.  I know rib is stretchy, but this was small!  What went wrong?  I made sure to change tension where needed.  I double checked the needle count.  I consulted with my MK mentor. I wasn't happy with the feel of the knitting either.  It was too crispy.  Some of that is because it was unwashed, but there was just something the yarn was trying to tell me.  I concluded that I had mysteriously done something wrong and should try again.

And got the same result.

Now, I know the definition of an idiot is someone who repeatedly does the same thing, expecting to get a different result.  Time to change it up.

I upped the tension to T6.  I shortened the cuff to 35 rows as it had seemed a little long even in the smaller version and I felt the larger tension would allow a bit of length anyway.   I set it up with the same needle set up--end needles on mainbed.  I did 40 rows of FB, hoping the larger gauge would mean they'd have longer hands.  I did the thumbs as written.

As with just about everything I make with self striping yarns, the second one ended up being too close too the first...but not close enough to make them identical.  I'd rather have had them be wildly different (but obviously the same yarn), then "almost close".

Sewing up was not as easy as Diana said they'd be.  I think because the end stitches were tucked.

They are still on the smaller side--but very stretchy.  This yarn really preferred T6.  I probably could have gone up a dot (or two even).  And people think I'm weird when I say yarn talks.

These gloves weighed 46gr, which I included in the previous post with all the totals.  There is a tiny bit of yarn left.  I would much prefer to have NO yarn left, and make these a smidge bigger.  However, technically I don't have "no" yarn left, since there's a couple more balls in the cubbies :)

Tuesday, October 06, 2015

Red!

After fine tuning Bill King's "Gold Star" pattern to suit my liking (click on the label over on the right sidebar to see them), I found out about another one of his designs, called "One Piece Waterfall", in Machine Knitting Monthly, Nov 2012.  I picked up the issue, and a while ago, gave it a test run, using a slubby red cotton.  I don't think I blogged anything about it, although I remember it giving me some headaches and I think I re-started a couple times.  Even looking at the end result, I could see quite a few missed stitches around the eyelets.  Once I had it done, I was not so enthused.  I had planned to extend the arms, so when I got to the cast off/on for the sleeves, I used waste yarn.  But I hadn't cast off/cast on again, so once the sweater was off the machine, the armholes were actually closed up and I couldn't try it on.  Putting it over my shoulders...

It came down to my knees.  It was heavy!  There was red fuzz EVERYWHERE on my machine.  Other projects became more important and I put this jacket on the shelf--where I could still see it, hoping to re-examine it later.

Later finally came this month, when my mom decided she wanted a family photo shoot and red would be one of the colours.  Knowing it could be quite cool, I figured now was as good of time as any!  I cut through the armhole waste yarn to make armholes...

 Yikes!  Look how long it is!!  It hadn't been washed, but I doubted it would shrink enough to make it reasonable on me.
 I liked the back though!
 Subtle angles, compared to the Gold Star!
 The front "waterfall" pieces were just so long!!
Here you can see the dropped stitches at the holes made when doing the short rows.

Of course, I didn't remember if I had taken any notes.  Like, tension?  Pbssst!  Just cast on and see if you can knit the first row!  Eventually I went from T7 at the cast on to T9.  I checked around on Ravelry, and found that making the waterfall panels with only two rows for each set of short rows, would shorten the front.  That sort of works, as the number of stitches is what gives the actual length, but the number of rows is what gave it the width, which when worn, droops to become part of the length factor.  If I do this again, I think I might stick with the two rows for the top 2/3, but then switch to the 4 row for the bottom third.  But I couldn't yet figure out which end of the piece was the neck and which was the bottom LOL.  I think the neck edge was the left side of the bed.

It started out really smoothly this time.  Until I didn't read the instructions for the back wedge properly.  I got to the mid-point and when reading the next bit realized I had done the last bit wrong!  That was a LOT of short rowing to rip out (I had put only one group of needles into work for each two rows!).  And then the gremlins started to appear.  My yarn was now really tangled, even though I had tried to be gentle.  Had to cut the yarn.  Had a thin spot in the yarn.  Dropped stitches.  I really started to fear I wouldn't get it done!
 This has been washed, but you can see there is much less volume now at the front!

I got the body off, and went to do the sleeves.  I couldn't get the piece to stretch to put the entire sleeve onto the mainbed, so I did each sleeve in two halves.   Of course, re-hanging the second side of the sleeve meant you're dealing with upside down stitches and they don't line up exactly.  The texture of the yarn hide it though.  I don't know how it would look in a smooth yarn.  And then I realized I could probably have done it in the round (or U shaped) if I had used the ribber bed too (although that wouldn't change the one side of the sleeve being picked up from the half-stitches instead of full stitches...hard to explain, but if you've ever picked up knitting from the bottom/cast on to knit downwards, you'd know).
 I like how there is a sort of panel that runs across the bottom.
 The sleeve eyelets formed by doing six rows (as per the instructions).  The eyelets end where the armhole is supposed to be cast off/on; where I picked up to knit a longer sleeve.  I was worried about that, but it looks fine.
 I decreased every tenth row on the bottom seam of the sleeves, but not the top seam, and did 60 rows.
I would have liked it to go more over my chest, so maybe the four rows for each group should be the top section.  I would have to look closer.  This is such a better length!
It actually looks a bit longer in the back than the original.  Partially because the original was still really rolled up as it hadn't been washed or blocked.

The unwashed piece left over from the original has a gauge of 29sts and 37 rows, measured in the 3x1 mock rib.  The empty needle spaces are more distinct, and this gauge does mean that my jacket was larger than Bill King intended.  The pattern gauge was 31st x 40 rows, so not a huge difference, but it could be enough to really change it.  The washed, finished garment has a gauge of 26st x 37 rows.  That would indicate that the finished garment should be bigger than the original unwashed garment, but what it seems is that the stitches bloomed and filled into the spaces left by the needles out of work.  This also explains why the back length is a bit longer than before, as that section has it's length determined by the stitch gauge.

Although this was not a "one day knit" as the pattern claims (maybe it could be, if you drink enough coffee and don't have to work and raise a family), I will certainly knit it again.  I like that it has much more shape and interest than the Gold Star jacket, and there is no seaming up of the two halves.  I really need a black cardigan.  Black.  Ugh.  Well, at least there's no transferring stitches and no seaming :)

Yarn In: 3825gr
Yarn Out:  448gr + 5015gr  = 5463gr
Balance:  1638gr more used UP than brought in
Costs:  $187.95 /279 days = $0.67/day