Wednesday, August 03, 2011

Itty Bitty

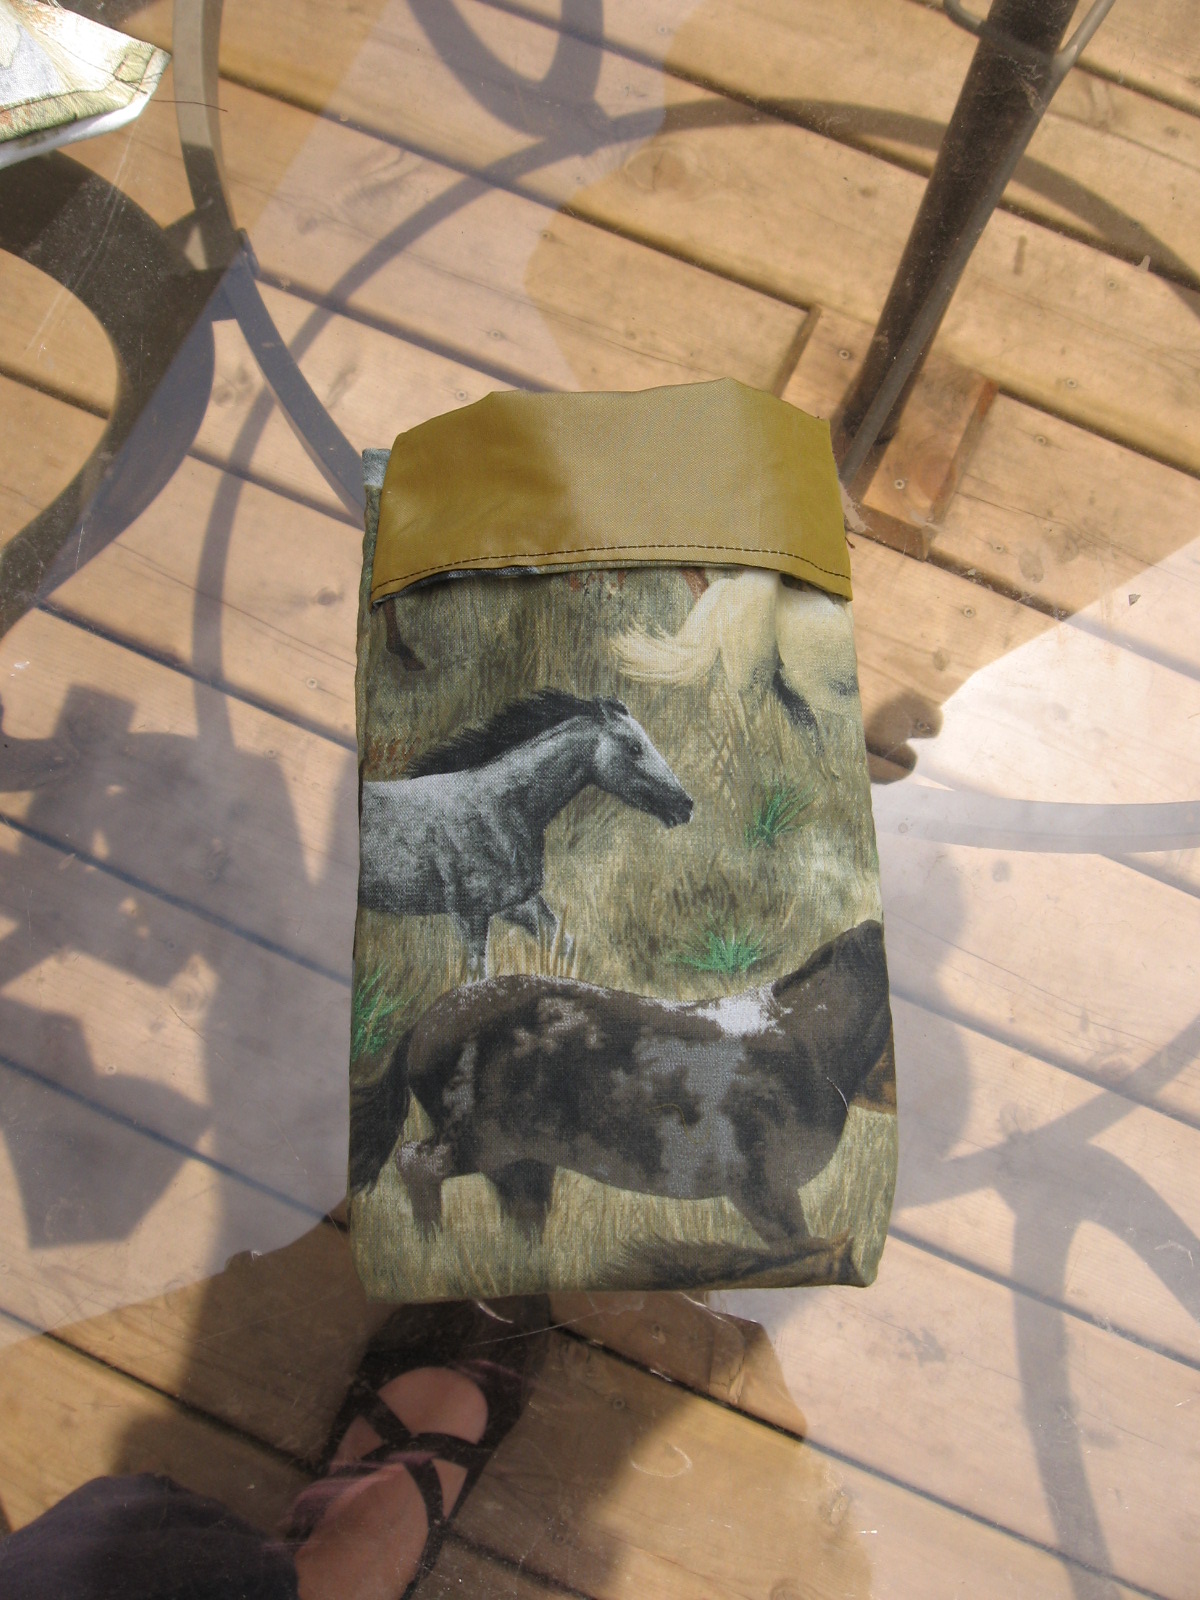
Almost forgot to show this project from late spring!  Lucy got a new camera for Christmas and had been keeping it in a sock.  I kept saying I'd make a case, but after some not-so-wonderful experiences trying to make a cell phone case for Meg, I put it on hold for a little bit longer.  Finally, I decided a zippered bag would work fine enough and got to work.  There's lots of tutorials for lined, zippered bags/pouches out there.  It's not a terribly difficult project, although I found it hard to figure out some steps due to the fabric choices/photos of the tutorial I used.
 A few years ago, Rob's brother, who works in the film industry making/supplies props, brought me a BIG bag of remnants, mostly upholstery weight fabrics.  That's the outside fabric, the inside fabric is satin from a Christmas mei tai that taught me slippery fabric does NOT work for straps!
I'm not sure why the top corners are angled in.  It's okay, but I'd like to know what I did wrong.
The zipper is a little bright for the fabric; I didn't have it with me when picking the zipper out and totally forgot that brown would have been a nice choice too.
I do have plans to make more of these, but there's lots of things out there I want to make!  I do have materials to make one for my band "stuff"  (oil spray, tuner, mouth piece, pencil...).

Monday, August 01, 2011

Answers!

I just got a comment on the last post about the hat and mitts in my profile picture.
I just did a quick scroll through the posts under "LK150" and "Machine Knitting" and it's not there---I might have posted it before I learned about Labels.  However, it's a self-made pattern using the tuck stitch design that's in the LK150 manual.  The mitts are based upon several mitt designs out there; that was in my early days of figuring out what I like in a machine knitted mitt.
I recently washed all my winter stuff, and had trouble getting the rinse water suds free.  So there were many (hot-ish) rinse cycles...and this hat felted!  Didn't shrink too much, but it's felted alright.  Oh well, I don't wear it much.

A very similar pattern can be found in another post  and there's a link to Ray's site, the designer.  I haven't checked recently to see if he's selling the pattern or not.  For my hat, I just made one wide rectangle to go around my head, ribbed for the band, then tucked till I got it high enough, and casted off.  Fold in half and stitch the top closed (graft) and sew the side seam.  Add some tassels...
Such an easy pattern since you don't need to work decreases into a stitch pattern, or transfer stitches. 

Sorry I'm not much more help!

Friday, July 29, 2011

Something Knitted

Apparently, on March 28, I started a pair of "Stricken" socks, by Cookie A.  I needed a small portable project for working on while the kids had their various extracurricular activities.  Parts of the pattern are easy, esp. once you get into the pattern, but then other portions are not so mindless.  There were numerous little issues with these, but mostly due to not paying attention.  I did find it annoying that the instructions for the different symbols were not on the same page as the chart/symbol key.  So I'd have to flip the pages, then find my place back in the chart...and several of the moves are very similar, but some have a twist and some don't, etc.  (I was doing two at a time on magic loop).
I was using a boo-boo bin yarn from Sweet Sheep that I got from the last time I went to the Kitchener-Waterloo Knitter's Fair (2008!).  The yardage on the tag said 360yd, I think.  But I was having some doubts as I got near the heels.  I don't know if it was the cables or what, but it became clear I wasn't getting full socks from this ball.  I thought some sandal socks would be fine, but indeed, they were still too short!
I am having a REALLY hard time getting the pictures to move where I want them.  This "What you see is what you get" format is crap....and once it's posted, it never looks like it does in this window anyway...right down to a different font!


 I thought maybe gloves/fingerless mitts might be an option, and from the front, they looked great. However, even taking out the heel, the leg is still too wide around my wrist. I loved how the leg pattern was brought down into the heel flap (although I did NOT love the change from working in the round to working back and forth and doing those cross overs!!!!!!!!!!).
I have no idea how this post is going to look.  LOL.  Sort of how I feel about these socks.....rip?  All the way, or back to mid-calve and try to pick the pattern back up and work decreases to fit, and then try to figure  thumb gusset increases into the pattern?  I have pink tipless gloves already; although I really felt diva-ish with elbow length "gloves" on, and could see that they would be nice on those days I'm wearing a t-shirt in the house and need arm warmth when I go out but don't want to wear a full sweater under my coat. 
Ideas?

Thursday, July 21, 2011

Not a Funeral Dress

Last July, when we received word my aunt was dieing, I set out to make a dress for the funeral, as I had no sad, summer clothes.  I had a lightweight black woven, with a beige floral embroidery.  It had been bought as remnant pieces, so I had to have a pattern I could work with, and chose Simplicity 5189 (which I posted a few posts back, in a different version).  This was before I knew about needing a FBA.  I made the dress based on my measurements.  And hated it.   It was baggy in the shoulders, my arms couldn't move, it was too long, baggy in the back....I took one picture, which didn't even turn out good (blurry, and my hair was in a towel).  I put it in the closet thinking "someday....".  In August, I learned about FBA, but didn't know how to alter the princess seams of an already made dress...especially the shoulder/sleeve relationship.

In June, I decided enough was enough, and I really wanted a dress with sleeves.  I thought it might be faster to alter it than to start new.  Not too sure about that, LOL.
 I knew I needed to cut the shoulders narrower, and have a little less length in the upper chest.  I played around, but was worried about how the princess seam would fit into the armhole, and if the sleeve would end up fitting right, with a higher, smaller armhole (it seems weird that the solution for a constricting armhole is to actually make it higher/shorter).  This picture above makes my left shoulder (with the sleeve) look very sloping!  So I cut it back even more!
Better, but I still felt the sleeve was somehow too low...do I need shoulder pads in EVERYTHING?
I snugged up all the seams from the shoulder to the hips.  I wanted to keep the skirt fullness, but this resulted in a weird , giant pleat...the side front pieces folded inwards and the front center piece came to the front....

Edit to add:  I also shortened the sleeves.  I realized that while I don't like little cap sleeves or little flutter sleeves, I don't really like sleeves that go down my arms past my bust line (unless in a pattern, or slim fitting like a t-shirt).  I feel like  I look a lot wider than I am in the first picture above, because my arms blend into my bust.

I hated the neck facings.  I couldn't get a 100% cotton in black, so had to get a poly-blend, I hated the edging of it, nothing was nice.  Since I had just made my own bias tape for the other version, I went back to the store and got a bigger bias tape maker (it's for 1" tape, but the instructions say to cut strips 1" wide...the same as for the 1/2" maker!).  Doing it around just the neck was certainly easier than having to do the armholes too!

Once I lowered the neckline, I became perplexed with how the upper chest was laying.  I thought the bodice had too much length as I could pinch out horizontal darts.  But I knew horizontal darts were not the answer.  I could rotate them and make pleats along the neckline, but thought it looked a little slapdash.  I had hoped the bias binding would help, but it didn't.
(I also hacked off a lot of length!).  The neckline is held down by double-sided costume tape.  Which doesn't please me either.  I was just looking at the picture, thinking I could make it into a bit of a cowl neck...but how?  It doesn't need anything around the back neck, just something along the front neck.  What do I do to avoid this next time?  How do I make the upper bodice narrower but get the armholes in the right place compared to the shoulder?  And does this have something to do with how when I tried the FBA, the armhole ended up being a really weird shape?  Argh.  Just when I think I'm "getting it", something throws a wrench into it. 

I did just pick up two plain dress patterns from Value Village...a sheath dress and a simple dress with more of a full skirt.  I think I'll be able to do a basic FBA on them and get a good, dependable pattern.  Of course, neither has sleeves!

Wednesday, July 06, 2011

Bathing Beauty

Back in early May, I decided to copy my bathing suit that was falling apart.  I figured, it had only a couple pieces, how hard could it be?  I found on line tutorials, blogs by people who sewed bathing suits, and got some supplies/material.  I dissected my suit (uh, there were more than "a few" pieces) and promptly got stage fright.

A little while later, I was at Value Village and took a look at the sewing patterns.  And wouldn't you know, there's Simplicity 8553, from 1978, in Meg's size!  I thought that might be a good way to get going.  We picked out the fabric together and then I had a panic attack at home when I realized the fabric didn't stretch as much as the guide on the pattern.  And the pattern called for 2 way stretch fabric, but isn't swimsuit fabric 4 way stretch?  Added to that, Meg was one size in the chest, and a much bigger size in the waist.  Bigger than any of the sizes on the pattern!  And then, there was the issue of the length.  Just how much should it stretch to be the right length?  She's only 5, and is tall, 

I DELETED PICTURES AFTER AN EXTREMELY UNSETTLING COMMENT


but probably not as tall as the size 8/10 that I was using.
 I carefully followed all the steps, in the order given (although I didn't really pay attention to the lay out of the pieces, so I've ended up with a LOT of the bright pink left; it called for .8m but since I laid it out differently, I used maybe .4m).  If I was doing it again, I would change when I did the button holes for the ties to come through to after sewing the side seams and putting on the binding, to ensure it lines up better.  Or, make it like my suit and have the ties come through the binding.

 There is no elastic used in the pattern.  I thought that was great for a young girl who often complains of things too tight.  However, her hips are not as big as the pattern, so I added a small amount of elastic in the binding at the outer thighs.

I have only two complaints...it seems a bit long, esp. the back.  The upper back is I think too tight, and it rolls downward, hiding the binding....and then it gets all droopy bum.  The neck tie at the front is stitched on the inside where the binding joins the suit, and that means the top edge of the binding rolls forward.  And the front droops too, I think pulled down at the sides by the back rolling down.

She loves it though and we've already bought fabric for another suit.  Or two.  However, there really wasn't a single skill I learned while making this suit that I then used to make my own suit.  LOL.

Tuesday, June 21, 2011

Name That Tune....

Back when I was a kid, I watched "Name That Tune" game show quite a bit (I don't remember that part of the show, mainly the "I can name that tune in 5 notes" bit.  But there are other links there too....).  I love listening to music, all sorts, and  had a good aural memory...until I had kids, LOL.

Today's blog post is a sewing version.  LOL.  I was at my parents' on the weekend, and was hoping they had some specialty presser feet I could borrow.  We found this little case in the cabinet.  It has a silver gizmo on the left side, and the center indent is empty.  It says Sears Kenmore on the clear lid.

 It doesn't have the usual notch on the side to screw it on, nor is it possible to snap it on (this is, assuming it is a presser foot!).
 It's shaped like a pie server, although the back is higher, and one side curves up.
 There is a hole in the top of the shaft, and a tiny screw on one side.
Any suggestions?  I'm totally baffled.  I've googled Kenmore presser feet, and it doesn't show up.  I've googled specialty parts, accessories, etc.  This makes me even more fascinated and determined to figure it out!

Wednesday, June 15, 2011

Finished!

So, I finally finished my "muslin" of Simplicity 5189.  I made my first version last summer when I had to go to a funeral, but it turned out too big...even though I had made the right sized based on chest measurements.  It wasn't until the next month when I was trying to make a sundress did I learn about a "full bust adjustment" and why my sewing attempts were failing (patterns are based on an average frame, with a B cup bust, so because I was a D cup, to get it to fit my bust, the rest of the body was too big).  I never showed a picture of it, as the only picture was blurry, over exposed, and my hair was in a towel, LOL.

I decided to give it another try, since I had found a tutorial on how to do a FBA on princess seams.  Well, as I posted a little while ago, it wasn't as easy as the tutorial showed.  I started by taking an inch out of the upper bodice, but I still ended up taking another inch out!  The bust curves were too sharp, there was too much material in the center panel over the upper chest.  I took the sides in quite a bit too. 
 The weather turned warm finally, so I ditched the plan to add the sleeves...I figured with the adjustments I was making, the sleeves would never fit right.

I had to get Rob to mark the bottom to hem it, as all the panels ended up a different length. 
I decided I'd try making my own bias binding.  Well, that was....fun.  This is a light, gauzy, woven material that I don't think is 100% cotton going by the sound the fabric made when I pressed too much with a hot iron.  I had issues making the tape...the rotary cutter made the edges open up, not fray exactly, but splay.  When I seamed the first piece, it didn't line up right so I had to figure out that it's the sewing line you have to match up.  The folded tape is really narrow...my gadget was for 1/2" tape, so it was really fiddly to sew it on.  I wasn't happy with the first sewing on job, and I noticed I needed to shorten the upper bodice more on one side, so I took the trim off the arms (hadn't done the neck), and re-did it, much better.  I had to cut a new neckline.  Trimming it went better than the armholes.  There still seems to be too much width in the upper chest, but I don't know how to fix that.

Oops, the continuous mode on self-timer didn't give me enough time to "suck it in" LOL.
It is a nice, light dress, even with a slip on it was still comfy.  I do have to watch what bra I wear, some show under the arms.

Edit to add:  I forgot to mention that I sewed a little strip of elastic across the back waist, to pull it in a little but still let me get it over my head without a zipper.  It's a nice little touch that I might do on other items; I like it better than sewing long ties into the side seams (too maternity dress-ish).

I had planned to use this as a muslin, but I made so many adjustments, I don't think I could transpose those changes onto the paper pattern, and now that it's summer, the fabric I was planning on isn't appropriate.  Next time, if there is, I will try using smaller shoulders as the adjustment...

Friday, June 10, 2011

Little Gifts

My to-do list is not getting shorter!  These items were on my longer to-do list, planning to do them later in the summer.  They're for my "grandma" as a thank you for letting the kids ride her horse briefly last summer.  I figured I'd make them before we go out there again.  Well, she's dropping by this afternoon to give Hugh his birthday gift, so I got to it!

This is another neck cooler.  After our afternoon there last summer, I looked around for some horsey fabric, but couldn't find any (not even through Freecycle).  A month or so later I found some nice quality horse print at Value Village!  It's a bit larger print than I would have liked, but oh well.  I wanted it a little wider in the tails, and my fabric was about 5" longer than I normally use, but that's okay.  I kept the length for the crystals the same, and centered the width that I normally use and sewed a tunnel (I normally cut it 4" wide, this time it was ...uh...there's just shy of 3/8" on each side...so that's 3/4" wider times 2, so it's a total of 5 1/2" wide?).
Next, I wanted to make a snack bag.  I wanted to use PUL to line it, but worry about the food-safeness of it (some sites say it's NOT food safe, some say it's not TESTED one way or the other), so I got some gold taffeta like fabric.  I sewed the three pieces together, turned right side out, tucked the open ends in and topstitched closed.  I wish I had pressed the seams first.  Then I followed the directions here.

However, the tutorial doesn't mention anything about using one way prints!  LOL!  The seams inside were a little bulky, but at least it's not the raw edges like if I had just held the pieces together.  But if there's a better way to make it double sided, let me know!

This (above) shows the backside, which is rightside up (it's one long piece) and the gold taffeta flap open.
I decided to make another one, without the lining, but this time I cut the front piece separate, and stitched it at the bottom to the back.  Then, as I was sewing the sides, I realized I could have just stitched a U shape around the three sides.
I folded the inside edge over and stitched it down, but for the flap, I fringed it a little and left it for that rustic look.
I've got lots more fabric pulled out to make more!

Thursday, June 09, 2011

My Wish Came True!

I've had opportunities this week to visit Value Village, Bibles for Missions, and Salvation Army thrift shops this week.  On Monday, it was VV.  I didn't find any fabric, or patterns, or anything to refashion, but I did get a Cleo sheath dress in a hot pink bamboo print.  It's not a Cleo Petites, but I think Cleo is geared to an older crowd, so it still fit.  I wore it that evening for Hugh's birthday party, and it was great; I wish I had gotten a picture.  Not a style I would normally try; it had princess seaming in the bust, but then a high waist seam, and was 98% cotton/2% spandex, a nice, solid fabric and well built too.
On Tuesday, Meg was upset that Lucy had gotten a purse at VV, and I had just seen a neat re-fashion of a men's polo shirt, so her and I headed off to Bibles for Missions thrift shop.  It's more like the Salvation Army, but I couldn't find a single men's polo shirt that was big enough!  I did get some "fabric".  The first item, I thought it was a sheet, in a crisp cotton, but it turned out to be a 20ft long valance!
 I like the print though.  I think I can piece together a dress, although it will be on the shorter side.   I also got a twin sheet, 100% cotton, with a nice pinks floral pattern...not the 70s floral, but a modern graphic print.  The only issue is that the side pieces of the fitted sheet are seamed on, not just notched at the corners, so this limits the usable amount.  Might end up being used for a child's dress or top.

While at this shop, I did find this plus size Maxi dress!  It's a crinkle cotton gauze, and definitely too big AND too long--you can't see it, but it pools on the ground a little!
 The extra neat thing is that it's got a wrap skirt!  So there's a LOT of fabric to work with.  The back waist seam is angled though, I guess that's to go over an ample booty.  And there is a center back seam, but that's okay, they don't show much and I'll just work with it.
 I'm thinking of sizing it down, taking off the wrap, and keeping it sheath like.  Shortening the straps to fit me will mean the waist seam will move up, creating more of an empire waist.  It'd also be neat to have a real waist seam, and a gathered skirt.  Could I use the overlay to make a new bodice, and have the resulting skirt be gathered enough?  I wonder if there is enough length to cut it short and either use that extra for the bodice and then the remaining skirts gets gathered, or maybe make a midriff band like the very first dress I made...
 There's no size tag, but it's a little too big, LOL.

Last night Lucy and I went to the Salvation Army, to search for a plus size polo shirt, and found a few things.  This dress is a little too big, mainly in the upper bodice...to get my bust to fit in the proper location, I have to pull the shoulders up quite a bit.  So, I'll shorten that, maybe keep the sleeves, and shorten it.
 The lower seams are split, so I'll lose that, and I'll lose a lot of volume, but since it's princess seamed, how can I keep that volume?  Make a waist seam anyway? 
 However, the back has a bit of detail that I want to keep.....suggestions?

At the Bibles for Missions shop I did find one polo shirt that I got, but it wasn't terribly big on me.  I had some ideas of what to do with it, but it would be fairly involved for a refashion.  So I had Rob try it on, and of course, it fit him fine.
I did find one at Salvation Army that I thought I could play with.  I don't like it as much as the one I lost to Rob, but it'll still work.
 Seems a little shorter than I thought though, I'll have to remember not to raise my arms!

I also found this Liz Claiborne knit sheath dress.  It is a heavy weight knit, so perhaps not a summer dress, but I was thinking maybe a nightgown.  I'll need to stitch down the button placket though, the edge of it is flipping upwards.  Again, the upper bodice needs some shortening.  The dress is a little snugger than I'd like, but man, it did make my booty look lovely!
I'm looking forward to doing some refashioning over the summer, I'm stocking up now since it's a little harder to shop with the kids over the summer.  One idea I want to explore is some shirring....I'm seeing it a lot on strapless maxi dresses right now.  These dresses are so long that I could probably cut enough off the bottom to make a bra-friendly bodice and move the shirring down to my midriff.  But do I want it there?  I do have one dress, in a heavy cotton knit, with a shirred bust, but it also has shoulder straps; most of the ones I've seen in the cheap store are a light woven cotton.  Yeah or nay?

Tuesday, June 07, 2011

Grooooowwwwwwwwwlllllll

Is anyone else having trouble posting on Blogger blogs?  Or is it just me?  I write my comment, click "Google Account" and it sends me to the Google sign in page, I do, then it sends me back to the comment page, but as "Anonymous" and when I try to post it goes back to Google Accounts sign in page...repeat....
If you're having trouble commenting on here, please email me at tracykm at yahoo dot com.

A few weeks ago I had plans to go to Value Village after a doctor's appointment as they're close by.  Then I saw that it was 50% off day....I went before on a 50% off day and it was nuts.  But I decided to try again as I had just seen some fabric there that I had passed over but I couldn't stop thinking about.  It was gone though :(  I did find some jersey sheets that I thought I could use to make summer dresses, muslins, and/or a baby wrap sling for Lucy's teacher.  I didn't find much else that I thought would work for me as is, or to refashion.  I did grab one dress that caught my eye.


I didn't get a before picture, but it was long!  I didn't think the bodice would fit me (it was a size Large), but thought the skirt was long enough that I could take the bodice off and get a short dress just from the skirt.  I tried it on at home, and surprise, it DID fit!  So then I thought I'd take off the woven strips on the bodice, and use them to make wider shoulder straps, although I don't seem to need a bra.  However, when I held them out of the way, the bodice was really boring looking.
I needed to shorten the dress by about 7 1/2".  I know "maxi" dresses are still in (I can't wait for them to be "out" so they'll appear in the thrift shops!), but it's a summer dress, and I like my legs!  I marked the new length, but saw that the skirt was several inches wider at the bottom.  I debated how I could shorten it from the top of the skirt....there's a band on the front, but no "waist" seam on the back.  I thought I could cut the back and make it seamed, but worried I'd mess up the seam allowances or something.  In the end, I do wish I had tried, so I could preserve the swishiness of the skirt.  But it's still okay!
I took the 7 1/2"  off the bottom and slip it in half, and hemmed the half from the top.  I tried a twin needle to see if it'd match the original.  The needle wasn't a stretch needle so it didn't work.  I gathered the long strip, pinned it on, sewed it down, and presto!  A great, new summer dress!  The ruffle sweetens up the sultry animal print, and a black stole gives a little coverage.  Perfect for a day trip to Toronto, or for date night!

Thursday, June 02, 2011

More On Illusions

How nice to get comments again!  :)  I know people are reading, but it's just nice to get feedback.

Z suggested re-working the maple leaf chart.  I could probably manage to make it symmetrical, but to be honest, I still can't really figure out how it all works!  LOL. 

Carla mentioned she wants to try doing illusion knitting on the USM (Bond machine).  The ever-wonderful Heidi has instructions on her website.  I haven't really read it, to be honest.  But while I was knitting the dishcloth, I'd do the knit side row and think "This wouldn't be too bad on the machine" and then I'd do the wrong side row...and think about converting all those stitches...The dishcloth took me one day (mmm...maybe actually two) to knit by hand.  Not a big time investment, and I don't think the machine would be faster for something that small.  Now, for a scarf or wall hanging....I'd think about it some more.  There are some pretty cool illusion designs out there!

As it stands today, I think I'll give the dishcloth to my inlaws' guest and explain it's the prototype, LOL.  I will look at the chart some more and see if I can alter it to make a better one for my sister in law, who is the type of person who always wants the best....if not....then I'll whip up a bunch of Marg Coe's circular dishcloths, and I can use the two day drive to graft them all and sew in ends, LOL!

Tuesday, May 31, 2011

Update to List

true up pattern and make swimsuit
finishing sewing muslin
-perfect fit
sew green dress based on muslin above
copy pink/black/white knit dress and sew copy
make at least one other knit dress, preferably two
make woven dress
make tops
make shrug (black?)
make cardigan with penguin for Nya
make Indianapolis Super Bowl scarf

Update:   Forgot to put Lucy's camera case and hem animal print dress on the list.
I'm almost done the muslin.  I've decided to not make the green dress at this time...I think the fabric would be too heavy for summer, and I feel a little frumpy in the princess seamed muslin.  Although the vertical seaming is supposed to add height, what I see is a big blob, LOL.  With no horizontal definition, you can't tell that I have (a bit of) a waist.  Sure, it's loose and flowy, and probably nice for summer (but so sheer it needs a full slip), but I'd rather have the horizontal seam of an empire waist dress.  I've also been experimenting with tucking in my shirts.  OMG.  It's been like, 15 years since I've tucked in a shirt!
Right now, I'm hemming the animal print sundress.  Cause summer came!

Monday, May 30, 2011

Eh?

Back in September 1995, I somehow convinced Rob to go on a road trip to the States.  We'd been dating only a few months, but had gone on weekend camping trips, so, hey, what's a 10 day trip to another country?  LOL.  I had hoped to get to Tennessee, but we made it only as far south as Kentucky, which we loved.  We spent a few days at Mammoth Caves National Park; it was just after Labour Day and a great time to visit.  One day we were looking at a large info board and struck up a conversation with another tourist.  At one point, he stopped, and asked "So, what part of Canada are you from?".  I laughed, Rob was confused.  The "eh?s" gave him away.
Right now, Rob's parents have a house guest from England.  She's come every year since 2006, and stays for a month.  I thought it might be nice to send a little bit of Canada back with her.

We're going to Indianapolis this summer to spend a week with Rob's sister.  I thought it might be nice to bring her a little bit of Canada too.
I've never done illusion knitting, but when I saw this maple leaf chart posted on Ravelry, I thought that would be a cool way to try.  Finding a bright red dishcloth cotton was harder than knitting it!  The stores around here had only a faded red.
I'm not 100% pleased with it :(  The chart is not symmetrical, and I don't know if that was intentional.  It's a little harder to see the leaf than I thought it would be, which is sort of cool though.
I don't know if I should try to alter the chart or just leave it as is.  Your thoughts?

Sunday, May 29, 2011

Cutie Pie!

A while ago, I found through another blog (Angry Chicken?), a link to a EDIT:  tutorial on making sock monkeys using dollar store novelty socks.  I knew I had to do that, esp. since two of my niece's like sock monkeys.  I bought a pair of Valentine Socks, but one of the girls wore them and got them dirty before I got around to sewing.  So I went off to Dollarama to get more socks.  Poor selection!  And, the two socks were not quite the same size!
 It was fairly easy to follow the tutorial, although I changed the ears a little.  I also used the purple heel that came from the second pair of socks in the set...I thought the black wasn't contrasty enough.  The buttons are from my stash.  Slim pickings for those!
 I sent this off to Nya, Rob's sister's daughter, for her birthday.  I also made her a neck cooler, like the ones I made last summer.  I had to piece the fabric a bit, the center, with the beads, is two layers, I thought the fabric was a little thin.  It's left over from a girls' dress last summer.
I also included some Canada temporary tattoos, and a Canadian 5 dollar bill (she's American, and turning 5), all jammed into a decorative box from Dollarama, and cushioned with all the metallic foil strips that fell out of the pom poms I bought for Meg from Dollarama.
This wasn't on the list I just made since I actually did this last weekend.  Today, I sewed a little camera bag for Lucy, which I had forgotten to put on that list.  So, there's nothing to cross off yet!

Friday, May 27, 2011

Plans

I've got so many plans/projects  going on that I think I need to make a concrete list, make it public, LOL.
In 6 weeks we head out to Indianapolis to spend a week or so with Rob's sister and her family.  Many of the things I really want/need to get done by then!

true up pattern and make swimsuit
finishing sewing muslin
    -perfect fit
sew green dress based on muslin above
copy pink/black/white knit dress and sew copy
make at least one other knit dress, preferably two
make woven dress
make tops
make shrug (black?)
make cardigan with penguin for Nya
make Indianapolis Super Bowl scarf

Is that it?  Oh my.  Since it seems to take me at least two weeks to sew a dress....yikes.  I'm hoping once I get the muslin done, the actually dress will be quick.  And since I'm copying my knit dress (and enlarging), hopefully that goes quick.  The shrug should be fast as I'll do it on the machine, same with the cardigan, although I don't know what pattern/knit radar I'll be using.
This weekend is busy.  Next weekend is busy.  Busy weeks.  So, I might not blog a whole lot for now :)

Thursday, May 19, 2011

Why Is It So Hard?!

First off, some proof I do still hand knit!  Lucy took this picture on Tuesday night during Meg's skating.  If you read my other blog, you'll have read how I got really distracted during Meg's swimming class and I didn't get much knit then, LOL.
Next up, more sewing.  I want some dresses with sleeves.  I don't have many patterns,  I bought a pattern at Value Village for a dress or top with or without sleeves.  I decided to try tissue fitting, but I decided while doing that that the pattern didn't have enough shape for me to make a dress.   
There was one dress I made last summer and never showed you.  I made it before I learned about "full bust adjustment", so I had made it for my chest size.  Well, it fit like a sack everywhere else.  The only picture I took was blurry, dark, and my hair was in a towel.  So you never got to see it, LOL.  I decided I would give it another try, since I found a couple blogs with awesome instructions on how to do a FBA on a princess seam pattern.  It'd be no sweat, right?

Why are things always so hard for me?

I started out by folding out an inch above the armhole and an inch just above the waist.  This made the waist a little high, but that's okay.   I then  followed the steps and tried to move the pieces apart the two inches I needed.  Things went REALLY wonky (look at that armhole, so I backed off to 1 1/2" (it's not a closely fitting dress).  I finished up the steps, which was not as easy as the tutorial made it seam.  The bust point is not marked on my pattern, and it seemed to be in the middle front piece while the tutorial showed it being in the side front piece.  The tutorial didn't show the notches, so I wasn't sure where to put all the slashes.  The amount I had to lengthen the middle section seemed humongous compared to the tutorial, and that threw off the pattern line. 

Today, I decided to retrace the side seams.  I had graded from an 18 to a 22, partly cause I want some swishiness, and because I was worried since I needed the 18 for the shoulders but the 18 waist (body measurement) is way too small.  I realized last night that the extra 3" I added in the bust would be going all the way down the length of the dress, and hence, over my belly (while it wouldn't be added over the back or bum, where I don't really need it!).
However, when I laid the pattern piece back on, I saw how weird the armhole had changed, despite the tutorial saying the armhole wouldn't change.  So now I need to go back and do something about that.  I decided that while doing all these adjustments I would do a muslin, despite hoping that the dress that I was making was going to be a (very) wearable muslin.  It might just be a top though.  I found out I have a shortage of woven tops in my wardrobe!  This is why I didn't know I have very big problem with "forward shoulders", the other dress I was going to make, which turned into a top, is woven and the shoulder seams were strange.....


Monday, May 16, 2011

Quick Dress

A while ago I thought I might try sewing underwear.  FabricLand had a bin with stretch knit remnants and I picked a couple pieces, but once I got home I found they were rather narrow.  And this one, felt a little thick, but it probably would have been fine.  However, Meg found it a couple weeks ago and wanted me to make a wedding gown, or at least, a train (thanks Kate & Will!). 

 After the success of my last knit dress, I figured a simple dress for Meg would be nice.  At first, I had this hilarious idea of folding it in half, cutting out a neckhole and armholes, and stitching up the sides.  LOL.  But I wanted the bottom more gathered.   I took a knit tank top pattern for kids that I already had, and traced a shortened version for the top.  I actually went a little large cause I didn't want it tight, but I didn't want it too loose.  And it's a smidge loose, but actually, it's not gaping and being indecent though.
Then for the skirt, I wanted it gathered.  But when I picked up the fabric, I discovered that it's a 2-way stretch (up/down and side/side).  So, I could do the skirt in any direction, but I was worried about it being too short, although the fabric was almost square, so it didn't really matter.  I did the gathering stitch across the top of the bottom piece (which was about 4" bigger), and then pinned it to the bodice and gathered it to fit.  But as I sewed, the gathering seemed to disappear!  I don't know if that's because of the stretch, or what, but it lacks the gathered look I wanted.

About a week after creating this, I was at Value Village and found a Simplicity pattern, in the right sizes, for this style of jumper dress, in wovens.  Of course.


Monday, May 09, 2011

Yes, I Still Hand Knit

I was wondering today, have I showed you any handknitting lately?  There was the dropped stitch in the black socks, but that's not new knitting.  I showed new yarn and needles.  I showed that I finally sewed buttons on a baby sweater and made a little hat for it.  I showed that I finished off some other baby items that were just needing minor work.  But it's been two months since I showed the "Fumbling Fleegle Socks" (and I think I finished them in February actually).  Wow.  What have I been doing?!

Before finishing all the baby stuff in February, I was having post-Christmas letdown, I think.  I had finished all the 'interesting' stuff, and all that was left was some uninteresting stuff to finish--like the baby items.  There were MANY projects I wanted to knit, but trying to find the right yarn for the right pattern was feeling overwhelming.  I was keeping busy with the new knitting machine, and then a big project on the LK150, but I knew I had to have handknitting too!  I started a pair of Cookie A. socks (Stricken Socks) but quickly realized I need the chart with me for awhile until I got into the rhythm.  Then it became portable, but fairly soon an even more complicated section started, relegating it to the couch project again.

I also started a baby sweater or dress.  I have a LOT of vintage patterns that all seem to take fingering/baby yarn (a few take DK).  I always think that maybe I'll knit up some, perhaps using DK or worsted, so they're a little bigger.  The yarn I wanted to use this time is a light worsted (what I used for the machine knit baby  cocoon), and although I didn't want newborn size, it seemed every pattern I liked was already for a bigger size, which meant, when knit in worsted, would be quite large.  I finally picked one but after a few repeats of the pattern, I still was not getting into it, and I couldn't even tell if I had been knitting it right!  Ripped it back to the band, and picked an easy pattern from a stitch dictionary.  It's my "purse" project right now, although the ball of yarn and the size of the sweater does make it bulky, LOL.

And lastly, my other current project is Omelet, from the lasted knittty.com.  It was a total impulse cast on, although I had been wanting to knit a shawl for awhile.  I decided to use a cone of mossy green yarn, quite fine.  I had previously wound (is the past tense of "wind" ("why-nd", not "win-d") wound...the same as "woo-nd, or injury?  English is so weird sometimes!)  off a ball, so I didn't have to knit directly from the cone, although I was looking forward to having only 4 ends to weave in.  However....twice now (still using the small ball), I've found the yarn broken :(   It's not a soft, squishy yarn (although I think it will wash up a bit better than it is now).  I felt that this pattern, due to the small motif, needed a solid colour yarn, and my choices were fairly limited--some off white, some black, grey, and some other coned yarns.  However, I sort of wish I had chosen a thicker yarn as I think this is going to take forever!  Luckily, although it's not a fuzzy, squishy, warm, wool, the colour seems more autunmy than summery, LOL.  I still want another summer shawl, so I might do it on a machine, LOL.  The shawl started as a couch project, but now that it's grown, I can do the right side rows on the couch, and then take it with me and do the purl row while Meg has her swimming  lesson/skating lesson, etc.

I'd still like some brainless sock knitting, however, I always feel that brainless socks can be so easilly knit on the machine that there's no point doing them by hand, LOL.  I have more of the Kroy Stretch, and I'm not sure how the machine would handle it, so maybe I should cast on for another pair of socks with that.  I really like the first pair I did.  Any other ideas?

Wednesday, May 04, 2011

Good Things Come in Threes

Back in February, I was worried I wasn't going to have any projects to show you, but I'm actually behind in posting new projects!  I decided, in a lull while working on a big project on the LK150, to do some pinwheel blankets for the donation/gift box.  I had gotten 4 balls of Bernat Co-ordinates in yellow, white, tealish blue and pink, from the Salvation Army (plus I had a white ball in the stash).  I would make the blankets on the Singer 155 as the LK150 was sort of in use (and on the backside of the table, a little cozy).
The first one I did was this tealish blue and white.  I used 50st, hold 2st per row, 10 wedges, T6 (I think).  120gr.
I felt this blanket was a little small for my liking, although I'm sure it's fine for a newborn/infant.


The next blanket was a challenge.  I picked up this interesting yarn at the Spinrite Factory Outlet tent sale one summer, probably no later than 2006.  It's a chenille which changes shade and texture, from a dry, thick pale pink, to a shiny, thinner, almost white.  I used T10, but it wasn't quite loose enough for the thicker sections.  I was really concerned about having enough yarn as I had tried to make a square, mitered blanket a few years ago, but ran short.  I got the blanket finished with a small amount left.  However, this blanket had a terrible problem...it wasn't laying flat.  I don't mean at the edges...I mean, in the middle!
It looked like a volcano!  I gave it lots of steam, and it started to behave.  I knew I didn't have enough yarn for a worm trim, so I decided to crochet around it, ending whenever I run out of yarn.  Well, on the first try, I did two rounds but made it a few inches shy of joining the third round.  It looked dumb.  I ripped back, hoping to space the sts so that I'd make it on the next try.  But I lost the crochet hook.  I had to use a smaller one, so I ripped back even further, and this time I JUST made it to the finish line.

I took a bit of a break after the two as I wanted to make the next ones with the Bernat Co-Ordinates a bit bigger and had to figure that out.  Turns out, you just add more sts, keeping to the 2st  taken out of hold each time, and 10 wedges.  Adding more sts automatically means more rows.
The third is yellow and white, and I think I used 60sts and T6, which is a bit loose.  I like the size of it though.  I finished off one ball of the white Co-ordinates, but there's still quite a bit of the 3 colours left.  I did weigh it, but I didn't write it down, LOL.  I'll probably make little sweaters to go along with these blankets.  I predict I'll make more....they take about one hour for the blanket, and then there's the edging/sewing up!

Monday, May 02, 2011

Ahhh, Man!!

I was inspired by the revelation that I could take a knit contour/radar pattern and turn it into a sewing pattern.  I wanted to make a simple pullover.  For awhile, I've thought of using the red fleece sweater that I based the green striped one on, as a pattern to sew another simple top, but altered to fit me a bit better.  So, I'm not sure if I'm going to make a sweater based on the red top, or based on the knit contour pattern that's based on the red top, LOL!
I was at Fabricland, picking up a "couple small things"  (thread, zipper...) and of course I looked at the clearance bin.  There was some perfect knit fabric pieces.  I wasn't sure how much I'd need, but at 1.3m and 1.5m, I thought I should be able to do something.  I've also thought maybe a wintery nightgown.  It'd be more comfortable than flannel, and perhaps not so granny-ish.
Meg took all the bands off the pieces of fabric that I bought.  I was feeling chilled, so I shook out one of the knit pieces to wrap around me.  I was stunned to see two patches where there wasn't any dye!  (The picture shows one spot).  The label didn't say it was flawed!  I don't know if I'll be able to layout a sweater and avoid the two patches.  Maybe a pattern with more pieces that could be jigsawed around the patches.  Bummer.  I'll probably end up with a nightgown after all (and this was the bigger of the two pieces!).

Thursday, April 28, 2011

Seeing Things From a Different Angle

The Knit Radar/Contour is a nifty device; I've talked about it before. You have a paper pattern, either half width or full width, and it's drawn to half the scale of the finished item. You do your swatch and measure it, and put a ruler with your stitch gauge in a slot at the bottom of your pattern. You turn a dial to your row gauge. As the carriage trips the row gauge lever, the pattern moves up an appropriate amount. The stitch ruler tells you how many stitches to have, where the pattern line intersects the ruler is the row you're working on. You can draw a pattern using your own measurements, you can draw one using schematics from a handknitting pattern, and you can even take a sewing pattern (for knits), and reduce it by 50% and use it. It's even been suggested to me that if you have a handknitting pattern with no schematic, you can use blank paper, and no yarn, and "knit" your item, but mark on the paper every time you dec/inc/etc. Then connect the lines and you have a new pattern.

Recently, I encountered something else. I have some yarn I want to use to make a springy, drapey, cardigan. I have a pattern for the standard gauge (and even the recommended yarn, but I don't want to use it!), and it has schematics. However, the yarn doesn't work on either of my machines with Knit Radar! If I were handknitting, I'd just start and then work out the pattern (dec. for shaping) as I go. But that's not easy on the machine. I was wondering if I could make the KR 7 on my bulky (which comes off), work for the LK150 as I didn't want to work out all the pattern calculations for a new gauge, and then write out the pattern.

A Ravelry member said to:

A) Work a Gauge Swatch on your LK150, block it and then measure the rows and stitches.

B) On the KR7, set the row setting dial, then select and insert the appropriate stitch ruler. Insert your 1/2 Scale Garment pattern, either pre-printed or one you have drawn yourself.

C) With pen and paper or laptop/iPad handy to take notes, and without any yarn in the bulky carriage, move this machines carriage back and forth to trip the row advance lever. You’re not knitting on this model, just using it’s carriage to advance the lever, and you can really fly through a pattern this way. Write down the pattern instructions; IE How many stitches to Cast On; How many rows to first decrease/increase, write down how many stitches to bind off for armhole shaping, rows to shoulder, etc.

What this method allows you to do is to quickly work through and write down the pattern instructions for the front, back and sleeves. Then you use this information on your LK150 and knit the sweater, when time allows. The front one evening, back the next, both sleeves a couple of nights later, and then onto blocking and finishing.

This process allows you to do a dry run in a sense, to think your way through and consider things like closures, IE button and buttonhole placement, or facings for zippers, how you might want to work the shoulder finishing, attach and work a neckband or modify a pattern to incorporate the shaping required for a shawl collar. This way you don’t have to unknit any mistakes that come from surprises or construction methods that you did not consider until the knitting was underway.


Isn't that clever?! "Ghost Knitting" is what came to mind. Using the Knit Radar instead of a calculator. On one hand, the thought of taking the time to knit WITHOUT yarn...LOL...but I'd really like to use this yarn, and on the LK150 (I know you can get a proper KR for it, but that's money!). I thought once I had the bulky and the standard gauge, I'd have all yarns covered with one or the other, and this yarn should have a gauge of 26st/4" which is doable on the standard gauge. I think however, the fiber mix, or the structure of the yarn, just didn't work on the standard. I do have some other little things to take care of first, but I'll keep you posted on how it works out!

Edit:  I totally forgot the other part to this!  LOL.  I recently saw a nice, sewn, hoodie on a blog.  I was lamenting that I don't have any sewing patterns for things like that.  Then I realized that I could take the KR pattern that I've altered to fit me (perhaps not as shaped as the SWS sweater I just showed), and use that to make a sewing pattern!  After all, it's just a flat representation of fabric!

Tuesday, April 26, 2011

Time Travel Would Have Been Useful

This is weird, but my typing screen is grey, and I can't see my cursor, and when I type, the type is showing up in a white strip.  I'm not sure I like the changes to blogging....I did this cause the "solution" for getting a space between paragraphs didn't work...

I haven't blogged this week (now the white strip is gone, but the background is still grey and there's no visible cursor) cause last Wed. I got a notice that we're at 75% of our internet usage for our new billing plan....and not at 75% of the month!  Then Lucy was home sick on Thursday, then it was a 4 day weekend for EVERYONE in the family.  I'm trying to cut down on blog surfing, etc.  However, today I looked at my emails, one was from Patternreview.com and they had a contest and the winner was shown in a dress that I thought I had in my pattern collection.  So I went off to her blog and fell in love.  Yup.  A sewing crush.  Sigh.  You know how on some blogs, they have at the bottom of posts "Other pages you might like" suggestions?  Well, one of the suggestions looked a lot like my "Empire Strikes Back" dress I worked (click on the "Sewing" label at the right and then scroll down,down,down to see the three posts) on last August.  I read through it and it was like re-living everything I did!  It was a different pattern, but extremely similar (Simplicity and New Look are the same after all).  I searched  and googled so much last summer and if only she had made her dress LAST year instead of this year! I feel very validated now, knowing that what I was doing was more or less the way to do it!    I also feel like it might be okay to have to grade a waist up 5" so that I can use the patterns I do have that are not quite big enough.  I just might give that dress another go now!

I've been really good about not buying yarn this year.  Earlier in the year I did find a good score at the Salvation Army, and I bought that Chromos yarn from Knitpicks.com but I've been really good.  Then I took Meg to Michaels for some craft stuff, and they had some Patons Classic Wool on clearance, so I bought 6 balls.  I know it'll get used for felting, so I like adding to my CW stash when they clear out colours.  Then, Meg and I dropped into the yarn store in Oshawa, cause I needed some wool wash.  She had the bright red "kitchen" cotton I need for a special gift project.  And she had a ball of James Brett Marble in boyish colours in the sale bin, so I got it, and one more (full price) ball of a different dye lot just to be safe.  And then I turned to my left and saw the Patons Lace, which I did pass up, for the more expensive but lovelier, Regia Lace, in black/charcoal/grey.  Ooops!  Still, I am using up yarn at a good rate this year, as I'll show in another post!