Thursday, October 08, 2020

A New Craft!

 It happened. I started a new crafting journey. I've always been interested in "personal doc(ument) cutting" machines. For awhile, I was seriously considering getting a Brother Scan N Cut. It didn't seem to be available locally and seemed to be the shy, smart kid off in the corner compared to the Cricut and Silhouette machines. Everyone knows about Cricuts and Silhouettes, but not many knew about the Brother. As soon as Rob started looking at them, he declared that we should get a "real" vinyl cutter, not any of these small ones. Of course, he wasn't about to invest the money in one, or set it up (some are big!), etc, so the idea just lingered. The home machines are pricey enough that I couldn't just rush out to purchase one. I mean, I've been putting off getting a new camera, which would have cost the same or less. 

Schools shut down at the start of March Break here. It was initially for two weeks after the break. Then it got extended....a few times...I knew I would be getting some money back from a cancelled trip, and a camp, and thought maybe this would be a good time to indulge and treat myself. I watched the prices for the Cricut Maker at Costco and Michaels, and then one day Michaels had a sale with the lowest price I'd seen (I've been getting their emails for years so I casually kept informed on the price). I was able to place an order for curbside pick up locally. There seemed to be very few machines available! I picked it up, plugged it in, and got started. Nervous but excited. I like learning things! But I also know there can be a lot to learn, and a lot of ways to mess up. Which I have certainly done!

Set up went smoothly. I tried to do the first, intro, project, and couldn't find it! I found "unboxing" videos and they were able to find it easily. I did find it but not with the kite cut from fabric. Eventually I figured it out.

I don't think I took a picture of the card, but here she is, all set up. Well, not really. I realized there were no outlets close enough here.

I didn't get any additional supplies but I used to do scrapbooking, so I thought I would have what some materials to get started. I started looking at the projects in the Cricut software and realized I had very little to work with. I did find this red cardstock and this neat maple leaf design, so I gave it a try. I didn't get it sized up properly and a tip got cut off.


These are the bits that are left on the mat. I thought they were almost as good as the paper that got cut out. But what to do with them? I did get some clear contact paper from Dollarama and tried to get them off the mat all together....but the contact  paper stuck to the mat, it got wrinkled, etc. I then put some on the backside too so the stickiness was contained.
So now what? I trimmed it close (because I got a grease spot from dinner on it), but then what? I decided I'd put it on a card for my niece who just got her Canadian citizenship.

I went to Dollarama to see what I could stock up on. They had pads of printed cardstock that was a great deal! And a bunch of other assorted things I thought I could use. I even needed just plain old glue.
Father's Day was coming up, and although I don't usually do much, the kids don't either--and especially now that they aren't in elementary school, making gifts. Lots of projects out there. I found this card design, but it needed an envelope. I found an envelope but wanted to try sprucing it up. I took a heart, and welded a star into it. However....I had taken the score lines off because I don't have a score wheel, and so I wasn't paying attention to where the flap gets folded and the heart is too low. 
 

I added slits so I could tuck a solid paper behind. The design was totally not mine, I wasn't ready for that yet.

I was making freezer meals for my eldest to have on hand while living away. I bought a small Crockpot and thought I should dress it up. I don't think this was the first thing I cut from vinyl, but I had some challenges.

There's so much to learn. Design aspects, materials, just how to use the software and machine. It's hard to know what's a user error, and what's a material error or a machine error.

I knew I had to shrink the letter spacing with cursive so the letters touch, but didn't realize it's a challenge to cut the thin lines in vinyl


It's so not me, that makes it even funnier! I still need to do my Instant Pot!
I made a simple two layer decal for Megan's Airpods case. Originally, I wanted a small M inside a big M. Kind of like an outline. I couldn't figure out how to do it though (tip:  you can't, using Cricut Design Space, you have to do this--offset--in other software).

I went back to paper for the next item. I thought it would be nice to have a simple gift box pattern. I could not find any that were free, and very simple! I did find this, from Jennifer Maker.  It's adorable, though I haven't done anything with it. It's not as box like as I wanted, but still a great, easy project with good impact.

Back to vinyl.  I have this IKEA plastic cover for in the microwave. People often take it out and leave it on the counter. So I made a reminder to put it back in if you take it out.

Some people say not to use items with vinyl in the microwave. At this point in my life, I've probably gotten enough plastic poisoning that I don't know if this little bit of vinyl, for the little amount of time the microwave is used, is really an issue.


I was getting ready to deliver the Crockpot and meals, and I was including some cornstarch for making slurries to thicken the meals. I wanted to make a label for the little jar. The font I used for Cornstarch had extra cuts between all the letter segments. It did go on fine though. The instructions, in blue, were a different story. I think I used a different font. I made sure it was thick, but the cut letters kept getting lifted as it cut, so it was all out of line. No way to get it back in proper order. So I just put the cornstarch label on the jar and wrote out the instructions. Not sure what happened here. 

The kid also needed a birthday card. Jennifer Maker came through again, with this 3D card. 

 
I didn't have spray adhesive, just Dollarama clear glue and the card kind of looks like a 1st grader put it together. It doesn't really "pop up" like in her video. I had a hard time figuring out where to score since I took off the score lines.  Next time, if they're not visible when done, change to draw lines, or make them skinny cut dashed lines.

I wanted to move on to more complicated things. Our mailbox was looking a little sad, so Rob painted it and I created this monogram. However, when I applied the vinyl, despite having marked where to place it, it didn't go on straight. Rob couldn't tolerate it, so he carefully scraped off the curlicues.

I love it, though I wish it was fancier LOL. 

Something else I got into this spring was cocktail chemistry. On our cruise last fall, we had our first drink package. I tried to try a lot of different drinks, though I didn't even know what I'd like. I found some YouTube channels that are all about cocktails, and got into making my own syrups. I bought some jars off Amazon, in two sizes, and realized very quickly that I need to label them better than with a Sharpie! This one is honey syrup. I'll make another post with all my bottles. With this one,  the yellow bits are individual, but get applied as one piece. If I ever do this one again, I'll make the yellow a single piece and put the black over it.

My FIL wanted his bicycle back and since Rob had to do a bit of fixing up, I added a decal. I wanted to include his cell phone number but got told no LOL. 

I started to make more complex designs after this, so I'll make different posts for those. 

What I would tell another Cricut newbie---find a YouTube channel with beginner tutorials. Watch some more advanced videos too, but don't get ahead of yourself. You really do need to start with some basic projects to learn how your machine handles different materials, and how to put things together. While a 4 layer vinyl decal looks not that difficult when you see an expert doing it on YouTube, keep in mind they've been doing it a long time, and the power of editing  is real.

 One downfall with Cricut is their design program has some strange deficiencies. In any FB Cricut group, when you ask how to do somethings, people will chime in that you can't, you need to use another program like Illustrator or Inkscape. I decided to get on the Inkscape bandwagon. It's free, and surprisingly powerful. Overwhelming at first, but again, watch tutorials for beginners, especially ones geared for Cricut users. The best thing about using Inkscape is that you can save your files as SVGs. This means you can share or even sell your designs! In Cricut, when you save your project, you're saving to their server. You can't take it outside of Cricut. You can share with other Cricut users, but I believe they have to have the same fonts, etc, installed. If Cricut has an off day, you might not be able to access your projects. Learning Inkscape has been really fun. I've created all sorts of non-Cricut designs too! Sometimes I get stuck, and I have to email the design off to Hugh, and he can use it in Illustrator and fix my mistakes and send it back. You can't do this with Design Space. I'll post more about Inkscape later. 


Tuesday, September 22, 2020

Yes, Another One

 After finishing the bulky scrappy afghan, I knew I had enough for another one. I reached in the bin and got knitting. Did a corner to corner again. This time I did allow myself to reach for the brighter colours, otherwise I might have been too close with the yarn amount.

What's frustrating is that I'll have small balls I leave to the end because I always want to get 1-2 rows of each colour. But then I usually end up with small balls still left because it really doesn't take as much as I think it will for the last section. Perhaps I need to do a blanket made of smaller blocks, sewn together. 

For this one, I didn't put a border on it. I wish I had slipped the edge stitch though. 

That join between the red and white, right in the middle, is really bugging me.

This weighed in at 600gr, which I thought was a lot, but then I looked back at the crochet one, and it took over 1000gr. Knitting really does use less yarn! It's great, being bi-craftual
Yarn In:  5115gr
Yarn Out:   8315gr + 600gr = 8915gr
Balance: 3800 gr more OUT than in!
Costs: $115.68/266 days = $0.43 per day


Tuesday, September 15, 2020

New Blankets for Charity

 I recently finished up two more blankets for charity!

This is from the cone of Bernat "Mosaic" that I showed previously. I really thought I'd have enough for a blanket, based on weight, but it ended up a bit small. The charity used to take a smaller size, so I don't know if they might still take it. It weighed in at 328gr. It's very rare for me to make a blanket by casting on the entire width. It's nice in this yarn because it keeps the colour sections even, as opposed to starting in the corner and the rows getting longer and longer.

I had a lot of chunky yarn left from projects--remember those hoods with the years that were so popular a few years ago? And the rectangular ponchos? And the mermaid tail blankets? It was time to clear out those yarns. Plus, my worsted weight collection is actually dismal, except for what I just bought.

I tried to keep this one to the more muted colours, no pink, yellow, red, bright green. It weighed in at 1016gr.
Lots of different weights and textures. I was using a 8mm hook. What I started doing was with the thicker yarns, making only 3 DC in each group, instead of 4.  It washed up lovely. I got started on another one, but in knit as the stash is dwindling! (Well...the yarns appropriate for blankets...the rest of the stash room is still full).

Yarn In:  5115gr
Yarn Out:    6971gr + 1344gr = 8315gr
Balance: 3200 gr more OUT than in!
Costs: $115.68/259 days = $0.45 per day


Friday, September 04, 2020

I Bought Yarn!

 Where'd August go? 

Oh yeah, it's 2020. My niece came to stay for a bit. It was suggested to us as "a few days" but turned into two and a half weeks, minus "a few days" in the middle when we sent her back to her mother because of behaviour. Interesting. 

Then we went to a cottage for two weeks. I thought I'd get lots of blog updating done there, but the internet was not that great with all of us trying to use it. 

Before going to the cottage, I bought yarn. I started this idea when I went on the Florida road trip. Buy a large skein (340gr) of Bernat "Handicrafter" in a colour that will remind me of the trip, and knit only dishcloths on the trip. No more "What should I pack to work on" dilemmas. Oh, I still take another small project, but my main focus is on the dishcloths. Small, no pattern, can work in the dark. Perfect. 

This year, for the cottage, I chose "Junebug".  I didn't look at the name, I just picked the colours. The only other option at Wal-Mart was shades of brown. Not inspiring. The neat thing was, this yarn perfectly matched the cushions in the screened in porch, where I spent most of my time. 


The porch became the puzzle room in the second week. Much hilarity ensued as puzzle building was turned into a competition sport.

I actually didn't get the cloths finished until after I got home. Two weeks should have been plenty of time, but I also had the little baby hats. I got 12 from the big skein, which was about $10.

My recipe for dishcloths:

Cast on 3 sts with 5.5mm needles.  I knit them a bit loose so when they shrink, they're still flexible.
Every row: K1, Yarn Over, knit to end of row.
Repeat until there are 20 eyelets up each side.
Every row: K1, Yarn Over, slip 1 stitch, knit 2 together, pass slipped stitch over the k2tog.
Repeat until there's about 4 stitches left. Then I wing it to decrease down to one stitch (like, k1, YO, k3tog; next row, k2tog and pull yarn through). 
I pull the big ball through the last loop and tightened. Leave a long length (8-10"?) and start again without cutting the first one off. After I do about 4 or 5, I will cut them off. Weave in ends.


(According to Blogger, this is in the center....will have to see....)

I also bought some more baby yarn for the newborn hats. I really have very little left for baby hats (suitable for hospital handout--I have lots of gorgeous yarns for custom hats when I can share care instructions). Three skeins of Loops & Threads "Snuggly" (141gr each). It was actually difficult to find a DK weight yarn suitable at Michaels. I could have gone thinner, but didn't find any suitable. I'd love to use sock yarn, but not for donations. I might try with some ends of balls I have. It is machine washable.


It was hard to find a perfect spot outdoors to knit. No lounge furniture on the deck, just dining furniture. Chairs on the patio/firepit level but it was pretty sunny. This part of the deck was usually shady, but it was often quite windy down here, and a little noisy with boats and jet skis. 
We ran into Giant Tiger to get more "Magic Fire" powder. They had some of those "1lb Unknown Fiber" bags of yarn. Grabbed a few worsted weight bags; 908gr, for  $17.99 (with tax).
And then, the best find of the year. While leaving Sobey's in Gravenhurst, I looked at the Community Bulletin Board. I saw a poster for "Shelridge Yarns"!!  How had I forgotten about this great business? Years ago, pre-blog (I started in August 2006) I found out about them. At the time, they were a farm in Ariss, ON, near Guelph. I visited it and bought some sock yarn. I have blogged about those socks, maybe 2007 or 2008. Then, they sold the yarn business to the women from Cabin Fever patterns and yarn. The business moved to Orillia at some point, I moved to Whitby and lost touch with the "indie" yarn companies as there weren't any fiber shows out here. So, imagine my surprise when I saw that they were alive and well and right there in the town we were staying near!

Walking in, I think I heard angels singing. It was delightful. So much yarn, so many colours! It's really nice yarn, and the great thing is colours are consistent between yarn weights. And not  just six colours per yarn type. No...more like six shades of just green. Their Instagram page has some photos. It's so beautiful to see all these "basic" yarns, rather than the hodgepodge of textures and fibers that fill the rows at Michaels. 

I started talking to Lyn, I think it was. I asked about some yarns I had seen on the website but couldn't recall the name of the group....something strange...."Strange Brew"! She told me about how she was trying tonal dyeing. Handpainted yarns have been very popular the last 15-20 years. While gorgeous, I find they can often be hard to work with. Often the colours are very distinct and different in the skein but when you knit them up, things get muddled and muted. With tonal dyeing, the colours blend more subtly. Some of the colours reminded me of the wools my aunt would dye from natural dyes we would collect (walnut shells, onion peels, etc). Lyn pointed out this worsted weight pile and my heart exploded. I mean--I was even wearing a turquoise top! The yarn was so new, it didn't have a tag or a colour name. I called it Curacao, as it reminded me of our southern Caribbean cruise almost 3 years ago. It is going to become either a hat or mitts. I have to sort through my bin and see what I need. (100gr, $28.25)

Total weight in....1771gr! Wow. That's like, half of what I bought all year, just in August. But.....almost twice what I spent up till now LOL. Still, less than 50cents a day on yarn. Not bad. However, have I told you about my other new hobby?  Stay tuned. 

Yarn In:  3344gr + 1771gr= 5115gr
Yarn Out:   6631gr + 340gr = 6971gr
Balance: 1856 gr more OUT than in!
Costs: $73.34 + $42.35= $115.68/248 days = $0.47 per day


Saturday, August 01, 2020

"Athletic"

I made this in mid-April, and I was thinking we would actually get back to school by May, or maybe for June (we usually go until almost the end of June). I bought a bunch of athletic jersey online and then found out it has only 2 way stretch. I haven't done much with it because 4 way is more comfortable. I did use some of this colour to make Rob some boxers. He seems okay with no vertical stretch. I'm not sure how. I tried making underwear for myself and could barely get it on.

I thought "Plitvice" by Itch to Stitch would be a nice option. I'd been wanting to make another one and just decided it was time. There were some adjustments I wanted to make (bit longer, more drapey). I hadn't done a FBA on the original, and I'm not sure now if I did one on this version LOL.

Okkkkkaaaayyyy.  I didn't remake the Plitvice! Looking at the photos, I'm like....what? That's not the same shirt LOL. Now I have to  go down to the basement and look through my patterns.  It was actually Simplicity 2938.

The gathers don't really float all the way down. I hate how it flares out at the bottom, though the sketch does show that happening. I tried on another shirt I had made years ago, yesterday, and it did the same. Don't like that. I thought it was good that it doesn't read as athletic material from a distance.


It feels a little tight around the arms. I did bands, and may have stretched them too much. 

I haven't worn it since LOL. Maybe now that it's summer I'll wear it again. I like that it's dark, but not black. I don't have much in the way of "serious" but not dressy clothes that are darker. You know, sometimes you don't want to wear your little black dress, but your bright pink outfit doesn't fit either. I'm sure I'll wear it when ever work starts again. My teens said it was acceptable, so that's a good thing. 


Thursday, July 23, 2020

I'm Trendy!

Fabricland finally re-opened, but I wasn't eager to go. Eventually I had to, to get my membership renewed. I also wanted to get some twill to make Rob shorts.

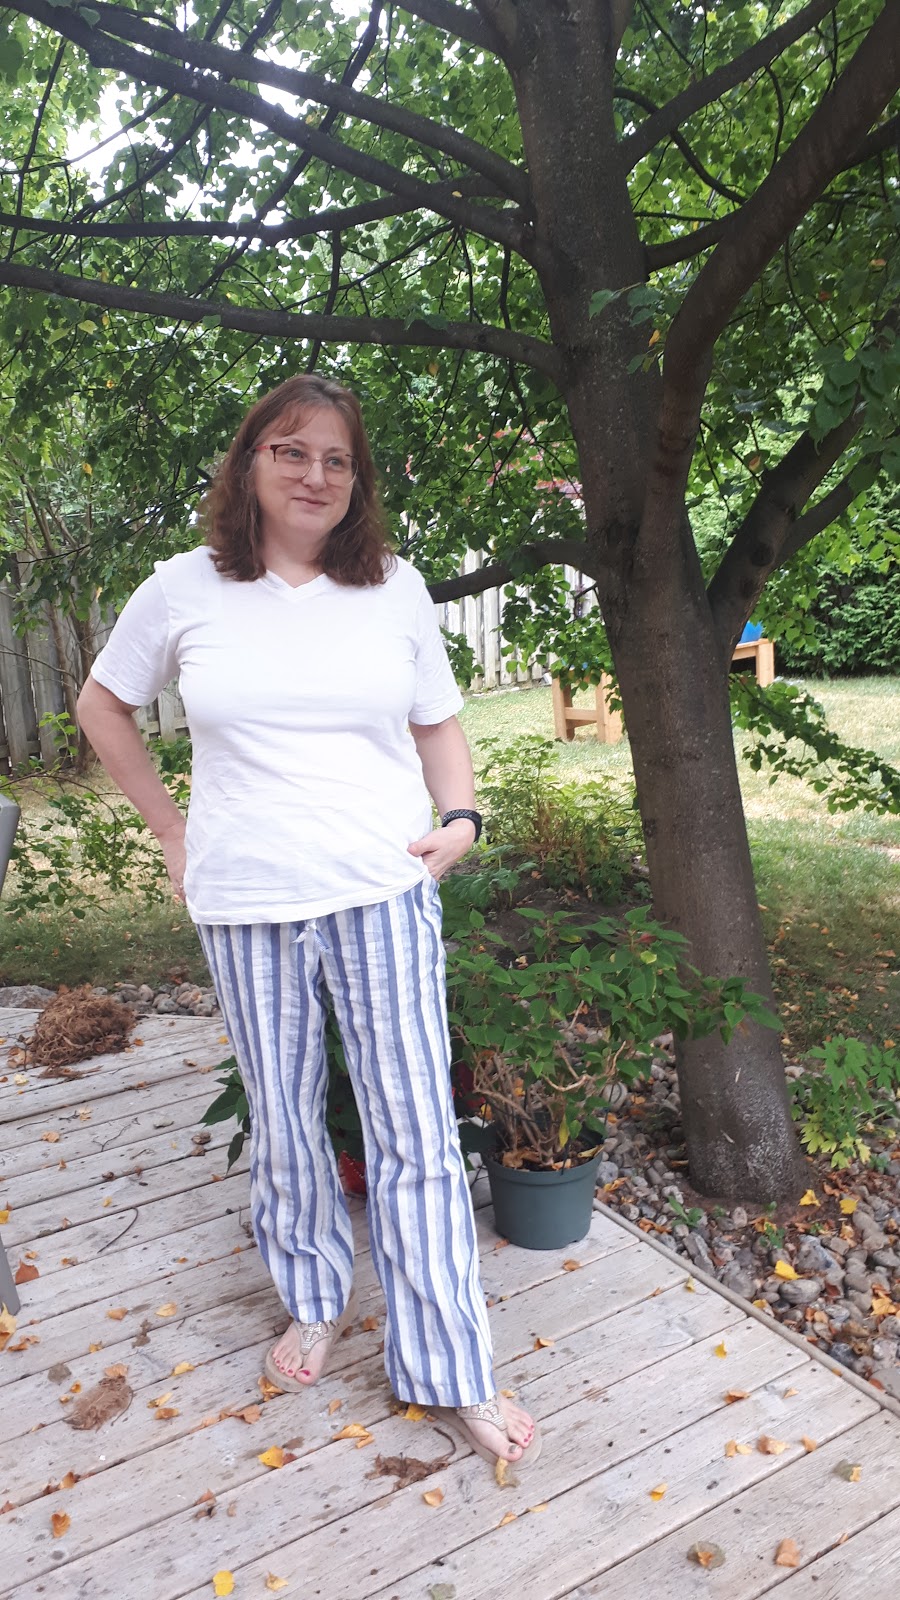
A few steps inside the door and there was a display with striped linen-cotton fabrics. They were lovely! Greys, pinks, blues. I knew I needed to make pants. I finally picked out a blue stripe. I wish there was a matching solid fabric though!


I got going on these pants right away. I was going to do another pair of Sequoia. I laid it out and quickly panicked. Do you reverse the stripes for the other side? Or keep the pattern going across the center seam? OMG. I questioned everyone, no real answer. I finally opted to keep the pattern going across the center seam.

The next thing was the side pockets. I didn't want to get fussy, I was just going to do the pocket but not the flap. Then I just decided to forget the pocket. I didn't want to fuss with matching the stripes. I did do the straps to roll up the pant legs.

For the waistband, I just did a contoured knit band. Simple. 

Yes, they do kind of have a pajama-ish look in the pictures. In real life though, you can tell they're linen. As I was preparing to make them (or had just finished?), I was at the Great Canadian SuperStore with the girls, and we walked past the Joe Fresh clothes. Wouldn't ya know? They had striped lined wide leg pants!! The girls groaned; they knew they had no opportunity to use the "you're not stylish" card now!!

Monday, July 20, 2020

Rob's Turn

After I had sewn a few things for myself, I decided it was Rob's turn. I had picked up this sprocket pattern cotton lycra from a de-stash (I think). It wasn't quite enough for a full shirt though, darn tall guy. With help from one of the teens, I chose a dark brown for the sleeves. This is the Zesty Tee, from the old Pickle Toes Patterns (now with a new name).
The cotton-lycra was fairly stiff at first, but after a few washings, it's quite soft now. Wish I knew where it was from originally

Looks pretty good. He's not sure of the dark sleeves, but whatever. 

Nice to see him in shirts without big holes and stains!

Then, one night, he says "Can you make me a tank top?". I had been thinking about that! I found that Thread Theory has a free one, the Arrowhead.  I picked out some bright yellow, and the periodic table fabric for the trims.
He was trying to do a muscle man  pose

Yes, it's bright!

Pretty good coverage in the back. Then he says, "I wasn't sucking in. Take it again". So I did LOL

The teens don't want to be seen with him in this. LOL. We do make him untuck it. 
I also made him a mossy green one. The problem is, it's too cold in the house to wear them LOL. Now I'll have to make him a cardigan!!


Wednesday, July 15, 2020

More Sequoias

Yup, another pair of Sequoia pantss, by Itch to Stitch! And another pair awaiting photos!
The pictures suck. These are black cotton pants that pick up hair like crazy. It's a black cotton from my stash. It's stamped at one end, in gold, 100% Cotton, made in China. I also have it in blue and made some pants from that version. It's light and has decent drape for cotton. 
I do a mock fly and a stretch knit band. The waistband in the pattern is lovely but I just don't need that about of fussiness. 

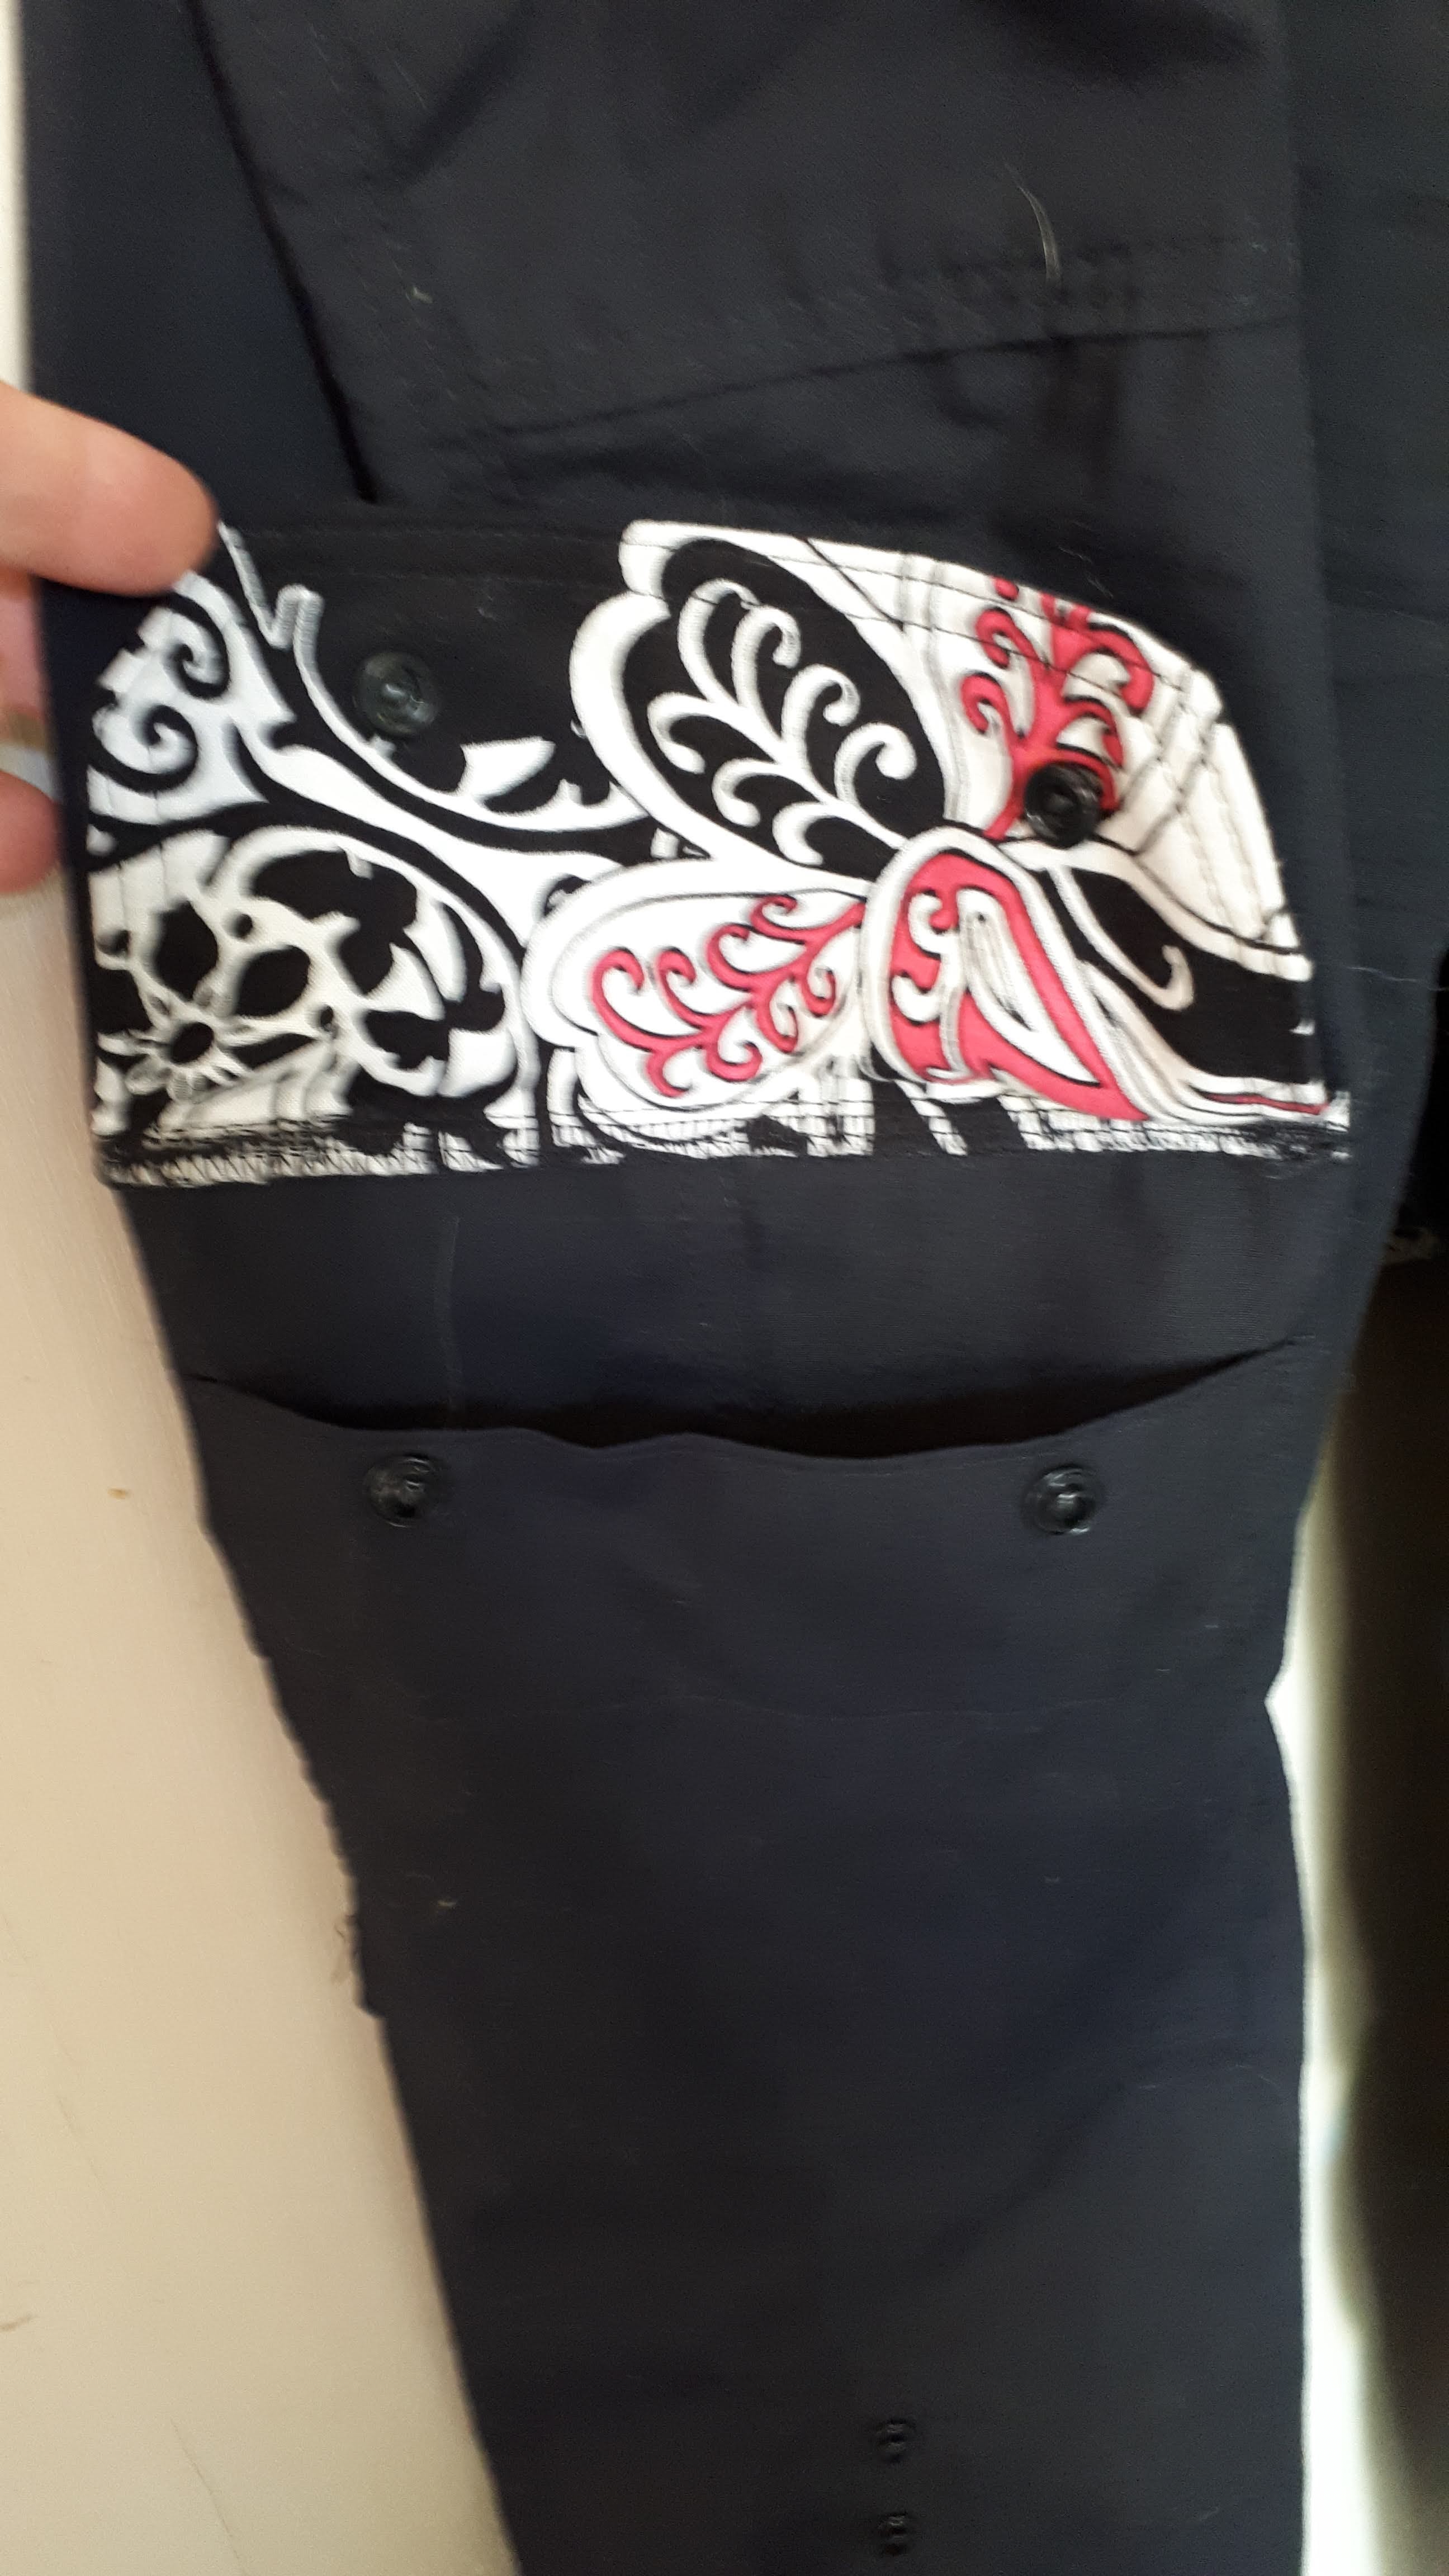
The snaps for adjusting the strap to roll up the pants

The inside of the pocket flap got some contrasting fabric.

I believe those are Transformer snaps on the pockets. Hard to see in the photo.

Not the greatest picture, LOL. I was wearing them the other day and hubby says "Where'd you get those pants?" (back when not much was open yet and I wasn't going out much). Dude, they took me over a week to make, using the dining table and the sewing machine located near your "office". I guess, to be fair, I did just order some clothes on line with gift cards I got at Christmas. Pretty cool though that even though he knows I sew most of my clothes, he thought these were purchased!