These pants are actually the second pair of pants I made from copying my old favourites. The first pair, I didn't take any pictures of the process, or any notes. I wasn't sure it was going to work. LOL. I really, really needed dark brown pants. This was the only suitable dark-ish brown I could find. Not quite what I wanted, but they've worked out well with a couple of the tops I've made.
I thought this chicken fabric would be great for the pockets, but I didn't have enough to do both sides of the pocket so I opted for the backside of the pocket, thinking it might show a bit more. Of course, once the facing goes on, you can't really see much. I had such a hard time remembering what side is what and what stitching will show. I think it would have been better if the facing was in the chicken fabric too!
These are the two pocket pieces for one side. Stitch the facings on (top stitch), having public side showing.
Stitch the facing down (inside--public side--of pocket down on right side of pant) at the angled edge and baste the top edge and side edge.
Fold pocket over to the inside and press well. Top stitch as many lines as desired.
This is the inside front of the pocket.
Lay the back pocket piece over the front piece
and serge it all together
Baste the back pocket piece to the front pocket piece at the top and sides
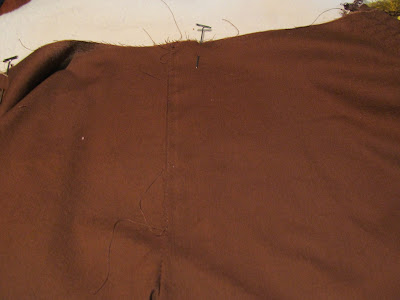
Draw the centre front line. Clip the notch where the fly meets the curve. Baste the centre seam.
Stitch the two fronts together along the fly and down the centre crotch seam (I was off a bit!)
Press the fly over to the left side.
Open up basting. Stitch the fly really close to the fold. Most patterns I see don't have this, but my original pants did. Helps to keep the fly laying flat.
Top stitch around the fly, doing one or two lines.
Top stitch the seam allowance down through the crotch if you're going to topstitch all the seams.
Finish off like other pants. Seam the back crotch, top stitch. Seam the legs, top stitch.
One important note. My original pants had a remaining seam allowance of 1/2" and both lines of top stitching were on that seam allowance. When I serged my seams, I did it at the 1/2" mark...but my remaining seam was much smaller so one line of my top stitching was off the seam allowance and looks different than the line that is on the seam allowance. On the next pair, I opted to serge the edges either before sewing together on the regular machine at 1/2", or I just barely skimmed the edge of the fabric as I serged the parts together at 1/2". Just enough to trim raggedy edges. It was a lot of back and forth from sewing machine to serger, but it wasn't too bad.
Yes, they wrinkle. And collect dog hair.. I did a knit waistband using a scrap of brown print knit.
I'm a little disturbed by all the rear view pictures with these two pairs of pants. They look weird around my butt. Is it from having my hands in my pocket? When I look over my shoulder in the mirror, I swear it doesn't look like this!
PS: I didn't go into much detail about how to copy YOUR favourite pants. This was more about copying MY favourite pants. The important part though, I didn't document. Taking apart your original pair. I know lots of DIY sites say to just lay them down and trace around, but I wanted to be accurate! And my originals had become unwearable, so why not take them apart?


No comments:
Post a Comment