Sunday, August 15, 2010

Sisters

I haven't been able to find the dress pattern that I had been using to make the girls' dresses (and they were at the top of the size range anyway), so the three of us went shopping to find a new pattern. Now, normally, I try not to take the two girls anywhere together. And, I would normally choose from just the patterns that were on sale. But this was going to be an exception. Wow, it was hard to find a pattern that met ALL our requirements--in particular--something that I felt I could actually sew! This pattern is Kwik Sew 3674, view B, but without a contrasting panel at the bottom.Meg chose a wild orange flower print, a very light weight woven cotton (I don't know the 'proper' names for all the different cottons). I lined the bust with off-white bastite on the advice of the fabric cutter, and I was glad she pointed it out because it was what I needed for other projects too. For Meg, I cut the top as a size 10! and I think they both got size 7 skirts but Lucy's I eased out to a size 8 for her tush :) Lucy's top was a 7, I think.
Most of the dress went together great! I cut out the pieces for each dress, then put all the stuff I needed to sew them in two Ziploc bags and took them with us when I went to my parents. However, I never got around to even attempting to sew them. But once I got home, I did Meg's a bit at a time and I think it took 3 days, and Lucy's I had done in one evening and the next day. The hardest part was getting the elastic in the casings...I had a crappy safety pin. I might do it the "diaper way" next time--tack the ends down on the one layer, then top stitch the layers to form the casings.Lucy's dress is an unusual quilter's cotton. She "doesn't do" flowers, pink, cute, or "weird polka dots". I was hoping to get them in co-ordinating fabrics, but oh well. LOL. They are both a smidge too big in the bust, causing some gaping when they move around, but they are cute dresses. I hope to make the other view someday, although Lucy thinks it's too pouffy. While Meg loves anything I make for her, Lucy is another story!
I'm glad I made these because it's similiar to the dress/top I've been trying to make for myself but constructed a little differently, and SO much easier! I learned alot making these!

Friday, August 13, 2010

Sew, I've Been Thinking

Haa Haa.
Been doing lots of thinking about my ill-fitting top/dress. My mom and I have about the same chest circumference. But we can't wear the same clothes. I've written before about how my front chest is larger than my back width. I can accommodate that in many pattern, but this one is so different, it's been stumping me. I thought about doing a "draping", basically laying the fabric on me and drawing/cutting how I want it. That would work better if I had a girl friend that could help out instead of a husband, LOL. But I also want a real, reproducible pattern.

When I cut out the new top, I saw that the chest/neck line was the same for all, and only the side seam and a bit under the arm changed for different sizes. The amount that gets gathered at the bottom of the cup, and the space it gets gathered into, stays the same for all sizes. And, since most patterns are sized for a B cup chest (and I am not a B cup!), just extending the side seam is not going to be the solution! Doh!
Some how I have to figure out how much fabric I need to cut, and how much to gather it. I know the bottom of the cups, when overlapped, have to fit to the top of the bodice. I'm just not sure how much to cut for the cups. I could try draping.
I'm also thinking I might use a dart for the lining layer as I felt the two layers gathered and sewn to the bodice made for a bulky seam allowance.

I've been getting kid/teen sewing books from the library. Some of the stuff has been cheezy (finger puppets and simple tote bags), but some of it has actually been really good--helpful info and good patterns which you fit to yourself. One of the books has a top like I'm doing (the green one on the cover), but the cups sit above the bodice, so the back seems a little low. They tell you how to create the pattern up to a C cup, and I wonder if that means they don't think teens come in larger sizes (although the skirts went larger), or if a larger size shouldn't wear this style?
I've also just finished sewing two dresses for the girls that have overlapping cups with a separate back piece. There's three pieces of elastic to rouch the back, and then one piece that goes all the way around, under the cups (LOL. They are not cups at these sizes!). They turned out really good (although I had major issues with inserting the three strips of elastic, due to a faulty safety pin), and I think between all these patterns, I should be able to come up with SOMETHING!
Stay tuned, and I hope to post pictures of the girls' dresses very soon (Lucy wore her's to daycamp today!).

Sunday, August 01, 2010

Fitting?

A few years ago, I made New Look 6557 to wear on a cruise. I had some fitting issues then and I've been wanting to re-work it (please look at my links). I cut a larger size based on the differences between the sizes and that I needed one size bigger than the largest size. It's still not fitting like the picture on the package. Instead of the cross over pieces laying flat on my chest wall, they pull out (I've stitched it together) so it's like a V-neck. I'm going to re-shape the pieces so there's a bit more coverage, but I still don't know what to do where it overlaps. Should they be closer together? Further apart? Further apart and then the overlap needs to get tucked under a girl. I thought of cutting it a bit larger and gathering it to fit between the same notches on the body. I don't need to extend the side seams, I need more? in the middle.
Any help would be greatly appreciated!!!!
Edit to add: I solved the fit issues of this top and the original dress by giving them to my mom. They fit her beautifully. Now I HAVE to sew again for myself! LOL.

Friday, July 23, 2010

The Importance of a Stylist

Being in a 'new' town, I'm excited to have a whole new selection of knitting book available to me at the library. I checked out a sock book recently. It had some nice patterns, a few unusual ones too. But what really caught my eye was the poor styling.
Having just bought sport sandals with a thong, I would be quite tempted to make a pair of tabi socks (or, also in the book, is a partial sock with no toes, but a thong to cushion the shoe thong). However, the choice of colour for these socks...I know the picture isn't the best (when it scanned, the red wasn't as bright as in the book), but what's the first thing you think of when you look at the close up? Lobster anyone?


Aren't these nice looking, well-fitting socks? In fact, they're on the cover of the book. It's really too bad that inside the book, this is what we see:

Did no one pay attention to the feet while taking pictures (the models are definitely models chosen for their appearance rather than their feet, I think). I would never wear socks like that. How hard could it be to pull them up. Or find someone else with smaller feet?

Wednesday, July 21, 2010

Do The Wave

Remember the orange/brownish crocheted cardigan I finished this spring? At the start of June 2009, I wanted to crochet a white cardigan for an outside band performance. I found this pattern and everyone on Ravelry said it was so quick and easy. I couldn't seem to get gauge though and tried the pattern that the orange cardi is but couldn't handle it either.

A few days after getting my yarn cubbies put up and filled, I grabbed a yarn I have been stashing for a long time (one of my oldest stashings!). Years ago (maybe 7 years?) I bought this yarn in the black colourway. It's called Mexican Wave, for some odd reason, and is 100% acrylic and DK weight. I loved the sweater I originally made (although it's a little big on me and getting pilly and will get it's own post soon!), and planned to make another identical one in this colour (blue base shade) although I wasn't sure if I had enough yarn. Instead, I rather impulsively decided to make the Chevron Lace Cardi. I'm glad I did!Yes, there's a yarn end hanging. I always seem to miss one.I didn't notice any striping until the green striped popped up (it's made from neck down).
Of course, I couldn't make this without having some sort of issue. I started at the neck with a loose chain cause many people commented that you needed a loose chain to prevent rippling. Guess mine wasn't loose enough? Then I did the increase rows, and got set to do the armhole divisions. I looked at the numbers, and shifted them a bit so the front would have a few more sts, and the back a few less. But as I worked the row, it didn't work out!! I checked my math a few times, checked that I had divided as per my math. Then finally I counted my sts and found I was 20 sts short for the size I was making. I was NOT ripping what I had already done. I had been sure I did each increase row at the neck, so I didn't count the sts back then. I had basically the right number of sts for the size smaller and it seemed to be fitting so I went ahead anyway. It still pretty much worked out, although it's tight around my hips so I'm not bothering with buttons. I ended up with a little less than one ball left. Me showing off my new hair cut!


Friday, July 16, 2010

Sew Funny!!

Edited to add links to the sites ("Then I came across a couple sites...")

If you've been reading this for awhile, or know me, you know of my love-hate relationship with sewing. I really want to sew well. But, I alternate being being a perfectionist and being lazy. At the wrong times/situations. With all my health issues this past year, I've put on a bit of weight. I'm also exercising, and just plain running around like crazy and want to be comfortable. I had some cotton knit fabric and was browsing the internet for a yoga pants pattern, either create your own or store bought. Then I came across a couple sites on how to turn a t shirt into a pair of yoga pants! Well, of course, I had no t-shirts I was willing to chop up. And man, Value Village has a LOT of t-shirts. It was actually hard to find one I liked, in a colour I liked, with a graphic I liked. Finally I found this grey one with a line of drinks across the chest and "It's 5:00 somewhere". We didn't go to any of the Margaritaville's on our cruises, but the reports back sure made them sound like fun!
(I'd never wear them in real life with a short shirt, this was during the sewing process!).
So, I had a few sewing issues. Tension, as always. I was happy to use my stretch overcast stitch, and have finished edges at the same time as seaming. But those seams were a little ripply. Then, to attach the 'waistband' (ie..."no longer a college student panel"), I used the straight stretch stitch, but as soon as I put them on, the seam started breaking! I'm not sure what stitch I used to fix that; I'll have to check before I do pair #2.

I thought I had a brilliant idea with the waist band. I read some reports that say the t-shirt fabric stretches out and doesn't stay up. I needed the full width of the sleeves to make the waistband and I noticed the hem on the sleeve was wide enough for elastic. So I stitched the two sleeves together along the sides, pinned them to the pants, and stitched up (and stitched again after totally blowing out the seam trying them on). I started to feed the elastic and got around to the other side seam when reality hit...and the casing was stitched closed. I had to pick out that bit, and some day, go back and handstitch it closed.I wasn't expecting the drinks to end up so high up on my little bum. Something to think about when choosing a shirt...like my next one that has a saying across the chest...
These are totally comfy although the seam across the upper bum makes me think they're falling down all the time, LOL. I used a size L shirt (men's) and used up almost all of it. You probably won't see me out in public in these pants, but they're great for weekends.

Tuesday, July 13, 2010

Sock It To 'Em

So, I finally finished a pair of socks I've been working on for awhile. They are from Interweave Knits "Favorite Socks", Flame Wave Socks by Ann Budd. I used http://www.elann.com/ version of Fixation. I did them two at a time, each one with it's own ball of Espirit. I had a fairly small amount leftover of each ball. I couldn't remember if this yarn shrinks though, so if they did, I have a bit more to lengthen. I had a hard time with the pattern/chart. The first half of the row repeat is fine and logical, but then it shifts and changes and I just couldn't get into it. Several times I nearly stopped the pattern on the instep, but then I was getting so close to being finished, I kept with it.

I did switch needle sizes a couple times through the leg. From about just above the ankle to the toe, I used 3.25mm.


As hard as it is to take pictures of your own feet (Lucy took these photos), it's doubly hard when you add a puppy to the mix. I had the on for only a few minutes....


I'm so glad to have these done. I don't have down when I started, but I think it was early May. Or April. I took them to a guild meeting. There's an older lady there that I can sense the other women don't really like. The socks were sitting on the table, and she picks them up, plays with the yarn (the labels were off), and says "These socks are going to stretch". Yup. Imagine that.


Tuesday, July 06, 2010

Just In Time For Summer....

I finished a pair of Kroy 3ply socks recently. Yeah, the thermometer outside yesterday (when I started writing this), read 45C/111F . Not to mention the Humidex reading will bring that number up much higher. But I still wear my wool socks in the summer. Although, I just bought new sport sandals that are a thong, so I have to make some socks for them.

Cookie A. "Twisted Flowers", less than 2 skeins of Kroy 3ply in a not-too-girly pink. Think I used 2.75mm needles. They fit great, better than the Mingus socks which had a bit of gauge issues.

I was attracted to this pattern as it has a large motif which is somewhat lacey, but not 'lace', and the pattern continues onto the heel. However, on one of the heels, I got a gusset hole. There is a yarn over hole in the pattern right there and somehow it grew.

Worked two at a time, sometimes on one circular, but mostly on two circulars. The one circular was just a little too short. And sometimes, my brain went wonky and I ended up knitting from one needle onto the other needle.

I did most of the pattern without a cable needle, as it's just one stitch held behind/forward. I like to start out with a cable needle, to make sure I'm doing the pattern right though. However, I got a little lazy apparently, on the foot, and messed up the crossings--check out the sock on the right, below.


As if taking pictures of your own feet isn't hard enough...add in a puppy...


Monday, June 21, 2010

Sneak Peak

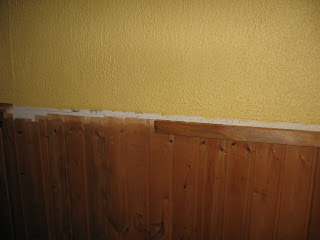
The puppy got me up early this morning so I thought I'd get a head start on the day. I do have a handknitting project I've been wanting to blog about, but I've got to get pictures still. What I do have pictures of is the recent 'remodel' of 'my' room in the basement. When we bought the house, I had forgotten about this area. In this picture, I'm standing about where my big knitting machine is in later pictures. I knew about the area to the left you can't see here, with the shelves, but didn't remember how big the room actually was. Once we moved in, I pictured this as my knitting/music/exercise studio. I was dreaming a little big perhaps, LOL. I'm so glad I got the picture before all the stuff came in! I don't have a 'before' picture of the 'remodel' but it's not a huge change anyway, LOL. The big thing was to get my yarn cubbies put up. I really thought it would be too heavy to put on the wall, but Rob said it would be okay because he could use the top trim of the panelling as support. However, when he started looking for studs, there seemed to be a problem. There weren't ANY!
I encouraged him to take the trim off and drill holes every two inches to find the stud. Surely there had to be a stud. He went across 39" and could not find a vertical piece of wood. We concluded that the drywall was held on at the top and bottom only. The next week, we had flooding in the bar area and had to take down some drywall. We discovered there that the 'studs' were just 1x2's (I think), placed horizontally!The shelves down at the end are interesting. The bottom 'shelf' is where the bottom half of the wall is about 12" out from the upper half, then there is IKEA shelves running across the wall. Shortly after we moved in, I was loading up the shelves, turned to walk away, and the one on the far right fell right off the wall. Apparently it wasn't in the 'stud'. Not all of those Rubbermaid boxes are yarn. 5 boxes do have yarn in them, but they're not stuffed anymore. Two of the five are cone yarn. There is also a small box for cotton yarn, and 4 full bags of Patons Divine that didn't fit in any box. The pink and green boxes have sewing stuff/fabric.

Over here is an XL plastic drawer (behind Scooby) that is one of 4 drawers that holds all my odd balls. There is also an 'underbed' size tote with lace yarns (again, not stuffed full). There's some more fabric, some crafting boxes, and some baby/kid stuff to sell/give away. The metal sawhorse will be for the knitting machine in the front of the picture, and my other machine is currently on a sawhorse in the kitchen so I can take it on the deck. The desk is for my sewing machine. Oh, and there's one large bag of assorted yarn from last year's Spinrite tent sale. So, I'm still a little more spread out than I'd like (the other 3 drawers got brought in here due to the flooding, but I don't like the drawers stacked on each other as it makes them hard to open).

I'm glad to finally get my stereo up again. I had fun filling the cubbies. When I saw it, I thought "Gee, those are small cubbies" but then I put in the green yarn in the lower left one, and there was still lots of room! I had planned on using it for 'project' yarns--the yarns I had enough of for a whole sweater. However, many of those yarns are actually bagged and I didn't want to de-bag them just to put them on show (for only myself, really). So I doubled up the cubbies with yarns that I'm hoping to use soon, and it's helped--I started a new project the very next day with one of the yarns, not what I was planning to make with it, but still a good choice! The cone tree I got from an older lady in town when I posted on www.kijiji.com that I was looking for cone yarn. I got a few cones from her too. Okay. More than a few (many of them are suitable just for waste yarn).
It's not totally finished; I still have to figure out what to do with my 4 odd ball drawers, and the stuff that is just stored in the corner, but I'm loving the room now. Esp. with the awesome light that got put up. It's 24 hours of daylight in there now!


Thursday, June 17, 2010

Dress Up

I bought Meg a cute and simple knit dress at Value Village and figured I could use it as a template to make her more. Just before that, someone in one of the Yahoo machine knitting groups I'm in asked about making a sideways knitted skirt. I spelled out how I would do it, and I was really intrigued with actually trying it out. I tried several ways of doing short row wedges to get the flare of the lower edge. Then I measured out her dress and wanted to make a paper pattern for my knit contour. I initially wanted to do the entire dress in one piece. However, even though she's just a girl, the skirt would be too long to graph--the length is the width when you do it sideways and it was too wide for the narrow contour paper. Just the skirt itself was too long (wide when knitted) to chart out. And it would be challenging to graph out. So I opted to just graph the top and the sleeve (oh, that was fun!), and knit the skirt sideways without a pattern.To make the skirt, I did some math. Yeah, lots of math in knitting! Then, I put all but the bottom two sts in hold, and started doing short rows, putting 4 sts back in work each time, and not wrapping the out of work needle so that there'd be the tiniest little hole (for detail, and for speed, LOL). Originally I was going to do 2sts each time, but the math indicated that would make the skirt extremely wide at the bottom. I didn't go all the way up to the waist with the short rows, as I wanted it flat over the belly. However, I think her shape might work better with the wedges going all the way up. I think a much more full skirt would be more youthful, too.

Then I knit the bodice, using the knit contour pattern. I don't remember if I did the sleeves next or the waistband. I know that while I was trying to chart the sleeves, I realized I could have just used the knit contour pattern that came with the machine for a child's sweater with set in sleeves! Oh well, the sleeves did fit in the end.

The waistband/casing is taken directly from "Window Dressing", the beige bathing suit coverup I made and showed again in the last post. I wanted a casing so I could put in ribbon or elastic if needed, but it didn't need it. I think it ended up being a bit more work than necessary for the dress (and also because I was tired when I was doing it and that's never good).You can see where the stitches become 'horizontal' for the skirt. That took many attempts to get the right pattern of stitches to pick up. I tried basic math at first, but that didn't work, so I tried the general row to stitch ratio and that didn't work. Sadly, I should have written down what finally did work. I think I picked up two rows, skipped a row, then three rows, skipped a row...You For around the neckline, I did a simple single crochet. I don't always have good luck with this, usually ending up with it pulled in or flared out. But it turned out good. The front neckline actually already laid flat, but the back neck edge did curl where it was cast off.
Finally, to finish it off, I did a 'worm trim' around the bottom, using 3 sts and 10 rows and skipping two rows between each loop.

I wasn't sure about the sizing on the bodice, and adding the casing. As a result, the casing is lower than originally planned, but this means as she grows, the dress will just become empire waist. There actually is less flare in the skirt than I wanted, but the math worked out good for 10 wedges, 30 straight rows between them (for a total of 300 rows at the waist, and I'm not sure off hand how many around the bottom; I think that's written down if anyone's interested). Combine with Meg's physique and the pale, dusty pink colour, I think the dress makes her look like a Ukranian mother of the bride. But she loves it.

Oh, and the dress is made from Tamm Diamante, T7 on the Singer 327. I haven't weighed it, but there's still a lot of yarn left on the cone. Plus, I have another full cone of the yarn in a co-ordinating white/purple/pink....

Wednesday, June 16, 2010

Economics and Knitting

I received a comment on the post about my Magenta Snuggy sweater, about how much did it cost to make it. That's not exactly an easy question to answer. This post might seem rather jumbled, LOL, but it's just one of those topics that one thing leads to another.
Many people turn to knitting because they think it will be a cheap way to make sweaters, hats, etc. And, it can be. But anyone who has been seduced by a cashmere sweater or a silk scarf and decides to knit their own, can tell you that it's not always economic to DIY.

In the fall, just after moving back to Whitby, I had a dental emergency. Luckily, my old dentist was happy to see me. I took a new sock to start, using some brown Sweet Sheep sock yarn that I had gotten at the K-W Knitters Fair, for only $10 (or less). The first question out of the staffs' mouths was "Why knit socks?". Because handknit/wool socks are wonderful, and if I were to buy them (HK in hand dyed wool), they cost $60 easily. They thought it was absurd to pay $60 for a pair of socks. I made it clear that I would never do that, and my yarn cost are never more than $15 for a pair of socks, but I try to get the best deals. They still thought it was crazy to knit socks. Now, my striped, felted, machine knit purse made out of scraps of wool (many of which I had gotten as donations for an art exhibit project), was cool and 'worth it'. The dentist rarely wore socks anyway. However, I think he carried a purse even less.

I have made mention before that I'm a very frugal shopper, but also that I have a weakness for rescuing orphaned and abandoned yarn. Rarely do I pay full price for yarn. One project I did recently that I actually could quote a price on, is the thrummed mittens from Fleece Artist. Apparently I payed $24.95 plus tax?! I did have enough of the thrums for another pair of mittens, though. You could easily pay $25 for a pair of thrummed mittens at a craft show, but they wouldn't be made with Fleece Artist. Because I made them for a special gift, I can't really put an absolute cost on them. All I know is that I wouldn't pay $25 for cheaply made/materials thrummed mittens because I know I could do it cheaper (with my own inexpensive (vs. cheap) materials).


But factor in time. Most of my knitting time is during my 45 minute soap watching time and during any evening TV watching, as well as driving time and appointment waiting times, etc. Other than my self-imposed mid-day break, I RARELY sit down with the sole intent of knitting. Now, machine knitting is different because I can't watch TV at the same time, or do it in the truck.


Now, back to material costs. Oy. This is such a toughy. How much did that sweater cost? I don't know where/when I got the yarn. Or even what yarn it was. However, $25 should be able to get you some similar cotton yarn, but anything larger than me would probably need more. Ravelry has a feature where you can input the yarn costs for projects, but I so rarely know it!

Oh, there is one I can give a cost breakdown for:

I bought the yarn, Yeoman Panama, at full price from www.cardiknits.com. A quick email to Pat let me know that it's $37.95 (wow, I'm surprised that I spent that much, but it is a great yarn!). Since it's online, there's also the shipping factor, oh, and the cost of the KnitWords magazine subscription. I've gotten a lot of use out of that issue, so let's call that part $4.00 (although, up to $12 would be acceptable for such a complex pattern). Oh, and the 35cents for the buttons. This one took me a year to make as I didn't realize I had bitten off way more than I could knit at the time. I had yarn left over, but not enough to make something on it's own. So, what did it cost to make? How much would I pay for something like it in a store? Well....Despite how much I love what I made, I wouldn't buy something like it!

I just bought some silk/alpaca yarn at $16 US (plus shipping). The Canadian dollar was pretty much at par that day, so it was worth it--but I wouldn't have payed full price--I think it was on sale for 1/2 price. I should be able to get a sweater out of it, using the standard gauge machine.

But to buy worsted weight, good quality wool at full price to make a sweater? No way. I just can't spend $120 to make a Noro sweater, or even $60 to make one with Patons Classic Wool. I did buy bags of Classic Wool at the factory outlet tent sale, but not in my most favourite, first choice colours. Cost vs Love. I would rather make a sweater out of a not-totally-loved colour of Classic Wool then in a colour of Red Heart or Bernat Satin that I do love and that would cost about the same. But that's because I knit primarily because I love the action of making something with time that would otherwise be wasted. The wearable object (or blanket, etc) at the end is the bonus, to me. I love learning new techniques, altering patterns, etc. I'm at the point now where I don't have to choose the cheapest yarn out there just to get my fix. I have learned where to get better yarns at good prices. And this means that when I must buy a yarn like Panama, or the mitten kit, I can really value it and appreciate it and not feel bad about spending the money.

So, if you are a process knitter, then cost perhaps isn't much of a factor. You could knit with twine. But if you are a product knitter, then you'll want to spend more, or at least learn how to spend less. If you knit a lot, you might want to be frugal. If you knit only a few special items a year, then higher costs might not bother you.

Would it be helpful or interesting for me to include more about yarn costs when I post projects?

Friday, June 11, 2010

Machine Knit Wool Soaker/Longies

So, faithful readers, you do realize that when I say "tomorrow" that the blogland definition of tomorrow is different than the real world? :)

Back to the machine knit soakers/longies. I prefer shorts or longie style because they were never worn as daywear, and I think wool soakers are a bit much to wear under pants, and I just couldn't get a good fit on Meg with traditional soakers. Just by extending the legs a little, they became shorts, which are also better at dealing with diaper blowouts.
This is a sketch of what the machine knit longies look like before sewing up. Hopefully you can click on the picture to make it bigger. I'll go through it set by step.


Make a large swatch and wash it. Yes. Or else you won't know what will happen to the soaker when you wash it! Figure out your row and stitch gauge, and measure your baby over their diaper...waist, hips, thighs, rise (front and back). Figure out how many to cast on (you don't need much ease over the diaper, but a little is good).
Use waste yarn and an open cast on and cast on. Knit for about an inch using just a slightly tighter gauge, then decide how you want the fold of the casing to be...picot edge? garter edge? nothing requiring extra work? Work your turn row, then switch to the 'real' tension/gauge and knit the same number of rows as the first half of the casing.

Pick up the open stitches of the cast on, remove the waste yarn and using a larger tension (ie T9 instead of T5, or KP4 instead of 3), knit one row to 'seal' the casing.
Knit another inch at the main tension. Now, we're going to do some short rows to raise up the back waistband. The short rows will be in the middle section only, which is the back 'bum'. I find it helpful to mark on the needlebed where the side edges (hip) will be. The middle bum in '0' and the center front seam is what ever your outer stitch is, so the hip 'seam' is halfway between. So, if you casted on 100 sts, from 50L to 50R, the hip 'seams' are at 25L and 25R.


If the carriage is on the left, put all the stitches from the hip seam to the right edge in hold/D position (all the way forward). Knit across. You need to take the yarn under the first needle in hold position (the one next to the one in working position) and bring it back up between the first two needles in hold position (make sure it stays in the carriage). This is just like 'wrapping' a short row in handknitting. Now, put the same needles in hold on the other side--from the hip seam out to the edge--and knit across, again wrapping the first hold position needle that you came to.
Now...you can get fancy and do math, or just eyeball it. It's a diaper cover! Just eyeball! You want to do about 1 to 2 inches worth of short rows, what is your row gauge? You've already done two rows, so subtract those. How many short rows are now needed? How many sts do you have in work position (hint--half of what you cast on, as we're working on the backside only now). You want to work short rows so you put in hold about 1/3 of the needles on each side of the backside. I mark this on the needlebed too. So, the back side is 25L-0-25R, so that means 1/3 of that is about 16sts. I'd work short rows until you have 16 more needles out of work on each side, and 18 needles in work in the middle. If you want 10 more rows, you will put 2 needles out of work on the side opposite the carriage before knitting across, but on a few of the rows, just do one needle out of work. So, a bit of math, a bit of eyeballing :)

(If you need help with short rows, just holler, or look for Diana Sullivan's videos on YouTube).

After doing the short rows, put the needles in hold, back into work, on the side opposite the carriage, and go slowly across. Repeat for the other side. Then continue to knit straight until you get to about 2" above where the crotch seam will be. Here, I do short rows again, but I do them like a wedge...

Start like the earlier short rows, and when you get down to 1/3 sts in work, instead of knitting all the way across, do increasing short rows by putting 2 or 3 or 4 or 5 needles back into work on the side opposite the carriage. Again, you're making a diaper cover, not a wedding dress. Finish off by knitting to the length required (it's easier to measure along the front seam, but good idea to check the center back too. You can take it off on waste yarn or just do your best on the machine...or, if you had done the swatch and know your row gauge...)


Now, to work one leg at a time. Cast off, on the side next to the carriage, one inch (a little less for small sizes). This is "A" on the sketch. Put the needles on the far side of 0 to hold/D, but keep in work "A" on the other side of 0.

What this means is, if the carriage is on the right, cast off one inch; let's say that's 5 sts. Still going with our 100st example, put all the sts to the left side of 0 into hold position, except 5L-0. Knit across (you'll knit from 45R to 5L). Now, cast off that one inch of sts that was on the far side of 0 (L5-L1), as well as another one inch worth continuing in the same direction (R1-R5). This means, now that our carriage is on the left, cast off 5L-0-5R then knit across. You'll now be working on 6R-45R.


Work the leg for the length you want. Or, take the yarn you have left and split it in two even balls, and work till you have a few yards left for seaming. You can rib the bottom, do seed stitch, garter stitch, let it roll, whatever. You'll need to add claw weights to the side that's in hold position.

To make other leg, have carriage on left, and cast off "A". You should now have 45L-6L in work. Finish this leg like the other one!


I'm sure this all seems very wordy and complicated. Just go step by step, and remember...it's a diaper cover! And, it's made quickly, so you can rip it back, re-knit, and still be done faster than if you handknit it!


Let me know if you need more info!


Wednesday, June 09, 2010

Soaked

I was doing so great at finishing up projects, new and old, until we got a puppy, in April. Suddenly, my great run of machine knitting ended as I couldn't go down there for more than a few minutes. Puppy couldn't come into the TV room either unless directly supervised and it's hard to knit while stopping a puppy from eating everything. But, he's calming down, and has a pretty predictable routine, so I'm getting back on track too.


Back at the May meeting of my local handknitting guild, someone was showing a baby outfit, and someone else mentioned that new moms today probably don't even know what a soaker is. I suppose I'm not a 'new' mom, but I didn't get the chance to insert my experience in the conversation. I haven't really written much about soakers here either, so I thought I'd do a post.


I'm not sure when I first learned about wool soakers. I had old knitting books, with baby "panties" and "soakers", but they went up to a 12 month size only. When Huey was born (he turned 10 last week!!), I looked into cloth diapers ("CD"), but we couldn't put out the money for the start up cost. And yes, I'm still kicking myself about that. I don't think I knew about soakers then though. When Meg was turning 2 (Nov 2007), I decided to ask on Freecycle for some cloth diapers and that was really the start of a new friendship with someone I had met in a parenting group but then connected with on Freecycle. Hi Sarah!! She told me that it was super easy to sew diapers. Oh my. She didn't tell me that it was addicting too. It's a whole new world of sewing. Specialty fabrics, notions, techniques...I'm not the best sewer (I'm impatient and don't always care about little details like matching thread), but I threw myself into it. I joined a Yahoo CD sewing group. There, many moms used "PUL covers" (like plastic pants, but it's a clear film bonded to fabric, often really cool, themed/licensed fabric). That's what I started with. Many moms though, were hooked on wool covers. Now, I'm a knitter, LOL, and knit socks, and know the many benefits of wool. But a wool diaper cover? I just couldn't quite get into it.


Eventually though, I wasn't impressed with PUL, esp. for at night. Many moms told me I HAD to try wool, esp. since I could knit. But instead, I got some old sweaters and tried sewn wool covers. I couldn't get the fit right for Meg--I think because she was already bigger than most patterns out there!

Finally, I decided to get some Peace Fleece wool as it was recommended and I could get it locally. I also had some plain blue yarn that seemed to be wool. I opted to do these longies (wool diaper covers that double as pants) on the knitting machine, and although they took awhile to get the sizing right, it was still fast. They were made in two pieces, with a seam at the center front and center bum. I added short rows to allow room for the diaper and bring the back rise up to prevent diaper crack, LOL.Rob thinks the striped longies look like hockey pants!
(Unfortunately, these longies had an accident--I was at my parents and they needed to be lanolized. To dry them faster I hung them over/next to the woodstove after a fire had been put out. The stove itself was pretty cool, but the metal trim stayed hot and burned the pants. I unravelled the leg to the burn spot, and re-knit using the rest of the yarn after cutting off the burned section. Then I unravelled the other leg to match the new shorter one).I had some yarn left over, so I tried the Curly Purly handknit soaker pattern. I wasn't thrilled with the fit, again cause Meg was bigger than the pattern (and built differently). Then I handknit the "Spare Ribs Shoaker" (not a typo) pattern, which caused a bit of headache to enlarge it. I liked that one, but the yarn I used felted very easily, so the benefit of the ribbing was lost. After that, I stuck to refining a machine knit longie.This bright orange one was Briggs & Little wool which we dyed orange. I think that was one whole skein of either Heritage or Regal. It faded quite a bit, but we still use it. I think I showed pictures before of a dusty rose longie I made, with cables up the sides, also in B&L. It's not the softest wool, but it's very affordable, esp. when bought at the Kitchener-Waterloo Knitter's Fair.I decided to 'splurge' again on two skeins of Peace Fleece. I did them on the machine, but did hand manipulated ribbing up the center front/back. I love Peace Fleece so much, I splurged and bought some to make me a sweater!This pair is one skein of Lionbrand Fisherman's Wool, dyed with Kool Aid and Wilton's icing dyes. The rise looks really long, but over a nighttime diaper, it's actually not too high. Because of Meg's belly shape, everything tends to slip down really low, unless made extra tall. Plus, she often doesn't wear 'real' pajamas, so the longer body here helps for warmth. They come down to just above her knees.


During all this knitting, I realized, a few pairs back, that I could knit them in one piece. I could put the seam up the center front, or the center back (along with leg seams on the inside). I decided to do the seam at the center front for two reasons. This allowed me to work short rows across the back side, and not have to try to remember what I did on one side to match the second side. I could work back and forth across the entire backside. Also, I could leave the casing open at the center front to tie a drawstring.

I didn't get the crotch gusset quite like a handknit longie, but it's still good. Tomorrow, I'll post more details on how I actually made the one piece longies. It won't be an actual 'pattern' as I'm sure there's not many people out there that need a pattern for a 63lb 4 year old's longies, LOL, but it'll be a recipe instead.


One other piece of the puzzle that 'new' moms know about that 'older' moms don't, is lanolizing. None of my old patterns mention it at all. This is probably for a couple reasons. Moms probably had more soakers than we use so they were in less rotation, and they probably got washed more frequently. The wool also was less processed and probably had more lanolin left in it. As well, diapers were changed very frequently, instead of the 'how long can we get' mentality that disposables have created. Lanolizing though, is the little secret that make wool soakers the ideal night time diaper cover!