I just wanted to start off with saying that this is my 400th post!! I started....4 years ago last month!
I recently came across this fab. blog: newdressaday.wordpress.com
The basic premise is that this young lady got laid off from her boring job and decided to not clothes shop for a year. She gave herself a budget of $365 and the mission of wearing re-fashioned thrifted items for the year.
I really like what she creates from the thrifted items. I have been glued to the computer trying to read the old posts as it's almost near the end of her year (she's on day 284). However, I don't think I'll be following in her footsteps anytime soon, for a few reasons:
1) She lives in California. Most of what she creates is suited to a warm climate, not Ontario. Sure, I love dresses too, but come October, they're not too practical. It's much harder to alter pants into something current and the right size.
2) She's young (30). She can wear clothes from the 80s and not look like she pulled them straight out of her closet. It's really hard to take something so popular in the 80s and wear it at my age, even with significant alteration.
3) She's slender. She can find clothes in more size ranges and take them in. When you're already at the larger end of regular sizes, that doesn't leave much room for alterations.
4) Lifestyle--I don't need beaded, sparkly, party shirts or dresses most of the year. I need casual clothes that don't look out of place in the school yard at 3:10. As well, I don't have the time needed to make an item every day.
4) Lack of resources. Back in Orangeville, there were two thrift shops two doors apart in the downtown (which had free parking). Here, there is Value Village which although large, is priced more like a consignment shop than a thrift store. There's one other thrift shop I know about but haven't been too. The Goodwill closed last year. There are some shops in Oshawa, but I don't get over there much. Last year I bought some items with the idea of making a type of cloth diaper. I needed large pieces of polyester. I bought a couple "muumuus" and was surprised at the price....definitely not $1 here! I had been thinking of altering them for myself since I'm not going to make the diapers now. Seeing her blog has given me the push to do it. Even if I pay $10 for a muumuu, that's still cheaper than the cost to buy the fabric new.
Thursday, September 09, 2010

Saturday, September 04, 2010
Way Back When It Was Summer...
I bought a pair of black and red yoga capri pants waaaaayyy back in late spring. I thought, gee, I have this huge cone of fine red yarn, I'll whip up a red tank top on the Singer 327. With the knit contour/leader, AND tuck stitch! 
Well, I did some swatches, single and double strand. I liked the double strand but the definition wasn't there in the tuck pattern and it did seem heavy. So I went with the single strand, 2/24 I think the yarn is.
Some of the knitting went great! Some, not so great. I forgot that the tuck side is the right side and finally learned for myself why patterns for garments like this say to take one side off on waste yarn when doing the other side of the neck. The neck band took so long to pick up sts, and cast off.
I still haven't sewn it up. I toyed with doing it on my sewing machine. I don't' know. It might need armbands, I guess. Plus it needs hems. That aspect of tuck st as right side sort of sucks. Is there any other option? Knit the band, take off on waste yarn, turn....you still have to get those sts back on the latches, and the gauge difference means different number of sts...
It's freezing here today and I just don't know what to do about this top. Finish it and wear it like mad during Indian Summer? Go back to sewing for tops like this?
Wednesday, September 01, 2010
Sew I've Been Thinking
Do you have any ideas, theories, ideology that you believe, but know it's silly, unfounded, or just plain dumb? In particular, ideas about clothing, sewing, knitting, etc?
I like dresses, especially with patterns. Not really wild patterns usually, though. And I don't wear them as often as I'd like. I like skirts with patterns, but I have a hard time finding skirts that fit and look good on me. Strangely though, I won't wear a skirt (or pants/shorts) in a pattern with a matching patterned shirt. Even if it does look like a patterned dress. Why is this? I think maybe I think it looks too "contrived", like I tried too hard, while a dress is just one piece to throw on. Silly? And, I'd really like to wear patterned pants, or shorts, but never do. Crazy.
I have another bedsheet that I want to use up for sewing. It's an old Sears one, a pale green with floral pattern (Rob says it looks "Amish"). The top of the sheet has a wide greeny-white band with dark green piping separating it from the sheet. Being doubled, I thought it make a good top piece for the dress---I'm thinking of doing the pattern you can see in the picture on this post; it goes straight across the chest. However, when I hold it up to me, it looks funny not having my whole bosom in the white part; the proportions are just not right. I could use this edge for the bottom hem, although that will limit how full the skirt can be, and it might feel too "sheetish". But let's face it...it IS a sheet, and it DOES look like a sheet. Perhaps I should make the dress for one of my girls--could probably make matching dresses although Lucy would never allow them to go out in public as matching. Make one with the band at the top and one at the bottom? Still too matching (when I made their dresses this month, I suggested same fabric, different dress and she refused). Maybe I should make a pair of "sheet pants" and work on creating a pants pattern? I KNOW I'd never leave the house in them though, and as school is starting on Tuesday, there's only two days a week I could possibly not leave the house.
My other silly notion. When I'm at the thrift shop looking for sheets (or other clothing to cut up or modify), I don't want to take the 'nice' stuff because I feel that someone would really like to have that item as it is. There were some great sheet sets that I passed up because hey---some people actually use both sheets and they still looked like great sheets. A passed up a duvet cover for the same reason. Silly? Like when looking for wool sweaters to cut up and felt....someone might really like to have the 'nice' sweaters.
What are your silly ideas? I just found the "Stats" tab on the dashboard here, and can tell that there really are people reading my blog, LOL. So, let me hear from you!
I like dresses, especially with patterns. Not really wild patterns usually, though. And I don't wear them as often as I'd like. I like skirts with patterns, but I have a hard time finding skirts that fit and look good on me. Strangely though, I won't wear a skirt (or pants/shorts) in a pattern with a matching patterned shirt. Even if it does look like a patterned dress. Why is this? I think maybe I think it looks too "contrived", like I tried too hard, while a dress is just one piece to throw on. Silly? And, I'd really like to wear patterned pants, or shorts, but never do. Crazy.
I have another bedsheet that I want to use up for sewing. It's an old Sears one, a pale green with floral pattern (Rob says it looks "Amish"). The top of the sheet has a wide greeny-white band with dark green piping separating it from the sheet. Being doubled, I thought it make a good top piece for the dress---I'm thinking of doing the pattern you can see in the picture on this post; it goes straight across the chest. However, when I hold it up to me, it looks funny not having my whole bosom in the white part; the proportions are just not right. I could use this edge for the bottom hem, although that will limit how full the skirt can be, and it might feel too "sheetish". But let's face it...it IS a sheet, and it DOES look like a sheet. Perhaps I should make the dress for one of my girls--could probably make matching dresses although Lucy would never allow them to go out in public as matching. Make one with the band at the top and one at the bottom? Still too matching (when I made their dresses this month, I suggested same fabric, different dress and she refused). Maybe I should make a pair of "sheet pants" and work on creating a pants pattern? I KNOW I'd never leave the house in them though, and as school is starting on Tuesday, there's only two days a week I could possibly not leave the house.
My other silly notion. When I'm at the thrift shop looking for sheets (or other clothing to cut up or modify), I don't want to take the 'nice' stuff because I feel that someone would really like to have that item as it is. There were some great sheet sets that I passed up because hey---some people actually use both sheets and they still looked like great sheets. A passed up a duvet cover for the same reason. Silly? Like when looking for wool sweaters to cut up and felt....someone might really like to have the 'nice' sweaters.
What are your silly ideas? I just found the "Stats" tab on the dashboard here, and can tell that there really are people reading my blog, LOL. So, let me hear from you!
Sunday, August 29, 2010
Marbles
I started this 'little' project as both a stash buster and a mindless knit for movie watching. I had been at Michaels and they had Red Heart Strata on sale, and it seems identical to James Brett Marble. I'd used the marble before and really liked it, but really felt it was NOT a DK yarn like the label suggests. The RH Strata had a more realistic gauge on it. I had one ball of the Marble in the blues so I bought one ball of the RH. I planned to alternate balls for the different sections; that didn't quite happen.
It starts off with an obscene length of garter stitch, 6 sts wide. I did the first tie, got going on the triangle shape, and decided after a fair ways along that it was at the wrong gauge for the yarn. I think I ripped back to the end of the tie. While finishing at the other end, I think I remembered that there had been gauge issues and instead of knitting the same number of garter ridges I had to measure instead (I don't think the difference in gauge is noticeable). It's called Judy's Grandmother's Baby Sweater
It starts off with an obscene length of garter stitch, 6 sts wide. I did the first tie, got going on the triangle shape, and decided after a fair ways along that it was at the wrong gauge for the yarn. I think I ripped back to the end of the tie. While finishing at the other end, I think I remembered that there had been gauge issues and instead of knitting the same number of garter ridges I had to measure instead (I don't think the difference in gauge is noticeable).
It's called Judy's Grandmother's Baby Sweater and is from the book "Greetings From Knit Cafe". A quick stroll through my blog revealed that I posted about getting this book from the library, Jan 2008. So, it took me a little over 2 1/2 years to get it made. And into the gift stash box it goes!
Thursday, August 26, 2010
Not Perfect...
If anyone follows "The FlyLady" you know the expression "Housework not done perfectly still blesses the family". It's a way of getting rid of the perfectionism that paralyzes many people from even trying.
Today, I was scanning my Yahoo groups, and one is devoted to a lace designer. Someone posted they had finished a shawl of their own design, for a new granddaughter. I clicked to see the pictures on Flickr. Something just didn't look right in a couple pictures, then I came to a close up. I could see immediately that there was major errors in the middle row of three rows of a large pinecone design. Not just a forgotten yarn over, but each pinecone in the row was wrong. It's very obvious as it's a large scale pattern, and the first and last row are correct (I don't mean row 1 and 3 of the pattern, I mean rows 1 and 3 of whole motifs, each motif is probably 24 rows). This might not have shown up during knitting, due to the large number of sts on the needles and the nature of lace, but wow, it shows up in the blocked product.
I would be so heartbroken to see this during blocking. I don't think I could post the pictures to a group with over 3000 members. I see errors in my knitting all the time, and it is a challenge deciding what I can live with and what I can't; I often use Rob as my judge.
However, the grandbaby won't be able to spot these errors. Knitting done imperfectly still blesses the receiver. Knit on.
Today, I was scanning my Yahoo groups, and one is devoted to a lace designer. Someone posted they had finished a shawl of their own design, for a new granddaughter. I clicked to see the pictures on Flickr. Something just didn't look right in a couple pictures, then I came to a close up. I could see immediately that there was major errors in the middle row of three rows of a large pinecone design. Not just a forgotten yarn over, but each pinecone in the row was wrong. It's very obvious as it's a large scale pattern, and the first and last row are correct (I don't mean row 1 and 3 of the pattern, I mean rows 1 and 3 of whole motifs, each motif is probably 24 rows). This might not have shown up during knitting, due to the large number of sts on the needles and the nature of lace, but wow, it shows up in the blocked product.
I would be so heartbroken to see this during blocking. I don't think I could post the pictures to a group with over 3000 members. I see errors in my knitting all the time, and it is a challenge deciding what I can live with and what I can't; I often use Rob as my judge.
However, the grandbaby won't be able to spot these errors. Knitting done imperfectly still blesses the receiver. Knit on.
Monday, August 23, 2010
The Empire Strikes Back (Part 3)
I measured myself, measured the triangle, stared at the first two dresses...and drew a new curve on my pattern piece. The printed piece here is actually for another bodice in the pattern set, but they all have the same bottom curve. Wow, when they say patterns are made for B cup chests.....now, I could have gone smaller, and done the 'squish them in' look, but I wanted some definition and support.
 And here it is! I'm really happy with it! I do see that the skirt pulls up in the middle of the bodice seam and the ribbon (not sewn down) emphasizes this as it's straight across. I really wanted to use the ribbon. A little history now. This fabric is the same fabric as the very first dress, but in a different colour. I had bought about 1.5m and sliced it down the length, then stitched the ends together, and made a really long ring sling. I liked the length, but it was a little slippery. Later on, I took one of the pieces and using this ribbon, made a bathing suit wrap for the cruise. However, once wet, it was cold and icky (it's a 'washable rayon'). And it looked odd. So, the two pieces sat around just waiting. I bought some FOE (fold over elastic) in turquoise, thinking I might make a shirt like I've done before, or a dress. But Meg got it and cut it into a couple pieces. I probably could have used it across the back instead of making an 'invisible casing'. I thought I might use the ribbon for the straps, but after reading the sundress tutorial, and seeing how it improved the fit and look of the test dresses, I assumed it would work for this one too.
 I won't wear the ribbon again, unless I sew it into the seams and tie it behind me (maybe if I lose some weight).
 I did lower the top of the bodice, as per Lucy's instructions, and I think it could go lower, although then it'd have to be lower in the middle too, and I don't know how low I could go and still be modest. I think, with the well fitting cups, that I could probably go quite a bit lower. I guess not every dress has to be suitable for a family reunion, LOL. I just didn't want to give any old men a heart attack. However, the bodice does make me look rather large. But, then again, I guess I actually am!
 Wow, when they say patterns are made for B cup chests.....now, I could have gone smaller, and done the 'squish them in' look, but I wanted some definition and support.
And here it is! I'm really happy with it! I do see that the skirt pulls up in the middle of the bodice seam and the ribbon (not sewn down) emphasizes this as it's straight across. I really wanted to use the ribbon. A little history now. This fabric is the same fabric as the very first dress, but in a different colour. I had bought about 1.5m and sliced it down the length, then stitched the ends together, and made a really long ring sling. I liked the length, but it was a little slippery. Later on, I took one of the pieces and using this ribbon, made a bathing suit wrap for the cruise. However, once wet, it was cold and icky (it's a 'washable rayon'). And it looked odd. So, the two pieces sat around just waiting. I bought some FOE (fold over elastic) in turquoise, thinking I might make a shirt like I've done before, or a dress. But Meg got it and cut it into a couple pieces. I probably could have used it across the back instead of making an 'invisible casing'. I thought I might use the ribbon for the straps, but after reading the sundress tutorial, and seeing how it improved the fit and look of the test dresses, I assumed it would work for this one too.
Wow, when they say patterns are made for B cup chests.....now, I could have gone smaller, and done the 'squish them in' look, but I wanted some definition and support.
And here it is! I'm really happy with it! I do see that the skirt pulls up in the middle of the bodice seam and the ribbon (not sewn down) emphasizes this as it's straight across. I really wanted to use the ribbon. A little history now. This fabric is the same fabric as the very first dress, but in a different colour. I had bought about 1.5m and sliced it down the length, then stitched the ends together, and made a really long ring sling. I liked the length, but it was a little slippery. Later on, I took one of the pieces and using this ribbon, made a bathing suit wrap for the cruise. However, once wet, it was cold and icky (it's a 'washable rayon'). And it looked odd. So, the two pieces sat around just waiting. I bought some FOE (fold over elastic) in turquoise, thinking I might make a shirt like I've done before, or a dress. But Meg got it and cut it into a couple pieces. I probably could have used it across the back instead of making an 'invisible casing'. I thought I might use the ribbon for the straps, but after reading the sundress tutorial, and seeing how it improved the fit and look of the test dresses, I assumed it would work for this one too. I won't wear the ribbon again, unless I sew it into the seams and tie it behind me (maybe if I lose some weight).
 I did lower the top of the bodice, as per Lucy's instructions, and I think it could go lower, although then it'd have to be lower in the middle too, and I don't know how low I could go and still be modest. I think, with the well fitting cups, that I could probably go quite a bit lower. I guess not every dress has to be suitable for a family reunion, LOL. I just didn't want to give any old men a heart attack. However, the bodice does make me look rather large. But, then again, I guess I actually am!
I do need to do some finishing to the seam allowances, and hem the beige roses dress. I spent yesterday tidying up my sewing room though, and I'm sort of 'sewn out' for the time being. It really bothers my neck. And while I would LOVE to make a few more summer dresses (I love wearing a dress as it's more forgiving of my weight increase and I have been really desperate for clothes this summer), really, how much more summer is there?

The Rise of the Empire (Part 2)
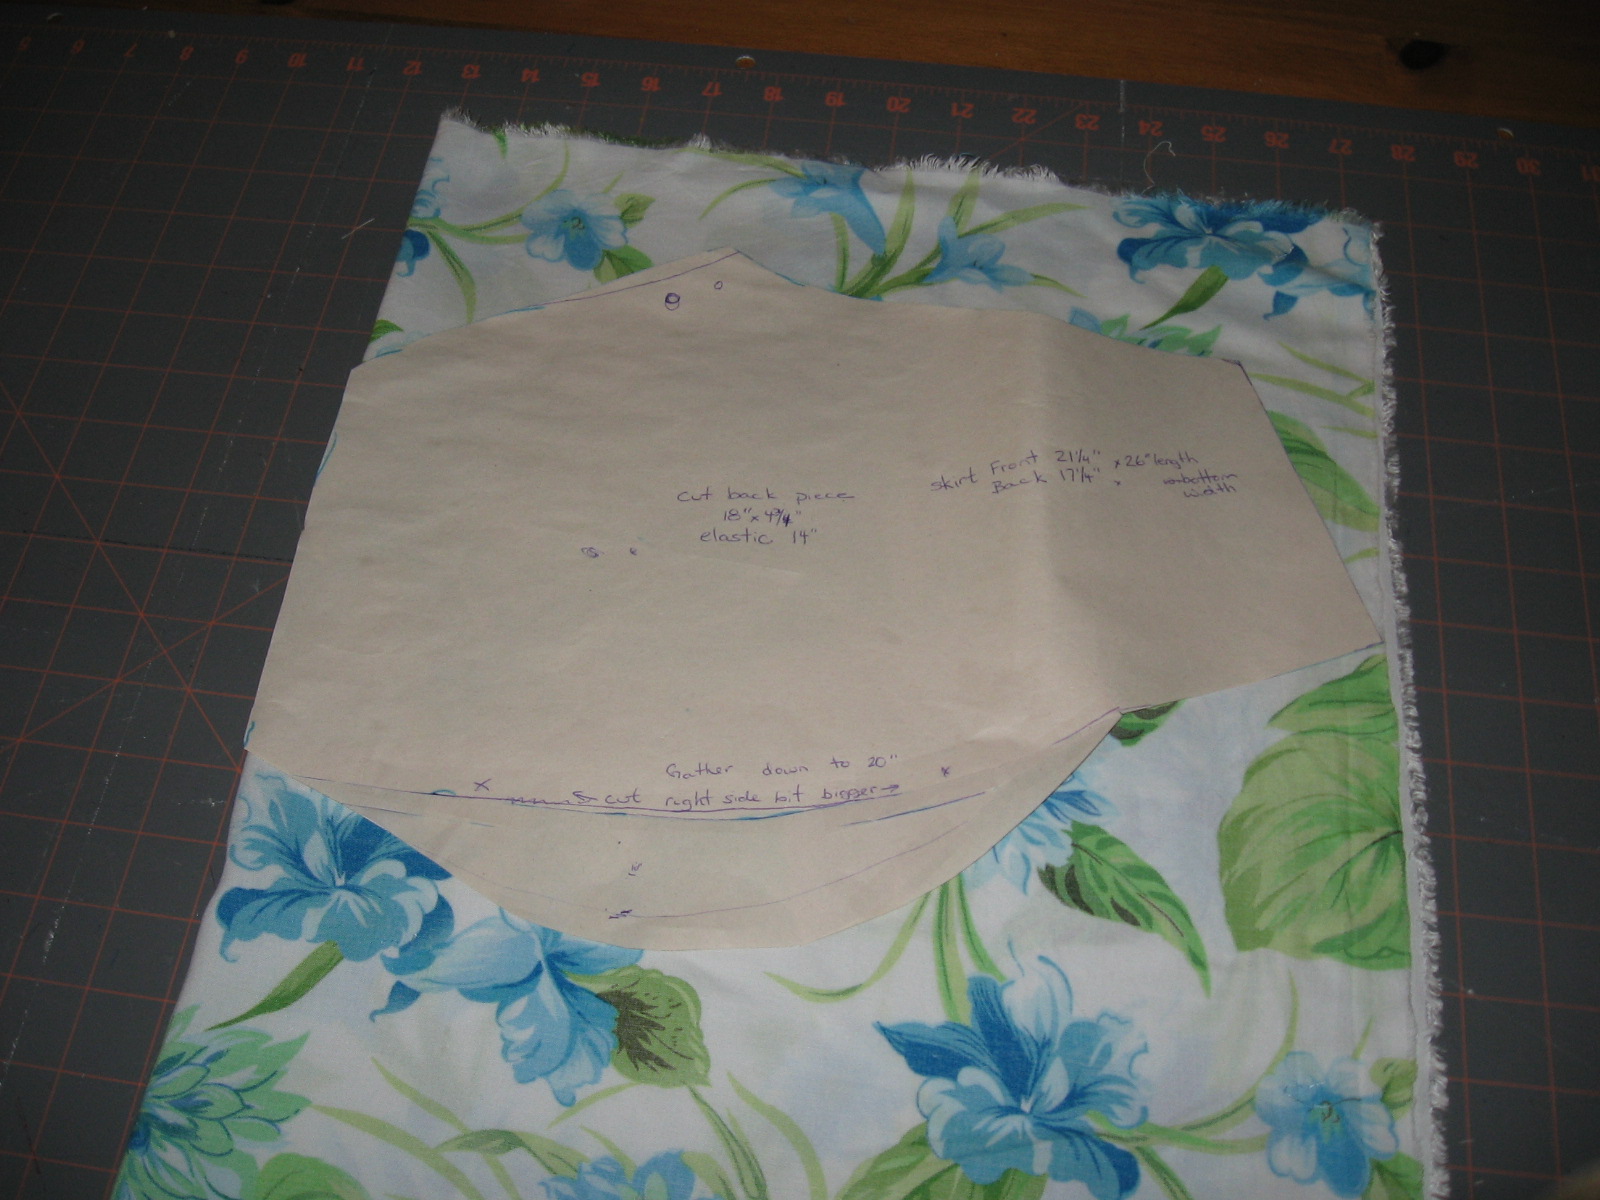
I didn't have any other fabric I wanted to possibly 'waste' making muslins, so Meg and I went to Value Village to search for sheets and fabric to use. I got this 2 yard piece, with original Wal-Mart tag on it...from 1997. It totally reminded me of the wallpaper at my parents home in 1997.
I found the sketch for the top from the teen book, so I decided to try it, just to see how the mechanics of it worked. You use a triangle based on your cup size, and then hack off the bottom corners based also on your cup size. I decided to err on the side of caution (and my larger boob) and go with a DD cup!! Oy.
 The flat area at the bottom gets gathered. This pulls the short angled parts downwards into line with the flat area. Wow, that really got my brain rolling. Along with finding a forum where another lady had a similar issue and was told she needed more curvature along the bottom.
 I did much googling and found out that the type of skirt I wanted had 'godets' not gores. This would mean 4-6 panels, with triangles at the bottom. I thought this was going to be a great way to make the narrow fabric be wider and 'swishier'. However, there are a lot of seams...each eating away at some fabric....
 I was happy with the construction, however, the cups didn't offer enough coverage on the sides, but they did lay flat on the chest! And lets not talk about how the skirt portion fits. I could pull it up quite a bit and find it's "sweet spot" but that made the skirt too short!
I was energized to re-draft the bodice of the original pattern, with more curvature. I didn't have time or fabric to make another test dress, so I was just going to use intuition!
I found the sketch for the top from the teen book, so I decided to try it, just to see how the mechanics of it worked. You use a triangle based on your cup size, and then hack off the bottom corners based also on your cup size. I decided to err on the side of caution (and my larger boob) and go with a DD cup!! Oy.
The flat area at the bottom gets gathered. This pulls the short angled parts downwards into line with the flat area. Wow, that really got my brain rolling. Along with finding a forum where another lady had a similar issue and was told she needed more curvature along the bottom.I did much googling and found out that the type of skirt I wanted had 'godets' not gores. This would mean 4-6 panels, with triangles at the bottom. I thought this was going to be a great way to make the narrow fabric be wider and 'swishier'. However, there are a lot of seams...each eating away at some fabric....I was happy with the construction, however, the cups didn't offer enough coverage on the sides, but they did lay flat on the chest! And lets not talk about how the skirt portion fits. I could pull it up quite a bit and find it's "sweet spot" but that made the skirt too short!I was energized to re-draft the bodice of the original pattern, with more curvature. I didn't have time or fabric to make another test dress, so I was just going to use intuition!
The Evolution of the Empire
First, yes, I do still knit. I just cast off a shawl this morning!
I wanted to go into some detail about the why and how of my recent sewing craze. When I first started sewing, in 2005, I had hoped at some point to be able to sew my own clothes, considering I was a hard to fit size. After my breast reduction in 2007, I was a 'normal' size for awhile, but still wanted to sew clothes. I started with some kid pajama pants and moved on to a dress for me, labelled "easy". I sewed a second version for a Christmas party even though I wasn't totally happy with the first one.
Even though I made the size for me (actually I might have made it a bit smaller cause I couldn't see how this style of dress would need something like 4" of ease). However, it just didn't have the coverage over the chest like the package showed, and it didn't lay flat on my chest. I moved onto a few other sewing projects but I was hesitant to make anything more for me, especially tops. And, I seemed to be ...ummm...growing. Recently, I felt that my skills were improving enough to try again. I decided to make a top using the same pattern. I drafted a slightly larger size, and altered the back so there wouldn't be a zipper.
 At first, I was happy, but really, it just didn't 'cup' me enough and didn't have the coverage. Plus, I HATE tieing things behind my neck. I gave it to my mom. As I mentioned a few posts ago, while we have the same chest size, we do not have the same bra size. It fit her fine.
I had a teen sewing book from the library and there was a cute empire waist summer top in it, with instructions how to draft your own pattern. They gave numbers for up to a C cup, but I figured I could try following the idea and upsize. I drew a sketch before I returned the book but when I went to actually try it out, I couldn't find the sketch. So I returned to my original pattern, and started a 'muslin' using an old sheet. I used the sewing techniques from the dresses I just made for the girls, but this made it hard to tell exactly how the dress was going to look until quite a bit had actually been done. I dress the pieces larger where I thought I needed it, but I wasn't sure what to do with the bottom curve. Trying it on showed that while I could get the right coverage and fit, the pieces would not be sewn straight along the original seam line. I just didn't have enough hands to hold it, pin it, mark it, etc. I knew that something was still not quite right.
I moved on to a different bodice from the same pattern set; this one is one piece, which I thought might be easier to fit. It is supposed to be much lower cut in the middle, but I wanted some modesty for this dress (family reunion). I knew, after finally finding a tutorial for a cross-over, empire waist sundress (on page 10 of the google results), that I needed more length to cover the bust and tuck underneath. However, I knew I didn't want the extra length at the side seams, so it got added to the top of the bodice. Lucy kept saying it was "too big" which she meant that it came up too high on my chest: I could see that it was pulling at the base of the V neck so I needed more width. I was pretty much happy with it though. So I got a better fabric--some blah beige quilter's cotton I had bought off Cheapcycle. It's rose blooms, actually. I didn't like how it looked in the middle (the skirt seam goes straight across, but the bodice seems to dip in), but I was pretty happy, although it was still not 'cupping' me. I wanted to be able to go braless, and not have elastic under the bust, which would gather the skirt and make it look like a maternity dress (even though I have a permanently maternity shaped body). There were some issues with the skirt. The fabric is only 44" wide!
 For ease of adding photos, I'm just going to start another entry for the rest of the story!
I wanted to go into some detail about the why and how of my recent sewing craze. When I first started sewing, in 2005, I had hoped at some point to be able to sew my own clothes, considering I was a hard to fit size. After my breast reduction in 2007, I was a 'normal' size for awhile, but still wanted to sew clothes. I started with some kid pajama pants and moved on to a dress for me, labelled "easy". I sewed a second version for a Christmas party even though I wasn't totally happy with the first one.
Even though I made the size for me (actually I might have made it a bit smaller cause I couldn't see how this style of dress would need something like 4" of ease). However, it just didn't have the coverage over the chest like the package showed, and it didn't lay flat on my chest.
I moved onto a few other sewing projects but I was hesitant to make anything more for me, especially tops. And, I seemed to be ...ummm...growing. Recently, I felt that my skills were improving enough to try again. I decided to make a top using the same pattern. I drafted a slightly larger size, and altered the back so there wouldn't be a zipper.At first, I was happy, but really, it just didn't 'cup' me enough and didn't have the coverage. Plus, I HATE tieing things behind my neck. I gave it to my mom. As I mentioned a few posts ago, while we have the same chest size, we do not have the same bra size. It fit her fine.I had a teen sewing book from the library and there was a cute empire waist summer top in it, with instructions how to draft your own pattern. They gave numbers for up to a C cup, but I figured I could try following the idea and upsize. I drew a sketch before I returned the book but when I went to actually try it out, I couldn't find the sketch. So I returned to my original pattern, and started a 'muslin' using an old sheet.
I used the sewing techniques from the dresses I just made for the girls, but this made it hard to tell exactly how the dress was going to look until quite a bit had actually been done. I dress the pieces larger where I thought I needed it, but I wasn't sure what to do with the bottom curve. Trying it on showed that while I could get the right coverage and fit, the pieces would not be sewn straight along the original seam line. I just didn't have enough hands to hold it, pin it, mark it, etc. I knew that something was still not quite right.I moved on to a different bodice from the same pattern set; this one is one piece, which I thought might be easier to fit. It is supposed to be much lower cut in the middle, but I wanted some modesty for this dress (family reunion). I knew, after finally finding a tutorial for a cross-over, empire waist sundress (on page 10 of the google results), that I needed more length to cover the bust and tuck underneath. However, I knew I didn't want the extra length at the side seams, so it got added to the top of the bodice. Lucy kept saying it was "too big" which she meant that it came up too high on my chest:
I could see that it was pulling at the base of the V neck so I needed more width. I was pretty much happy with it though. So I got a better fabric--some blah beige quilter's cotton I had bought off Cheapcycle. It's rose blooms, actually. I didn't like how it looked in the middle (the skirt seam goes straight across, but the bodice seems to dip in), but I was pretty happy, although it was still not 'cupping' me. I wanted to be able to go braless, and not have elastic under the bust, which would gather the skirt and make it look like a maternity dress (even though I have a permanently maternity shaped body). There were some issues with the skirt. The fabric is only 44" wide!For ease of adding photos, I'm just going to start another entry for the rest of the story!Tuesday, August 17, 2010
Sew Quick!
One day, earlier in this excruciatingly hot and humid summer, my brother stopped by to drop some things off. He was wearing a 'thing' around his neck that he ran under some cold water to chill it, and said he got it from "Tilley's Endurables". Rob (my husband), had been complaining about how hot and sweaty the commuter train is in the afternoons and needed something to cool him down. I did some googling, and found that Tilley's sells "Cobber Neck Wrap". I realized quickly that I could probably make one for much less than $20. But what to fill it with? They use tiny beads that when soaked in water (hot or cold), swell up enormously and as long as the fabric is still wet, will feel cold (or hot) for hours. Eventually, they can dry up again, and be re-used. I was stumped as to the filler, until I found the answer from an unusual source.
The machine knitting groups I'm in are hosted through Yahoo! Groups, and you have a choice of getting each message as a separate email, or getting a day's worth of messages in one neat and tidy, organized, "digest". For most groups, I'm now on digest (this really curbed my need to answer questions as soon as someone asked one, as now, often the answer has already been given by the time I read it). One complaint with these groups is that a subject will meander away from the original heading, but the subject line is still the original topic. So, if someone posts about their Brother machine, I don't read any of the messages, but then some day I might be scanning through the digest on the way to another message, and something might catch my eye. That's what happened here. In a subject I had not been following, the talk turned to neck coolers! The writer posted that she bought these crystals at the garden center. They're for mixing with the dirt so it holds water longer. Bingo!
Immediately, I gathered up the children and headed on a crystal hunt. We cruised "Man Row" (Canadian Tire, Sport Check, Staples, Home Depot and Lowes all within a few blocks), but got too hot and hungry to make it all the way to Lowe's. The next day I went to Michaels' and forgot to take my flyer coupon for 40% off. Of course, they had something that seemed the same, but intended for fake flower arranging "Cracked Ice". I bought it, even without the coupon, because for $9.99 it seemed it would last a long time and I was tired.
Of course, I had to Google to see if there were instructions on how to actually sew them, and then I found all kinds of links to the crystals. One woman even took apart disposable diapers to get the crystals! Because mine were not the same product, I decided to soak them in water first, and fill the coolers this way so I'd know just how much to put in.
When I searched my stash for "manly" fabrics, all I could find was a brown cotton gauze with a subtle embroidery. I cut it to the size suggested, sewed, and filled. We tried it for a day, and it felt rather heavy. Then I made one with quilter's cotton, to the same measurements. I quickly realized that the cotton gauze had stretched out it's crinkleness as the crystals grew! So, it had surgery and I removed probably half the crystals. Rob tried it on the train and said he felt better, but he was still sweating like crazy (the cooler lays against the carotid artery and cools the blood heading to your brain, so you stay clear headed, but can't really lower your body temperature overall). I dug down deeper in the bin and found the blue print, and the flowered one was a remnant from the fabric store (I was very disappointed that they had barely any quilter cotton remnants! This was the only one!). The pink and black one is to match Lucy's dress. The black one with beige stitching was to go with a dress I haven't yet posted about. I made all of these (except the pink and black one) plus three more, out of the one package of "Cracked Ice". It wasn't all wine and roses though, I did have an issue with trying to dry out the crystals...in the oven...
Then, we were tree shopping, and went to the Lowe's I hadn't gone to in my initial search. I quick stroll through the houseplant section, and guess what I found? The "real" crystals, for $3. Although I don't predict a need for another 10 neck coolers, I had to stock up with another package! For all but the last one, I made closed tubes so I wouldn't have to finish the raw edges. I decided to do Lucy's differently, so it'd be more like a scarf with her new dress. I placed the tube seam in the middle (instead of the edge), so the tails could open up.
  My edge finishing sucks. But it's cute. The kids aren't really into them though. Rob also doesn't take his anymore. He also won't even take a water bottle! But I did get him to move to the lower level of the two level train, LOL!
The machine knitting groups I'm in are hosted through Yahoo! Groups, and you have a choice of getting each message as a separate email, or getting a day's worth of messages in one neat and tidy, organized, "digest". For most groups, I'm now on digest (this really curbed my need to answer questions as soon as someone asked one, as now, often the answer has already been given by the time I read it). One complaint with these groups is that a subject will meander away from the original heading, but the subject line is still the original topic. So, if someone posts about their Brother machine, I don't read any of the messages, but then some day I might be scanning through the digest on the way to another message, and something might catch my eye. That's what happened here. In a subject I had not been following, the talk turned to neck coolers! The writer posted that she bought these crystals at the garden center. They're for mixing with the dirt so it holds water longer. Bingo!
Immediately, I gathered up the children and headed on a crystal hunt. We cruised "Man Row" (Canadian Tire, Sport Check, Staples, Home Depot and Lowes all within a few blocks), but got too hot and hungry to make it all the way to Lowe's. The next day I went to Michaels' and forgot to take my flyer coupon for 40% off. Of course, they had something that seemed the same, but intended for fake flower arranging "Cracked Ice". I bought it, even without the coupon, because for $9.99 it seemed it would last a long time and I was tired.
Of course, I had to Google to see if there were instructions on how to actually sew them, and then I found all kinds of links to the crystals. One woman even took apart disposable diapers to get the crystals! Because mine were not the same product, I decided to soak them in water first, and fill the coolers this way so I'd know just how much to put in.
When I searched my stash for "manly" fabrics, all I could find was a brown cotton gauze with a subtle embroidery. I cut it to the size suggested, sewed, and filled. We tried it for a day, and it felt rather heavy. Then I made one with quilter's cotton, to the same measurements. I quickly realized that the cotton gauze had stretched out it's crinkleness as the crystals grew! So, it had surgery and I removed probably half the crystals. Rob tried it on the train and said he felt better, but he was still sweating like crazy (the cooler lays against the carotid artery and cools the blood heading to your brain, so you stay clear headed, but can't really lower your body temperature overall).
I dug down deeper in the bin and found the blue print, and the flowered one was a remnant from the fabric store (I was very disappointed that they had barely any quilter cotton remnants! This was the only one!). The pink and black one is to match Lucy's dress. The black one with beige stitching was to go with a dress I haven't yet posted about. I made all of these (except the pink and black one) plus three more, out of the one package of "Cracked Ice". It wasn't all wine and roses though, I did have an issue with trying to dry out the crystals...in the oven...Then, we were tree shopping, and went to the Lowe's I hadn't gone to in my initial search. I quick stroll through the houseplant section, and guess what I found? The "real" crystals, for $3. Although I don't predict a need for another 10 neck coolers, I had to stock up with another package!
For all but the last one, I made closed tubes so I wouldn't have to finish the raw edges. I decided to do Lucy's differently, so it'd be more like a scarf with her new dress. I placed the tube seam in the middle (instead of the edge), so the tails could open up. My edge finishing sucks. But it's cute. The kids aren't really into them though. Rob also doesn't take his anymore. He also won't even take a water bottle! But I did get him to move to the lower level of the two level train, LOL!Sunday, August 15, 2010
Sisters
I haven't been able to find the dress pattern that I had been using to make the girls' dresses (and they were at the top of the size range anyway), so the three of us went shopping to find a new pattern. Now, normally, I try not to take the two girls anywhere together. And, I would normally choose from just the patterns that were on sale. But this was going to be an exception. Wow, it was hard to find a pattern that met ALL our requirements--in particular--something that I felt I could actually sew! This pattern is Kwik Sew 3674, view B, but without a contrasting panel at the bottom. Meg chose a wild orange flower print, a very light weight woven cotton (I don't know the 'proper' names for all the different cottons). I lined the bust with off-white bastite on the advice of the fabric cutter, and I was glad she pointed it out because it was what I needed for other projects too. For Meg, I cut the top as a size 10! and I think they both got size 7 skirts but Lucy's I eased out to a size 8 for her tush :) Lucy's top was a 7, I think.
Most of the dress went together great! I cut out the pieces for each dress, then put all the stuff I needed to sew them in two Ziploc bags and took them with us when I went to my parents. However, I never got around to even attempting to sew them. But once I got home, I did Meg's a bit at a time and I think it took 3 days, and Lucy's I had done in one evening and the next day. The hardest part was getting the elastic in the casings...I had a crappy safety pin. I might do it the "diaper way" next time--tack the ends down on the one layer, then top stitch the layers to form the casings.
 Lucy's dress is an unusual quilter's cotton. She "doesn't do" flowers, pink, cute, or "weird polka dots". I was hoping to get them in co-ordinating fabrics, but oh well. LOL. They are both a smidge too big in the bust, causing some gaping when they move around, but they are cute dresses. I hope to make the other view someday, although Lucy thinks it's too pouffy. While Meg loves anything I make for her, Lucy is another story!
I'm glad I made these because it's similiar to the dress/top I've been trying to make for myself but constructed a little differently, and SO much easier! I learned alot making these!
Meg chose a wild orange flower print, a very light weight woven cotton (I don't know the 'proper' names for all the different cottons). I lined the bust with off-white bastite on the advice of the fabric cutter, and I was glad she pointed it out because it was what I needed for other projects too. For Meg, I cut the top as a size 10! and I think they both got size 7 skirts but Lucy's I eased out to a size 8 for her tush :) Lucy's top was a 7, I think. Most of the dress went together great! I cut out the pieces for each dress, then put all the stuff I needed to sew them in two Ziploc bags and took them with us when I went to my parents. However, I never got around to even attempting to sew them. But once I got home, I did Meg's a bit at a time and I think it took 3 days, and Lucy's I had done in one evening and the next day. The hardest part was getting the elastic in the casings...I had a crappy safety pin. I might do it the "diaper way" next time--tack the ends down on the one layer, then top stitch the layers to form the casings.
Lucy's dress is an unusual quilter's cotton. She "doesn't do" flowers, pink, cute, or "weird polka dots". I was hoping to get them in co-ordinating fabrics, but oh well. LOL. They are both a smidge too big in the bust, causing some gaping when they move around, but they are cute dresses. I hope to make the other view someday, although Lucy thinks it's too pouffy. While Meg loves anything I make for her, Lucy is another story!I'm glad I made these because it's similiar to the dress/top I've been trying to make for myself but constructed a little differently, and SO much easier! I learned alot making these!
Friday, August 13, 2010
Sew, I've Been Thinking
Haa Haa.
Been doing lots of thinking about my ill-fitting top/dress. My mom and I have about the same chest circumference. But we can't wear the same clothes. I've written before about how my front chest is larger than my back width. I can accommodate that in many pattern, but this one is so different, it's been stumping me. I thought about doing a "draping", basically laying the fabric on me and drawing/cutting how I want it. That would work better if I had a girl friend that could help out instead of a husband, LOL. But I also want a real, reproducible pattern.
When I cut out the new top, I saw that the chest/neck line was the same for all, and only the side seam and a bit under the arm changed for different sizes. The amount that gets gathered at the bottom of the cup, and the space it gets gathered into, stays the same for all sizes. And, since most patterns are sized for a B cup chest (and I am not a B cup!), just extending the side seam is not going to be the solution! Doh!
Some how I have to figure out how much fabric I need to cut, and how much to gather it. I know the bottom of the cups, when overlapped, have to fit to the top of the bodice. I'm just not sure how much to cut for the cups. I could try draping.
I'm also thinking I might use a dart for the lining layer as I felt the two layers gathered and sewn to the bodice made for a bulky seam allowance.
I've been getting kid/teen sewing books from the library. Some of the stuff has been cheezy (finger puppets and simple tote bags), but some of it has actually been really good--helpful info and good patterns which you fit to yourself. One of the books has a top like I'm doing (the green one on the cover), but the cups sit above the bodice, so the back seems a little low. They tell you how to create the pattern up to a C cup, and I wonder if that means they don't think teens come in larger sizes (although the skirts went larger), or if a larger size shouldn't wear this style?
I've also just finished sewing two dresses for the girls that have overlapping cups with a separate back piece. There's three pieces of elastic to rouch the back, and then one piece that goes all the way around, under the cups (LOL. They are not cups at these sizes!). They turned out really good (although I had major issues with inserting the three strips of elastic, due to a faulty safety pin), and I think between all these patterns, I should be able to come up with SOMETHING!
Stay tuned, and I hope to post pictures of the girls' dresses very soon (Lucy wore her's to daycamp today!).
Been doing lots of thinking about my ill-fitting top/dress. My mom and I have about the same chest circumference. But we can't wear the same clothes. I've written before about how my front chest is larger than my back width. I can accommodate that in many pattern, but this one is so different, it's been stumping me. I thought about doing a "draping", basically laying the fabric on me and drawing/cutting how I want it. That would work better if I had a girl friend that could help out instead of a husband, LOL. But I also want a real, reproducible pattern.
When I cut out the new top, I saw that the chest/neck line was the same for all, and only the side seam and a bit under the arm changed for different sizes. The amount that gets gathered at the bottom of the cup, and the space it gets gathered into, stays the same for all sizes. And, since most patterns are sized for a B cup chest (and I am not a B cup!), just extending the side seam is not going to be the solution! Doh!
Some how I have to figure out how much fabric I need to cut, and how much to gather it. I know the bottom of the cups, when overlapped, have to fit to the top of the bodice. I'm just not sure how much to cut for the cups. I could try draping.
I'm also thinking I might use a dart for the lining layer as I felt the two layers gathered and sewn to the bodice made for a bulky seam allowance.
I've been getting kid/teen sewing books from the library. Some of the stuff has been cheezy (finger puppets and simple tote bags), but some of it has actually been really good--helpful info and good patterns which you fit to yourself. One of the books has a top like I'm doing (the green one on the cover), but the cups sit above the bodice, so the back seems a little low. They tell you how to create the pattern up to a C cup, and I wonder if that means they don't think teens come in larger sizes (although the skirts went larger), or if a larger size shouldn't wear this style?
I've also just finished sewing two dresses for the girls that have overlapping cups with a separate back piece. There's three pieces of elastic to rouch the back, and then one piece that goes all the way around, under the cups (LOL. They are not cups at these sizes!). They turned out really good (although I had major issues with inserting the three strips of elastic, due to a faulty safety pin), and I think between all these patterns, I should be able to come up with SOMETHING!
Stay tuned, and I hope to post pictures of the girls' dresses very soon (Lucy wore her's to daycamp today!).
Sunday, August 01, 2010
Fitting?
A few years ago, I made New Look 6557 to wear on a cruise. I had some fitting issues then and I've been wanting to re-work it (please look at my links). I cut a larger size based on the differences between the sizes and that I needed one size bigger than the largest size. It's still not fitting like the picture on the package.  Instead of the cross over pieces laying flat on my chest wall, they pull out (I've stitched it together) so it's like a V-neck. I'm going to re-shape the pieces so there's a bit more coverage, but I still don't know what to do where it overlaps. Should they be closer together? Further apart? Further apart and then the overlap needs to get tucked under a girl. I thought of cutting it a bit larger and gathering it to fit between the same notches on the body. I don't need to extend the side seams, I need more? in the middle.
Instead of the cross over pieces laying flat on my chest wall, they pull out (I've stitched it together) so it's like a V-neck. I'm going to re-shape the pieces so there's a bit more coverage, but I still don't know what to do where it overlaps. Should they be closer together? Further apart? Further apart and then the overlap needs to get tucked under a girl. I thought of cutting it a bit larger and gathering it to fit between the same notches on the body. I don't need to extend the side seams, I need more? in the middle.
Any help would be greatly appreciated!!!!
Edit to add: I solved the fit issues of this top and the original dress by giving them to my mom. They fit her beautifully. Now I HAVE to sew again for myself! LOL.
Friday, July 23, 2010
The Importance of a Stylist
Being in a 'new' town, I'm excited to have a whole new selection of knitting book available to me at the library. I checked out a sock book recently. It had some nice patterns, a few unusual ones too. But what really caught my eye was the poor styling.
Having just bought sport sandals with a thong, I would be quite tempted to make a pair of tabi socks (or, also in the book, is a partial sock with no toes, but a thong to cushion the shoe thong). However, the choice of colour for these socks... I know the picture isn't the best (when it scanned, the red wasn't as bright as in the book), but what's the first thing you think of when you look at the close up? Lobster anyone?
I know the picture isn't the best (when it scanned, the red wasn't as bright as in the book), but what's the first thing you think of when you look at the close up? Lobster anyone? Aren't these nice looking, well-fitting socks? In fact, they're on the cover of the book. It's really too bad that inside the book, this is what we see:
Did no one pay attention to the feet while taking pictures (the models are definitely models chosen for their appearance rather than their feet, I think). I would never wear socks like that. How hard could it be to pull them up. Or find someone else with smaller feet?
Wednesday, July 21, 2010
Do The Wave
Remember the orange/brownish crocheted cardigan I finished this spring? At the start of June 2009, I wanted to crochet a white cardigan for an outside band performance. I found this pattern and everyone on Ravelry said it was so quick and easy. I couldn't seem to get gauge though and tried the pattern that the orange cardi is but couldn't handle it either.
A few days after getting my yarn cubbies put up and filled, I grabbed a yarn I have been stashing for a long time (one of my oldest stashings!). Years ago (maybe 7 years?) I bought this yarn in the black colourway. It's called Mexican Wave, for some odd reason, and is 100% acrylic and DK weight. I loved the sweater I originally made (although it's a little big on me and getting pilly and will get it's own post soon!), and planned to make another identical one in this colour (blue base shade) although I wasn't sure if I had enough yarn. Instead, I rather impulsively decided to make the Chevron Lace Cardi. I'm glad I did! Yes, there's a yarn end hanging. I always seem to miss one.
 I didn't notice any striping until the green striped popped up (it's made from neck down).

A few days after getting my yarn cubbies put up and filled, I grabbed a yarn I have been stashing for a long time (one of my oldest stashings!). Years ago (maybe 7 years?) I bought this yarn in the black colourway. It's called Mexican Wave, for some odd reason, and is 100% acrylic and DK weight. I loved the sweater I originally made (although it's a little big on me and getting pilly and will get it's own post soon!), and planned to make another identical one in this colour (blue base shade) although I wasn't sure if I had enough yarn. Instead, I rather impulsively decided to make the Chevron Lace Cardi. I'm glad I did!
Yes, there's a yarn end hanging. I always seem to miss one.I didn't notice any striping until the green striped popped up (it's made from neck down). Of course, I couldn't make this without having some sort of issue. I started at the neck with a loose chain cause many people commented that you needed a loose chain to prevent rippling. Guess mine wasn't loose enough? Then I did the increase rows, and got set to do the armhole divisions. I looked at the numbers, and shifted them a bit so the front would have a few more sts, and the back a few less. But as I worked the row, it didn't work out!! I checked my math a few times, checked that I had divided as per my math. Then finally I counted my sts and found I was 20 sts short for the size I was making. I was NOT ripping what I had already done. I had been sure I did each increase row at the neck, so I didn't count the sts back then. I had basically the right number of sts for the size smaller and it seemed to be fitting so I went ahead anyway. It still pretty much worked out, although it's tight around my hips so I'm not bothering with buttons. I ended up with a little less than one ball left. Me showing off my new hair cut!
 Me showing off my new hair cut!
Friday, July 16, 2010
Sew Funny!!
Edited to add links to the sites ("Then I came across a couple sites...")
If you've been reading this for awhile, or know me, you know of my love-hate relationship with sewing. I really want to sew well. But, I alternate being being a perfectionist and being lazy. At the wrong times/situations. With all my health issues this past year, I've put on a bit of weight. I'm also exercising, and just plain running around like crazy and want to be comfortable. I had some cotton knit fabric and was browsing the internet for a yoga pants pattern, either create your own or store bought. Then I came across a couple sites on how to turn a t shirt into a pair of yoga pants! Well, of course, I had no t-shirts I was willing to chop up. And man, Value Village has a LOT of t-shirts. It was actually hard to find one I liked, in a colour I liked, with a graphic I liked. Finally I found this grey one with a line of drinks across the chest and "It's 5:00 somewhere". We didn't go to any of the Margaritaville's on our cruises, but the reports back sure made them sound like fun!
 (I'd never wear them in real life with a short shirt, this was during the sewing process!).
So, I had a few sewing issues. Tension, as always. I was happy to use my stretch overcast stitch, and have finished edges at the same time as seaming. But those seams were a little ripply. Then, to attach the 'waistband' (ie..."no longer a college student panel"), I used the straight stretch stitch, but as soon as I put them on, the seam started breaking! I'm not sure what stitch I used to fix that; I'll have to check before I do pair #2.
I thought I had a brilliant idea with the waist band. I read some reports that say the t-shirt fabric stretches out and doesn't stay up. I needed the full width of the sleeves to make the waistband and I noticed the hem on the sleeve was wide enough for elastic. So I stitched the two sleeves together along the sides, pinned them to the pants, and stitched up (and stitched again after totally blowing out the seam trying them on). I started to feed the elastic and got around to the other side seam when reality hit...and the casing was stitched closed. I had to pick out that bit, and some day, go back and handstitch it closed. I wasn't expecting the drinks to end up so high up on my little bum. Something to think about when choosing a shirt...like my next one that has a saying across the chest...
These are totally comfy although the seam across the upper bum makes me think they're falling down all the time, LOL. I used a size L shirt (men's) and used up almost all of it. You probably won't see me out in public in these pants, but they're great for weekends.
If you've been reading this for awhile, or know me, you know of my love-hate relationship with sewing. I really want to sew well. But, I alternate being being a perfectionist and being lazy. At the wrong times/situations. With all my health issues this past year, I've put on a bit of weight. I'm also exercising, and just plain running around like crazy and want to be comfortable. I had some cotton knit fabric and was browsing the internet for a yoga pants pattern, either create your own or store bought. Then I came across a couple sites on how to turn a t shirt into a pair of yoga pants! Well, of course, I had no t-shirts I was willing to chop up. And man, Value Village has a LOT of t-shirts. It was actually hard to find one I liked, in a colour I liked, with a graphic I liked. Finally I found this grey one with a line of drinks across the chest and "It's 5:00 somewhere". We didn't go to any of the Margaritaville's on our cruises, but the reports back sure made them sound like fun!
(I'd never wear them in real life with a short shirt, this was during the sewing process!).So, I had a few sewing issues. Tension, as always. I was happy to use my stretch overcast stitch, and have finished edges at the same time as seaming. But those seams were a little ripply. Then, to attach the 'waistband' (ie..."no longer a college student panel"), I used the straight stretch stitch, but as soon as I put them on, the seam started breaking! I'm not sure what stitch I used to fix that; I'll have to check before I do pair #2.
I thought I had a brilliant idea with the waist band. I read some reports that say the t-shirt fabric stretches out and doesn't stay up. I needed the full width of the sleeves to make the waistband and I noticed the hem on the sleeve was wide enough for elastic. So I stitched the two sleeves together along the sides, pinned them to the pants, and stitched up (and stitched again after totally blowing out the seam trying them on). I started to feed the elastic and got around to the other side seam when reality hit...and the casing was stitched closed. I had to pick out that bit, and some day, go back and handstitch it closed.
I wasn't expecting the drinks to end up so high up on my little bum. Something to think about when choosing a shirt...like my next one that has a saying across the chest...These are totally comfy although the seam across the upper bum makes me think they're falling down all the time, LOL. I used a size L shirt (men's) and used up almost all of it. You probably won't see me out in public in these pants, but they're great for weekends.
Tuesday, July 13, 2010
Sock It To 'Em
So, I finally finished a pair of socks I've been working on for awhile. They are from Interweave Knits "Favorite Socks", Flame Wave Socks by Ann Budd. I used http://www.elann.com/ version of Fixation. I did them two at a time, each one with it's own ball of Espirit. I had a fairly small amount leftover of each ball. I couldn't remember if this yarn shrinks though, so if they did, I have a bit more to lengthen. I had a hard time with the pattern/chart. The first half of the row repeat is fine and logical, but then it shifts and changes and I just couldn't get into it. Several times I nearly stopped the pattern on the instep, but then I was getting so close to being finished, I kept with it.
 I did switch needle sizes a couple times through the leg. From about just above the ankle to the toe, I used 3.25mm.

As hard as it is to take pictures of your own feet (Lucy took these photos), it's doubly hard when you add a puppy to the mix. I had the on for only a few minutes....
 I'm so glad to have these done. I don't have down when I started, but I think it was early May. Or April. I took them to a guild meeting. There's an older lady there that I can sense the other women don't really like. The socks were sitting on the table, and she picks them up, plays with the yarn (the labels were off), and says "These socks are going to stretch". Yup. Imagine that.
 I had a hard time with the pattern/chart. The first half of the row repeat is fine and logical, but then it shifts and changes and I just couldn't get into it. Several times I nearly stopped the pattern on the instep, but then I was getting so close to being finished, I kept with it.
 I did switch needle sizes a couple times through the leg. From about just above the ankle to the toe, I used 3.25mm.
As hard as it is to take pictures of your own feet (Lucy took these photos), it's doubly hard when you add a puppy to the mix. I had the on for only a few minutes....
 I'm so glad to have these done. I don't have down when I started, but I think it was early May. Or April. I took them to a guild meeting. There's an older lady there that I can sense the other women don't really like. The socks were sitting on the table, and she picks them up, plays with the yarn (the labels were off), and says "These socks are going to stretch". Yup. Imagine that.
Tuesday, July 06, 2010
Just In Time For Summer....
I finished a pair of Kroy 3ply socks recently. Yeah, the thermometer outside yesterday (when I started writing this), read 45C/111F . Not to mention the Humidex reading will bring that number up much higher. But I still wear my wool socks in the summer. Although, I just bought new sport sandals that are a thong, so I have to make some socks for them.
Cookie A. "Twisted Flowers", less than 2 skeins of Kroy 3ply in a not-too-girly pink. Think I used 2.75mm needles. They fit great, better than the Mingus socks which had a bit of gauge issues.
 I was attracted to this pattern as it has a large motif which is somewhat lacey, but not 'lace', and the pattern continues onto the heel. However, on one of the heels, I got a gusset hole. There is a yarn over hole in the pattern right there and somehow it grew.
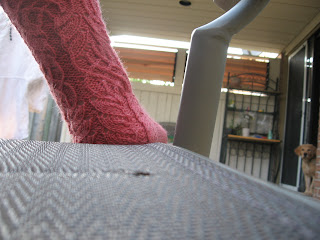 Worked two at a time, sometimes on one circular, but mostly on two circulars. The one circular was just a little too short. And sometimes, my brain went wonky and I ended up knitting from one needle onto the other needle.
 I did most of the pattern without a cable needle, as it's just one stitch held behind/forward. I like to start out with a cable needle, to make sure I'm doing the pattern right though. However, I got a little lazy apparently, on the foot, and messed up the crossings--check out the sock on the right, below.

As if taking pictures of your own feet isn't hard enough...add in a puppy...

Cookie A. "Twisted Flowers", less than 2 skeins of Kroy 3ply in a not-too-girly pink. Think I used 2.75mm needles. They fit great, better than the Mingus socks which had a bit of gauge issues.
 I was attracted to this pattern as it has a large motif which is somewhat lacey, but not 'lace', and the pattern continues onto the heel. However, on one of the heels, I got a gusset hole. There is a yarn over hole in the pattern right there and somehow it grew.
 Worked two at a time, sometimes on one circular, but mostly on two circulars. The one circular was just a little too short. And sometimes, my brain went wonky and I ended up knitting from one needle onto the other needle.
 I did most of the pattern without a cable needle, as it's just one stitch held behind/forward. I like to start out with a cable needle, to make sure I'm doing the pattern right though. However, I got a little lazy apparently, on the foot, and messed up the crossings--check out the sock on the right, below.
As if taking pictures of your own feet isn't hard enough...add in a puppy...

Monday, June 21, 2010
Sneak Peak
The puppy got me up early this morning so I thought I'd get a head start on the day. I do have a handknitting project I've been wanting to blog about, but I've got to get pictures still. What I do have pictures of is the recent 'remodel' of 'my' room in the basement. When we bought the house, I had forgotten about this area. In this picture, I'm standing about where my big knitting machine is in later pictures. I knew about the area to the left you can't see here, with the shelves, but didn't remember how big the room actually was. Once we moved in, I pictured this as my knitting/music/exercise studio. I was dreaming a little big perhaps, LOL. I'm so glad I got the picture before all the stuff came in! I don't have a 'before' picture of the 'remodel' but it's not a huge change anyway, LOL. The big thing was to get my yarn cubbies put up. I really thought it would be too heavy to put on the wall, but Rob said it would be okay because he could use the top trim of the panelling as support. However, when he started looking for studs, there seemed to be a problem. There weren't ANY!
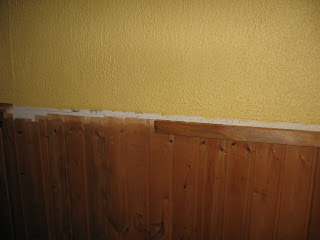 I encouraged him to take the trim off and drill holes every two inches to find the stud. Surely there had to be a stud. He went across 39" and could not find a vertical piece of wood. We concluded that the drywall was held on at the top and bottom only. The next week, we had flooding in the bar area and had to take down some drywall. We discovered there that the 'studs' were just 1x2's (I think), placed horizontally!
 The shelves down at the end are interesting. The bottom 'shelf' is where the bottom half of the wall is about 12" out from the upper half, then there is IKEA shelves running across the wall. Shortly after we moved in, I was loading up the shelves, turned to walk away, and the one on the far right fell right off the wall. Apparently it wasn't in the 'stud'.
  Not all of those Rubbermaid boxes are yarn. 5 boxes do have yarn in them, but they're not stuffed anymore. Two of the five are cone yarn. There is also a small box for cotton yarn, and 4 full bags of Patons Divine that didn't fit in any box. The pink and green boxes have sewing stuff/fabric.
 Over here is an XL plastic drawer (behind Scooby) that is one of 4 drawers that holds all my odd balls. There is also an 'underbed' size tote with lace yarns (again, not stuffed full). There's some more fabric, some crafting boxes, and some baby/kid stuff to sell/give away. The metal sawhorse will be for the knitting machine in the front of the picture, and my other machine is currently on a sawhorse in the kitchen so I can take it on the deck. The desk is for my sewing machine. Oh, and there's one large bag of assorted yarn from last year's Spinrite tent sale. So, I'm still a little more spread out than I'd like (the other 3 drawers got brought in here due to the flooding, but I don't like the drawers stacked on each other as it makes them hard to open).
 I'm glad to finally get my stereo up again. I had fun filling the cubbies. When I saw it, I thought "Gee, those are small cubbies" but then I put in the green yarn in the lower left one, and there was still lots of room! I had planned on using it for 'project' yarns--the yarns I had enough of for a whole sweater. However, many of those yarns are actually bagged and I didn't want to de-bag them just to put them on show (for only myself, really). So I doubled up the cubbies with yarns that I'm hoping to use soon, and it's helped--I started a new project the very next day with one of the yarns, not what I was planning to make with it, but still a good choice! The cone tree I got from an older lady in town when I posted on www.kijiji.com that I was looking for cone yarn. I got a few cones from her too. Okay. More than a few (many of them are suitable just for waste yarn).
 I don't have a 'before' picture of the 'remodel' but it's not a huge change anyway, LOL. The big thing was to get my yarn cubbies put up. I really thought it would be too heavy to put on the wall, but Rob said it would be okay because he could use the top trim of the panelling as support. However, when he started looking for studs, there seemed to be a problem. There weren't ANY!I encouraged him to take the trim off and drill holes every two inches to find the stud. Surely there had to be a stud. He went across 39" and could not find a vertical piece of wood. We concluded that the drywall was held on at the top and bottom only. The next week, we had flooding in the bar area and had to take down some drywall. We discovered there that the 'studs' were just 1x2's (I think), placed horizontally!The shelves down at the end are interesting. The bottom 'shelf' is where the bottom half of the wall is about 12" out from the upper half, then there is IKEA shelves running across the wall. Shortly after we moved in, I was loading up the shelves, turned to walk away, and the one on the far right fell right off the wall. Apparently it wasn't in the 'stud'. Not all of those Rubbermaid boxes are yarn. 5 boxes do have yarn in them, but they're not stuffed anymore. Two of the five are cone yarn. There is also a small box for cotton yarn, and 4 full bags of Patons Divine that didn't fit in any box. The pink and green boxes have sewing stuff/fabric.
 Over here is an XL plastic drawer (behind Scooby) that is one of 4 drawers that holds all my odd balls. There is also an 'underbed' size tote with lace yarns (again, not stuffed full). There's some more fabric, some crafting boxes, and some baby/kid stuff to sell/give away. The metal sawhorse will be for the knitting machine in the front of the picture, and my other machine is currently on a sawhorse in the kitchen so I can take it on the deck. The desk is for my sewing machine. Oh, and there's one large bag of assorted yarn from last year's Spinrite tent sale. So, I'm still a little more spread out than I'd like (the other 3 drawers got brought in here due to the flooding, but I don't like the drawers stacked on each other as it makes them hard to open).
 I'm glad to finally get my stereo up again. I had fun filling the cubbies. When I saw it, I thought "Gee, those are small cubbies" but then I put in the green yarn in the lower left one, and there was still lots of room! I had planned on using it for 'project' yarns--the yarns I had enough of for a whole sweater. However, many of those yarns are actually bagged and I didn't want to de-bag them just to put them on show (for only myself, really). So I doubled up the cubbies with yarns that I'm hoping to use soon, and it's helped--I started a new project the very next day with one of the yarns, not what I was planning to make with it, but still a good choice! The cone tree I got from an older lady in town when I posted on www.kijiji.com that I was looking for cone yarn. I got a few cones from her too. Okay. More than a few (many of them are suitable just for waste yarn).
It's not totally finished; I still have to figure out what to do with my 4 odd ball drawers, and the stuff that is just stored in the corner, but I'm loving the room now. Esp. with the awesome light that got put up. It's 24 hours of daylight in there now!
Subscribe to:
Posts (Atom)