Wednesday, April 29, 2020

Happy Day Pants

I have these green jeans. A bright apple green. I love them. Their shape never loved me though. They were lower rise and just never stayed up. I wore them with a tie belt I borrowed from a pair of shorts.

Then I started seeing in Facebook sewing groups that people were taking a waistband from a leggings pattern and taking off the waistband from low rise jeans, and using the legging's waistband. In the group "Patterns for Pirates" (not their business page, but their group page), you can get a free download of hacks for their leggings pattern. One of the items is a wide "contoured" waistband. It's kind of like a maternity panel. It's high, more on the front, and the sides are slightly tapered because it's supposed to sit up at the natural waist which is narrower than where low rise jeans sit (which is why they so often fall down).  I knew this would be the fix.

It took awhile to get around to doing this, mainly because of the lack of a printer, and just so many other projects. Totally regret not getting to it sooner! First step, take off the old waist band.  I was dismayed by the fading!!

I decided that I would fix the fake pockets and make them into real pockets. Why do they do this? I found an awesome video on doing this.  https://www.youtube.com/watch?v=9e-pK8Bul50&t=2s  Two big take aways--use a slippery fabric, and make them LONG! You know how much it sucks when you have your phone in  your front pocket and you sit down and it pops out? Make the pocket long enough the phone sits on your thigh!!

I left the little "coin pocket" (I think that's what it's called).
I used some green athletic jersey left over from a pair of Rob's boxers.

I laid the phone down and traced around it, adding some ease and seam allowance. I followed the curve of the pocket's old facing.


Pin and sew carefully. This is easier than in the video because there's no waistband

Stitched to the facing. I did have some issues with getting it to line up properly.  I was probably not being very accurate. Just fudged it a lot LOL

Top stitched to the outer pant, following the existing top stitching. I actually had a pretty good match for the thread. Again, much easier to do with no waist band. 


For the waistband, I took this old bright green t-shirt I had that was getting old. It was 95-5 Cotton-lycra. This is the outer portion of the two layer band.  For the inner layer, I used the pocket fabric. I was a little disappointed to notice that after I cut the front outer piece, that there was a tiny hole, and a tiny stain right at the centre front, somewhat low (not that I ever intend to have the band show, but sometimes you have to raise your hands up. 
I didn't take any pictures of constructing the waistband, but I did add clear elastic to the top seam.


So happy!! I love wearing these pants when it's grey outside. They really cheer people up. I often get people telling me they love them. 

They always fit in the back, but with my belly, the front was always an issue

See how the band comes up to my natural waist? So much better. 

I did have some issues, of course. They weren't staying up!  I seam ripped them off, at a side seam, not all the way around, and took in the side seam about 2 inches. Tried them for a couple days. Better, but they didn't hold up to gardening. I seam ripped the entire back side and sewed in regular elastic to the top seam of the band, over the back section, and also took in the other side seam by 2". This has made a huge difference. Don't bother with clear elastic for these. 


Tuesday, April 28, 2020

New Dance Outfit

For a long time I've wanted to make Megan skating outfits. She's been resistant. I had an idea of making a basic bodysuit and then various skirts, for the different dances. Now that she's getting towards the end of her dance tests LOL, she agreed.  What really helped was that I got an offer of fabric from https://fabric-online.com/. I thought making her a skating dress would be a great way to show their fabric and make something new.

We went to www.jalie.com and browsed. I liked the long sleeve Tessa  but she actually wanted sleeveless so I felt it better to go with a sleeveless pattern to start with. We settled on the Tank Skating Dress. I opted to get the PDF version since I didn't want to wait for the mail. Well.

I ordered the pattern on January 17. I order the black fabric (Dream Performance Athletic Knit) from Halo Fabric Addicts . Some awesome fabrics there!! This black is thick, squat-proof and feels great. That was ordered on January 3.

I went to Staples on Feb 1 to print. It wouldn't print the right size. I thought maybe I had saved it wrong. Went home, made sure to save it through Adobe. Went back, and it was still wrong. Went to the Facebook Sewing with Jalie page to inquire. Turns out that you can't print Jalie patterns at the self service at Staples. Now what? My printer wasn't working. I googled for copyshops that did A0/drafting prints and found a franchise shop (not UPS). I sent in a request for an estimate through their website. Got an automated response saying they'd send it within 24 hours. I waited a few days and sent an email. Got a response quickly with an estimate. Not bad, I thought, so I went ahead and sent in the files (I had bought two patterns). After a few days I sent an email asking how long it would take. It was ready the next day.  That was Feb 19. When I picked up, they were a little more than the quote had said. They came to $15 and change and the quote said $13. I didn't have it with me, so I just sucked it up.

I had to trace her sizes. Cut that out. I wanted to do a thong since the skirts would have panties attached and I didn't want her to have to worry about conflicting panty lines. The leotard was pretty easy to actually sew, and fit her well.  I did have an issue with the thong and elastic. I forgot that the thong pattern I was using was intended for a tiny band added. I was doing elastic, which gets sewn on, then flipped to the inside and topstitched. If I had done that, the elastic would have ended up over lapping on the  thong part. So I just sewed it down and didn't flip it in. Also makes it a bit smoother if she wears it under leggings.

On to the skirt. Oh my gosh. We went to Fabricland on February 22. We were also looking for her solo dance custome fabric and it was overwhelming. She told me her next dance was "tango-ish", so we were looking at red and black. She liked the idea of red chiffon with a black lay overlap. An assymetrical skirt. And the lace had a nice scalloped edge. Okay.

Well. OMG. The skirt was killing me. My first attempt, the long side just sagged inwards and there wasn't much "fullness". I tried another version, using a flouncy border piece so the scalloped edge was still usable. She didn't really like that either. I was out of the lace.  I have pictures, but for some reason they're not in my Google photos.

Then she played me the music. Ummmm. Not tango-ish at all. Apparently they had been practicing to the "Series 8" option which is the instrumental, old-timey version that Skate Canada offer, and the vocal "Contemporary" song is much different. The first thing that came to mind when I heard it was "1970s Canadian Disco". Turns out it's an American song from the '2000s?! https://www.youtube.com/watch?v=4H5I6y1Qvz0   I dare you. Go listen/watch.
I texted her coach for suggestions. I thought a bell bottomed pantsuit would be fun but yeah, I knew it wouldn't go over LOL. Next option was a full skirt, and the coach recommended a bright colour. Back to the store we went, March 3. She picked out this nice bright ....magenta? It's not really bright, but it's not dull either.

I found a pattern in my stash from my mother-in-law that was a full skirt. Got all set up, and found out that although the size chart went large enough (up to 18), the pattern in the envelop only went up to size 12. Argh. Thankfully, I didn't have to add much. And in the end, I think I had to take out most of that because she didn't need so much ease.

The skirt pattern calls for a side zipper. I was doing a knit band for the waist, so could I get away with no zipper? Well, no. Not exactly. But how is this going to work with attached panties? Much thinking, and ripping, and I got it done.

Hemming was a nightmare. Well, not the actual stitching, but chiffon! It grows! It does all kinds of weird things! It ended up being way too long and not even!  And Megan kept saying she wanted it shorter. Usually dance skirts are on the longer side. I hung it and trimmed, I laid it out on the floor and marked it and trimmed. In the end, the chiffon matches up pretty close, but I think her right side is a bit longer. The actual stitching was easy. I was going  to do a rolled hem, but didn't really like it, so I went with a narrow, 3 needle hem.

See how it's a bit longer on her right?
It swished so nicely when she skated though! She said it kept going between her legs and bugging her. I wish she had been able to have a test run before the test day. The first go round of the dance was a bit rough but the judge had them go around again and she was able to pass!
I also made her a skinny tie for her hair.

Megan felt the need to add crystals. This was also new territory. She wanted to glue them on, but I did some research and decided we needed to "Hot Fix" crystals. We got our coupon and went to Michaels. There was a cheap Hot Fix "gun" (?) in the crafting section but we weren't keen on it. We looked at the Swarovski  one and liked it better. It is a lot more, but with the coupon (a rare 40% one!), it brought it to about the same price and seemed like a much better device. The cheap crystals were also not suitable so she picked out some Swarovski crystals. However, once she got them out of the package, she realized they had a pink tint to them. Fine for this outfit, and really, I'm sure no one else will notice if there's a pink tint to the crystals when she's wearing, say, a green skirt.


She tested on March 11 and I was finishing up the tie that morning. It ended up being way more rushed that we originally thought, but the end result is much better than the original plan.
I wish I could attach a video of her test. I have posted it on my FB page but not sure if it's public. Maybe it's time to update YouTube LOL.

EDIT---Added on YouTube  https://www.youtube.com/watch?v=q-jfNGgAFjs


Friday, April 24, 2020

Amish Puzzle Ball

I came across this pattern somewhere...maybe a FB group, maybe Pinterest, maybe a blog; doesn't really matter. The kids had a sewn ball like this when they were babies, but it didn't come apart. It was still neat, because it was easy to handle and toss around.
 It came from https://lookatwhatimade.net/crafts/yarn/crochet/free-crochet-patterns/crochet-amish-puzzle-ball/  There's some other cool patterns there too!

I needed a break from a knit blanket I'm doing, so I decided to whip this up. It went pretty quick. Just chose random (sort of) yarn from a pile I had just been donated. 

It comes apart in these three circles of 4 wedges. It's all crocheted together (the turquoise yarn)

There's videos out there showing how to put it together (just google "Amish Puzzle Ball", probably more options than if you add crochet). The third piece, put over your wrist like a bracelet, pinch one of the clusters of wedges already linked up, and slip it over. Easy as pie! LOL. It's not a big stash buster, given it's size, but it's an effective way to use up some small amounts.

Yarn In:  3344gr
Yarn Out:  75gr + 5211gr = 5286gr
Balance:  1942gr more OUT than in!
Costs: $42.35/115 days = $0.368/day

Wednesday, April 22, 2020

Snowflakes

This shirt is more than a year old and needs to get blogged! The delay was mainly to needing photos. So, since we woke up to snow again, I decided to just get it done.

I picked up this piece of fabric in a destash I think. It wasn't very much, maybe 1m. I decided to do New Look 6807 so it'd be a bit dressier for work, than New Look 6735 (check  them out over under "Labels" off to the right--desktop version). This is also a thicker cotton-lycra so I didn't want it too form fitting.


It doesn't have the greatest drape. It's soft and lush, but not drapey. 


Unfortunately, there wasn't enough fabric for full length short flutter sleeves, so I did them shorter. There are two things I dislike about this shirt, and that's one of them.  They sort of stick out rather than flutter.


The other thing I dislike is how there is a distinct line between the pattern repeats. I didn't notice it until after it was cut out. Probably couldn't have moved things around much with the limited amount I had.

I did have some scraps left and made some underwear. I did a white backside, so I could wear them under lighter coloured pants. The front may have been pieced. The seams do help keep everything compressed a bit. Scrundlewear.

These I don't have to keep relegated to just the winter LOL.

Sunday, April 19, 2020

Charity Blankets

Back at the start of March Break, I had one blanket for charity finished, and was finishing up a second, when word came that they weren't going to collect anymore because of the current health crisis. I stopped finishing the second one and started another. Why not?

The group announced today that they had an urgent request for 120 blankets! I grabbed the almost finished one and got to work. All I had was a few ends to weave in! I've started working ends in by knitting with the tail of the old yarn and the tail of the new yarn together. So, they just needed a few rogue ends trimmed. It probably should have been washed too, but that'll get done probably before they get handed out.

First up:
A corner to corner crochet blanket. 

I originally started with this colourway, and did not like it. I hadn't even noticed how the multicoloured yarn was pooling, I was more concerned with how the solid beige yarn wasn't standing out like the cream yarn. Even though I had worked a fair bit, I wasn't happy, so I ripped it out. I might have also gotten to the halfway mark in the supply of one of the yarns, but not the half way mark of the blanket. 

It ended up a smidge small so I crocheted a border.  707gr

I had quite a bit of yarn left in the same colours, plus dark brown, and in the donated yarns there was the soft green. So I went back to basics, with a corner to corner garter stitch blanket, random stripes. I try to keep the stripes thin so that I can use up small little balls. As it was I was getting low on dark brown. I found a bit more and I think I was able to spread it out consistently. Just last week though, I found a skein of dark brown hiding in plain sight. 

You can see how I double up the ends of the yarn to knit it in. 567gr


I had folded the first one all nice, so I folded the second one too. I folded it so the edges were on the inside of the fold. It looks so tidy, wrapped up.

Yarn In:  3344gr
Yarn Out:  3937gr+707gt+567gr= 5211gr 
Balance:  1867gr more OUT than in!
Costs: $42.35/110 days = $0.385/day

Friday, April 17, 2020

ID Tags

When you go on a cruise, you get a little card. This is your door key and your on ship "credit card" and ID. It has info like your cruise details, dining room info, and muster station. You need to always have it with you, especially if you have a drink package. Many people get a hole punched in the card and clip it to a lanyard. This bugs me because it looks crappy when you're dressed up, and in photos. For my last cruise (I mean, cruise prior to the one I made these for), I took Rainbow Loom bracelets in colours to match my clothes, put a clip on them, and wore those. Plus, I had my had my phone baggy.  They worked, but had some issues (mainly at the buffet LOL).

This time, I found out that our Seapass cards could not get a hole punched because of the RFID tech. We'd need a little pouch to attach to the lanyard. Most people just use a clear vinyl pocket, but that's not interesting. I saw some nicer looking ones and got thinking. I could make the same thing, but with a clip, and just clip it to my shorts. I found a tutorial or probably just thought about it and made my own template.

I did use some heavy interfacing on one side of the fabric. Place right sides together, sew around it but leave the bottom open. Turn right side out, sew button hole at the top for the clip, sew on the vinyl, fold in the bottom and top stitch around. Easy. So easy, I went a little crazy.

When I had just a couple done, Rob thought I had made one for him (the black one?). I was like, no...They're so I can match my outfits LOL. The girls liked them, picked their favourites, but weren't too sure about actually using them.

I made this one for my mom. I carefully tried to lay out the little bit of chicken fabric that I had so you could still see the chicken when done.  She loved it, and it was a great conversation starter on the cruise


You can see the little button hole I made for the clips. I found out that not all our clips were the same though, so make sure to double check how low to make it before doing it.
I was worried the cards would slide out so the first ones I made were a little snug. The cards kind of stick to the vinyl though. 

I loved using these, and having matches. It was easy to hand to Rob or to the bartender/waiter and made it easy to get the card back because I could say "The one with the fabric". 

These would also be great for conventions, work, etc. It could still be hung on a lanyard. I have my ID tag on a lanyard, but with a whistle also clipped on. The whistle rubs off the printing on my tag. I really should put the card in a sleeve. I'll definitely use these again if we ever cruise again. Rob says he won't cruise again, but I think my mom might be game.

Wednesday, April 01, 2020

Personal Mask

Living in Canada, we've been watching the COVID-19 epidemic slowly spread, until BAM. Less than 2 weeks after Rob and I enjoyed a day in Toronto at the theater, we were plunged into "social distancing", shut downs, panic buying and no more school. We trust our government here, and look to them for direction in these times. One thing expressed repeatedly, early on, was that personal masks were not necessary for the average, healthy person. We were told that only n95 masks were of any use, everything else was a waste of a mask and more likely to make you sick.

As the pandemic progresses, the interesting thing is that countries where mask wearing is part of the normalcy of daily life, infection rates have stayed lower. How is that possible? Everyone wears them perfectly? They're not all wearing n95 masks. Maybe there is some benefit to wearing masks?

Then we started hearing that hospitals, clinics and senior/nursing homes needed donations of masks and were taking home made fabric masks.  Community groups sprung up, patterns and tutorials became abundant, and suddenly it has become acceptable to wear a mask. Not so much to protect others if you are sick, but to protect yourself.

Just how much protection? It's hard to know precisely. More on that in a bit.

Rob came to me saying he wanted a mask, with a flap of plastic/vinyl/rubber flap hanging over the mask. He found an exercise band and held it over his top lip, hanging down. He looked freaky and creepy. But it got me thinking. I have PUL--polyurethane laminated cotton frequently used in diaper making. Surely it has some barrier protection. What pattern though?

The most common pattern I saw was the rectangle, pleated, with elastic loops for the ears or long ties. Rob said it had to be snug at the nose. I saw some people were using wire or pipe cleaners along the top. What other pattern options were out there?

I came across the "HK Mask". I appreciated the science behind it and it seemed well designed. I got the pattern pieces printed--but I had to ask someone to do it for me and I forgot to mention you have to check the scale instructions. So they printed too small and I had to use experience to upsize it.  I had so many mistakes going through the process of making the mask. Everything that I could sew wrong, I pretty much managed to. In the end, it turned out fine. I decided to make a tutorial since the written instructions are pretty bad. They were obviously translated with a translation program instead of a translator who knows sewing lingo. The video helped a lot though. I also adjusted a few things.
Cut out the pattern piece on the solid dark line. Trace it to make the lining piece, but use the dark dashed line where it varies from the outline--across the top flat part and the centre curved seam. Ignore all the other lines. 


Make sure your two pieces are reversed when you put it on the fabric. If you're using a single piece that's folded, you're fine.

If you're trying to use up small pieces of scrap, make sure you flip the pattern piece before cutting. And when you find out you've somehow cut  two the same, definitely make sure you flipped the piece compared to the first two. I ended up with three pieces the same, the last of this PUL. Don't know if those are even worth keeping.

Second attempt, I was able to fold my fabric to eliminate the error of the first attempt. The lining was going to be the flannel print, the lilac PUL was for inside. 

I
Sew the long, curved edge. With the PUL, use clips, or pin just within the seam allowance. The seam allowance is 1cm and backstitch at each end to secure the threads.

I think trimming the seam will help with the curve

Fold down the top edge, 1cm. This is now the longest straight edge. If it's not straight (like in the first one I made), you've sewed something wrong. Make the "notches"---just mark their location, you don't need to make actual notches. For wire, use something easily bendable and will hold it's shape. My wire is a bit thick and might rust with washing. But it works. 

Sew the top edge down, and when you come to the notch marking, pivot and sew to the edge. Sew back to the original stitching and pivot to keep going across the top.

When you get to the second notch marking, lift the foot and slide your wire into the pocket formed by the hem. Push it all the way to where you sewed the first little perpendicular line, pivot and sew the little pocket closed. 


Make sure the wire is out of the way before stitching this little pocket closed! Stitch back to the main line of the hem and stitch to the end of the hem. 

Take the liner piece and hem the top and bottom edges the same way, but with no wire on the nose bridge.

I used some cotton lycra to make the ear bands and ties ("tapes"). I cut them to the lengths given, and just eyeballed a width.

I laid it out and it worked out perfectly across the width of my 60" fabric. Until I accidentally cut the two ear pieces apart in the wrong spot--I was stretching it and cut too quickly before it relaxed. 

Place the ear elastics/bands at the edges, over top of the right side of the outside mask. Position them so they point to the middle seam. Stitch down each side, close to the edge. You might even want to go over the ear straps twice to reinforce. 

Lay the two masks right sides together. Cry when you remember that you had intended for the flannel to be the inside mask. Before I started the actual sewing, I thought it might not be pleasant to have the flannel against my mouth. The plastic side of the PUL is the "wrong" side so that the fabric side is against my mouth. I picked out the top hem, sewed the curve centre seam a bit smaller, and started re-sewing the top hem. Only to realize that it was actually the bottom edge!! I was beyond caring. As long as the inner layer mask is slightly smaller, it should be good. 

The head "tapes" confused me. I watched the video and it made sense. I didn't take a picture though. I'm wearing an Aircast on my leg/ankle and it sucks going up and down the stairs.  Take one tie, lay it inside of the two layers, right up to the edge seam joining the layers. Use a clip or pin to make sure it stays right at the edge. Sew a channel, from top edge  to bottom edge (or the other way around), far enough out from the edge so you don't catch the tie in the stitching. You should be able to pull the tie through (but don't pull it all the way out!).  Do this for the other edge too. 

Lastly, sew a small rectangle in the bottom hem, about 1.5" long, centered on the centre seam. Again, you can see this in the video. My rectangle was really wonky but it's just to attach the two layers together at the bottom. This allows you to place a tissue or paper towel or real filter between the layers without it falling out. 


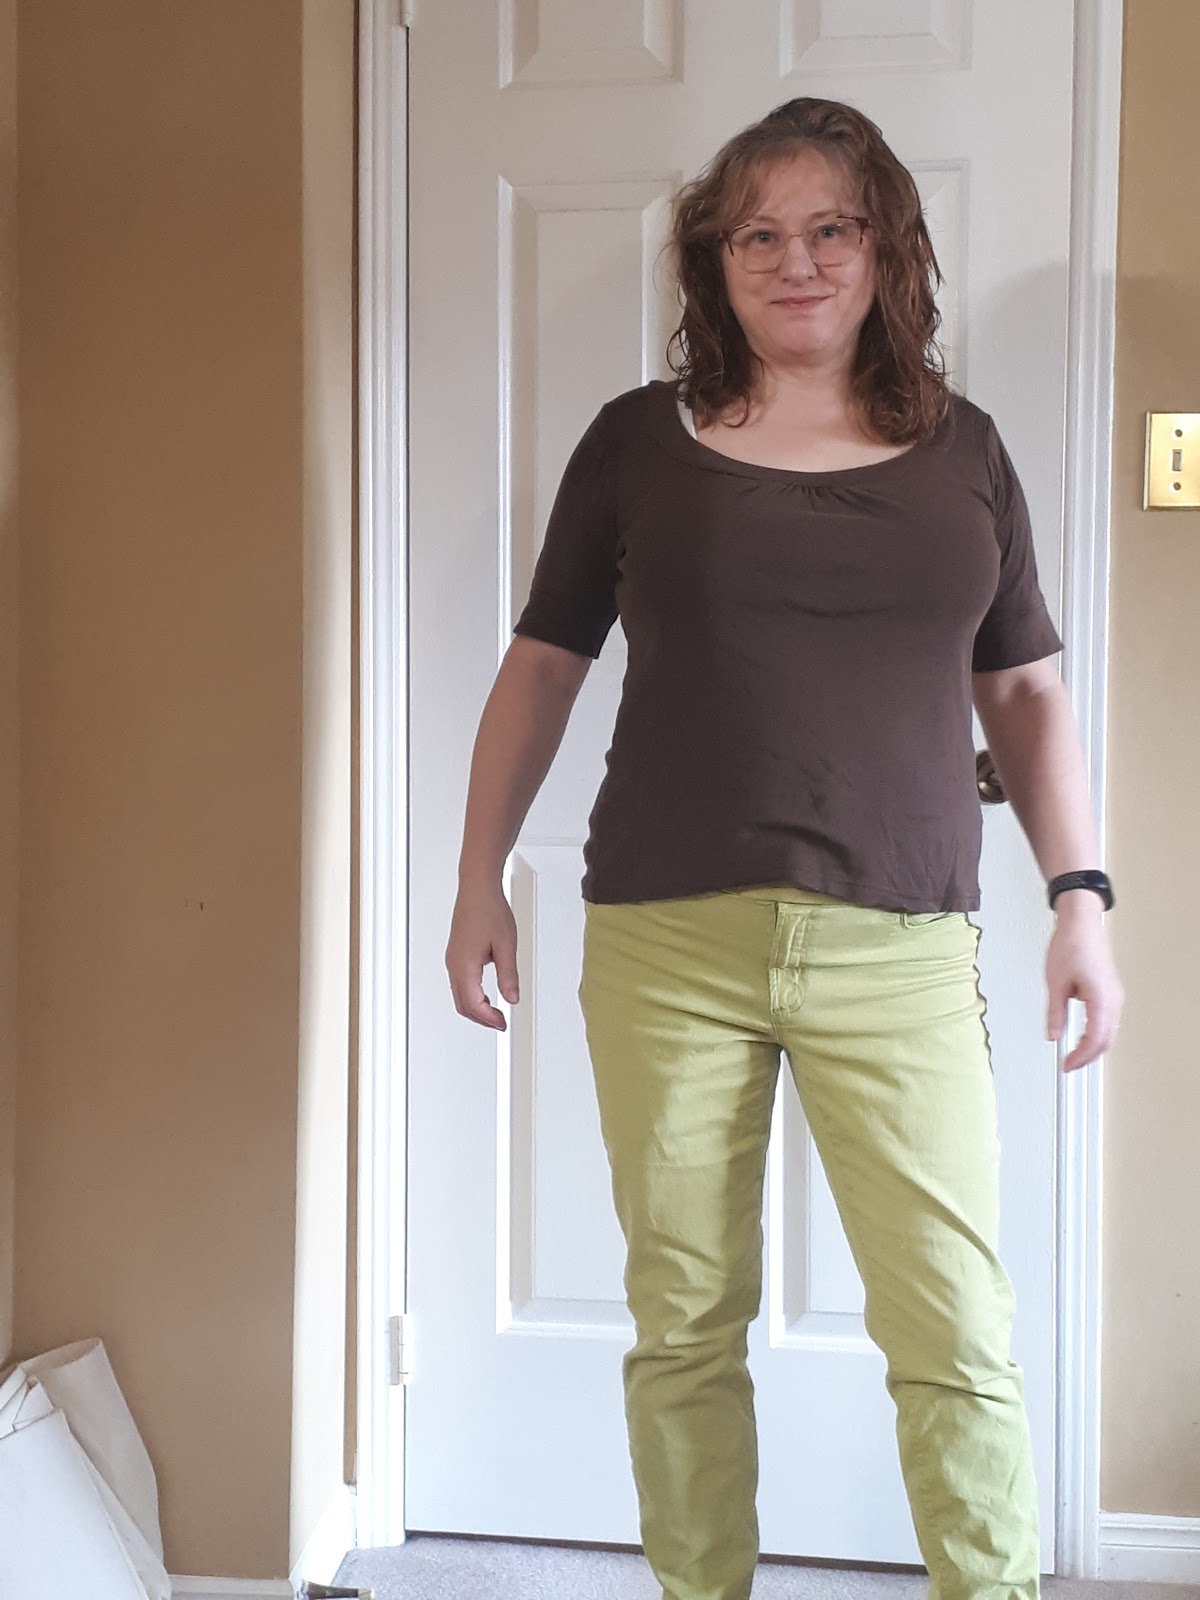
I don't have it properly adjusted here, it's too high on my nose and messing with my glasses. I immediately felt claustrophobic. There's a pretty decent seal--every time I breathed in, it would come right in to my nose. It also got hot very quickly! I think the flannel is too heavy. Most patterns call for one layer flannel and one layer quilter's cotton or two layers quilter's cotton. This is such a happy pattern for spring though. It might be better outside, rather than my warm sunny kitchen. I don't have a lot of PUL left so I will be doing some two layers quilter's cotton. I do have some of the PUL that's not laminated, it's intended to be sewn between layers of other fabric (I wonder if a heat press would be hot enough to laminate it to a fabric). I'm also wondering if just a section of PUL over the nose/mouth area would be cooler but still protective enough.

It's important to know that these masks can not eliminate the risk of getting infected. Neither can a n95 mask if it's not fitted right or you touch it or your eyes with contaminated hands. It's important to remember all the other precautions--wash your hands thoroughly with hot water and soap, disinfect things you touch, keep your distance from others. Be safe, stay home. 

For more info on the filter abilities of these masks, read through all the info at the website I linked to with the pattern.

Updates: I took apart that flannel and PUL mask and made a cotton and PUL mask. It still was hot and suffocating. I think Rob's worked better because the PUL in his was a woven and a bit stiffer.


If you cut and sew everything correctly, the lining piece will be slightly smaller. This gives a good snug fit on the cheeks. I have also adjusted the pattern so it's a bit lower on the cheeks, but both pieces are cut the same size. 


I"ve been reading about the use of non-woven interfacing as a filter layer. The important thing with a filter is that it fills up the pocket entirely, or else air will chose the easiest route in--around the filter.  made one today and used non-woven interfacing sewn to the wrong side of the liner, after hemming it. I cut the interfacing with the lining pattern piece, then cut 1/2" off the top and bottom because I didn't want to hem it. I realized I should lay it on the liner before I fold over the hems and stitch. Then it's just one trip through the machine.


 For the strap, I cut a 1" wide strip across the 60" width of a piece of cotton lycra. I sewed it in like the ties above, but the top ends were actually a loop, with the two ends coming out the bottom of the mask. The fit was good. I don't even know if the ear elastics are needed.
Sixty inches gave me plenty of extra length on the ties, the pattern I followed said 50"-60" but of a non-stretch cord. I might drop down to 50" but it's kind of nice to just use up the whole width of the fabric.

We've just been advised in Canada that indeed, it is a good idea to wear a mask if in public. I really haven't been out much, but I feel better knowing that if I need to go out, I'm covered. I can also give a couple to my mom, or mother-in-law. Next up is trying the "fabric" used in cheap recyclable bags as the inner layer. It's non-woven, and non-cotton. You know those bags you get at conferences, events, some stores...it's sort of dimply, has kind of a paper feel. It's very similar to the material used in real masks. It still won't offer n95 protection, but it's cheap and can be used as disposible filters.