Our wonderful school has a "Spring Fling" every June. The highlight, for me, is always the raffle table. For $5, you get 20 tickets. There are usually baskets put together by classes, and LOTS of miscellaneous items--the types of things you re-gift to a raffle. But awesome stuff that other people would love. I've even put things in, like the year I did the red and white basket with my water bottle holders and a few other items. These past two years, I haven't won anything (but I make up for it at other contests!), but in the past I've gotten a lot of great stuff that I've been able to gift to others! This year though, every class did a theme basket and there were only a few other items. I'm not sure why, though last year (or maybe the year before?), they had a LOT of items, and then right at the start of the fling, it started to pour rain so it all had to be moved inside quickly. And, well, last year, there was a group of moms from the parent committee who had been involved for a long, long time and their kids all graduated. Anyway.
My older daughter's class got "Baking". What could I contribute? What could I create? What could TracyKM Designs create? I thought about an apron. A bit boring, but necessary. Then, I remembered I had a couple "Snowbird" patches I had bought from the previous conductor of our community band, who is involved with Air Cadets, and one squadron is called the Snowbirds--named after the Canadian Air Force Snowbirds, an acrobatic team. Our school is named after one Snowbird member from our town who was killed in a crash. I knew him in high school, and am so proud my kids go to "his" school. I found a large piece of plain white twill (what the heck did I plan to do with 2m of white twill?!). I even found some adequately sized red bias tape. I have a scary looking old apron that is just a piece of twill with bias tape for the straps and tie. I copied the shape onto the twill, cut, hemmed the sides and bottom and put the bias tape on.
Wow. Pretty darn quick! I had to stop myself from making one for myself!
I sewed the patch on, and it was ready to go!
I was disappointed at the fling, when I saw the basket, it was folded in such a way you couldn't see the patch. Oh well. The winner ended up standing next to me, so I let her know.
I can totally see making more of these aprons. I have one more patch, I think, but now I know an embroider who happens to live across the field from the school and her oldest is starting JK in the fall, so I'm sure she'll be motivated to get the image digitized!!
Thursday, June 30, 2016
Wednesday, June 22, 2016
Cinch Sack and Grip Bag
My youngest, has a good friend who is a competitive gymnast. For her birthday gift, Megan really wanted to make her a "grip bag". I knew what the wrist grips were, but my daughter's skills at describing a grip bag left a lot to my imagination. I couldn't figure out why you'd need a specialized bag and how I could sew one. Finally I looked it up. All it is, is an aprox. 9x11" bag with a drawstring. Okey-dokey. I could sew that.
Of course, I wanted it to be reversible, or at least, lined. No exposed seams to get covered in chalk dust. I couldn't find a pattern that had the drawstring at the top but since it was pretty much like the cinch sacks, I just went with that. A message to my embroidery lady and an image was found and wham! a quick (and affordable) gift. Two fat quarters! The embroidery cost more than the rest of the supplies.
I loved the fabric Megan picked for the inside, though I really wanted it on the outside since it matched the fabrics she picked for the backpack. I did sneak it into the design of the water bottle holder. I simply used the scraps from trimming the fat quarters down to size. They were perfect. Originally, I thought the pocket was going on the outside, so I put the solid grey on the edge, to set it apart from the zig zag pattern.
But no, Megan said the bottle holder had to be on the inside so no matter which way she wore it, the pocket could still be used. Smart!
A sort of faded zig zag pattern.
The outside is the same zig zag I used for my niece's back pack, a few posts ago. I was hesitant. Megan originally said one side would be solid grey, but I told her that was boring. I thought the two zig zag patterns were very close in colour and style that there wasn't any need to have a reversible bag. But it was a gift for Megan to give, so she got final say.
I hope it gets lots of use!
Of course, I wanted it to be reversible, or at least, lined. No exposed seams to get covered in chalk dust. I couldn't find a pattern that had the drawstring at the top but since it was pretty much like the cinch sacks, I just went with that. A message to my embroidery lady and an image was found and wham! a quick (and affordable) gift. Two fat quarters! The embroidery cost more than the rest of the supplies.
I loved the fabric Megan picked for the inside, though I really wanted it on the outside since it matched the fabrics she picked for the backpack. I did sneak it into the design of the water bottle holder. I simply used the scraps from trimming the fat quarters down to size. They were perfect. Originally, I thought the pocket was going on the outside, so I put the solid grey on the edge, to set it apart from the zig zag pattern.
But no, Megan said the bottle holder had to be on the inside so no matter which way she wore it, the pocket could still be used. Smart!
A sort of faded zig zag pattern.
The outside is the same zig zag I used for my niece's back pack, a few posts ago. I was hesitant. Megan originally said one side would be solid grey, but I told her that was boring. I thought the two zig zag patterns were very close in colour and style that there wasn't any need to have a reversible bag. But it was a gift for Megan to give, so she got final say.
I hope it gets lots of use!
Monday, June 13, 2016
The Little Things
The nice thing about crafting your own items is you can make it how you want it. Got longer legs? Doesn't matter! Prefer side-thumbs instead of palm-thumbs on your mitts? No problem! Thick arches? Do more stitches for the heel!
Sometimes though, it's easy to say "Why bother?" when it comes to tweaking a pattern. But why not? Often, it doesn't take much (if any) more time, material, or expense. And the results can be stunning.
I've recently made three sunhats from a free pattern. It came in one size, yet each of my hats were slightly different sizes. Most of them (there's really two "hats" per hat, as they're reversible) had some assembly issues. I wasn't sure how to fix these problems. Hats are circles, and circle math is complicated.
Yesterday I was going through my bookmarked patterns again, trying to decide which hat pattern to do this time for an order. She wanted a flat top hat, rather than the "beach ball" style I had been doing. I found Martha Stewarts' pattern for a reversible bucket hat, though I thought the brim was a bit narrow and angled down quite a bit, so I kept looking. I kept thinking about a hat drafting tutorial I had saved.
It looked so complicated! So much math and drawing! I was considering just doing the Martha Stewart one, but thinking maybe I could use the brim of the one I had already done. Then I started reading the comments, since there weren't too many. One caught my eye: "Thank you for acknowledging that heads aren't circular shaped, and the tapered side panels makes the hat look more professionally made."
Wait! What! Heads aren't circular, didn't I know that? I mean, I knit hats that are "circular" though earflaps are always off center. Mmmm. Cowboy hats, and fedoras, and Tilley hats aren't circular! Why was I sewing circular sun hats? And why would Martha endorse this fallacy? I mean, it says right on her site--take time every day to learn something new! Martha! News flash! Heads aren't perfectly round! Knitted fabric can shape to the head, but woven fabric doesn't! Maybe this is why my sun hats flew off too easily! Slipped around! Even though they should technically fit!
(It's the same thing with sizing knit sweaters. Designers just take the chest circumference and divide by two. Look at your self in the mirror. See something sticking out on your chest that isn't there on your back? Is your front width the same as your back width? Unlikely! If it's a small difference, the knit fabric can stretch, but more than a few inches and you end up with a sweater that sags in the back and is too tight across the chest! But it's the "right" size! Really?).
I'm all for the little details that make my items unique and "better" than others. I don't like the word "better". I'd prefer, "enlightened". Why make a hat a circle when it should really be an oval?
Okay, got the crown figured out, next came the side pieces. Melly Sews shapes them, so the top is slightly smaller than the bottom. I wouldn't know how much smaller to do this. In fact, the template for the crown piece confused me--if I was doing this on my own, I would have just drawn a circle with the head circumference plus seam allowance, then squished it to an oval. But this would result in a very boxy look. Think of a pill box hat. Very straight sides. It was a bit of work to do the side pieces, but actually, not a whole lot. It turns out though that my piece is too big for a fat quarter (unless done on the bias), so I split it in two, and even remembered to add seam allowances!
The brim....how do you draw that?! Can't use a compass, since heads aren't circular! I just made many, many marks at the length I wanted. Though I'm a little confused since the crown template is a bit smaller than the bottom of the side band....I'm just going to follow the instructions. I cut a little pie slice out, then realized that I will lose another 1/2" on each side for the seam allowance. Keep this in mind. I also can not figure out how, if you cut the wedge all the way through the width, it will fit with the side piece. You've made the seam line smaller by what ever you take out with the wedge. Don't you need to keep this seam line the same as before? Uh oh. Just keep working...
I`ve got all my pieces cut out, and we`ll see how it goes! I have realized that although it took a while to draft this, sewing it will be quicker because there won`t be all the crown pieces (six wedges) to sew togther and topstitch. So once the template is done, making multiple hats will be so quick! Put a little more into prep, and reap the benefits in the assembly and the finished results!
Sometimes though, it's easy to say "Why bother?" when it comes to tweaking a pattern. But why not? Often, it doesn't take much (if any) more time, material, or expense. And the results can be stunning.
I've recently made three sunhats from a free pattern. It came in one size, yet each of my hats were slightly different sizes. Most of them (there's really two "hats" per hat, as they're reversible) had some assembly issues. I wasn't sure how to fix these problems. Hats are circles, and circle math is complicated.
Yesterday I was going through my bookmarked patterns again, trying to decide which hat pattern to do this time for an order. She wanted a flat top hat, rather than the "beach ball" style I had been doing. I found Martha Stewarts' pattern for a reversible bucket hat, though I thought the brim was a bit narrow and angled down quite a bit, so I kept looking. I kept thinking about a hat drafting tutorial I had saved.
It looked so complicated! So much math and drawing! I was considering just doing the Martha Stewart one, but thinking maybe I could use the brim of the one I had already done. Then I started reading the comments, since there weren't too many. One caught my eye: "Thank you for acknowledging that heads aren't circular shaped, and the tapered side panels makes the hat look more professionally made."
Wait! What! Heads aren't circular, didn't I know that? I mean, I knit hats that are "circular" though earflaps are always off center. Mmmm. Cowboy hats, and fedoras, and Tilley hats aren't circular! Why was I sewing circular sun hats? And why would Martha endorse this fallacy? I mean, it says right on her site--take time every day to learn something new! Martha! News flash! Heads aren't perfectly round! Knitted fabric can shape to the head, but woven fabric doesn't! Maybe this is why my sun hats flew off too easily! Slipped around! Even though they should technically fit!
(It's the same thing with sizing knit sweaters. Designers just take the chest circumference and divide by two. Look at your self in the mirror. See something sticking out on your chest that isn't there on your back? Is your front width the same as your back width? Unlikely! If it's a small difference, the knit fabric can stretch, but more than a few inches and you end up with a sweater that sags in the back and is too tight across the chest! But it's the "right" size! Really?).
I'm all for the little details that make my items unique and "better" than others. I don't like the word "better". I'd prefer, "enlightened". Why make a hat a circle when it should really be an oval?
Okay, got the crown figured out, next came the side pieces. Melly Sews shapes them, so the top is slightly smaller than the bottom. I wouldn't know how much smaller to do this. In fact, the template for the crown piece confused me--if I was doing this on my own, I would have just drawn a circle with the head circumference plus seam allowance, then squished it to an oval. But this would result in a very boxy look. Think of a pill box hat. Very straight sides. It was a bit of work to do the side pieces, but actually, not a whole lot. It turns out though that my piece is too big for a fat quarter (unless done on the bias), so I split it in two, and even remembered to add seam allowances!
The brim....how do you draw that?! Can't use a compass, since heads aren't circular! I just made many, many marks at the length I wanted. Though I'm a little confused since the crown template is a bit smaller than the bottom of the side band....I'm just going to follow the instructions. I cut a little pie slice out, then realized that I will lose another 1/2" on each side for the seam allowance. Keep this in mind. I also can not figure out how, if you cut the wedge all the way through the width, it will fit with the side piece. You've made the seam line smaller by what ever you take out with the wedge. Don't you need to keep this seam line the same as before? Uh oh. Just keep working...
I`ve got all my pieces cut out, and we`ll see how it goes! I have realized that although it took a while to draft this, sewing it will be quicker because there won`t be all the crown pieces (six wedges) to sew togther and topstitch. So once the template is done, making multiple hats will be so quick! Put a little more into prep, and reap the benefits in the assembly and the finished results!
Friday, June 10, 2016
Sweet Vintage
We were heading out for a day, and there was a 45 minute drive, so I needed something easy to work on. Keeping with the vintage feel of the Baby Surprise Jacket, I thought I'd whip up another "5 Hour Sweater". Looking at the pattern though, it didn't really work with my yarn, so I went with "Quick Baby Sweater" by Lorriane Major. This is an oldie but goodie that I've done before. The date on my print out is February 19, 2002. Just days before I would have found out I was pregnant with Lucy! On the back of the pattern is a doodle, by Rob, of how he pictured the awkward corner in our basement that he was renovating at that time. I've made this sweater before and remember having a few issues with keeping track of right side/wrong side, and that happened again. I also used smaller needles, I think 6mm with worsted weight yarn (on the smaller side of today's worsted). I think the 6.5mm makes it just a little too loosey-goosey. I've used this yarn for lots of other baby items, and I think I still have some left!!
I really don't have much to say, except the pink doesn't show up too well in the picture. I made the seamless version. There's no instructions for button holes, so I crocheted two ties (4 chains) and made bows. This will go in the "In Stock" box as apparently my extended family is popping out boys only.
According to the first post written about this yarn, I had 70gr left. Yet this one took 89gr, and there's the cat Lucy made, which took 20gr. This truly is one of those never ending balls of yarn!!
Balance: 2644gr more USED than bought
Costs: $74.87/162days = $0.46/day
I really don't have much to say, except the pink doesn't show up too well in the picture. I made the seamless version. There's no instructions for button holes, so I crocheted two ties (4 chains) and made bows. This will go in the "In Stock" box as apparently my extended family is popping out boys only.
According to the first post written about this yarn, I had 70gr left. Yet this one took 89gr, and there's the cat Lucy made, which took 20gr. This truly is one of those never ending balls of yarn!!
Yarn In: 1586gr
Yarn Out: 4141gr + 89gr = 4230grBalance: 2644gr more USED than bought
Costs: $74.87/162days = $0.46/day
Wednesday, June 08, 2016
Still Knitting!
Yes, I'm still knitting! While letting the wrist heal, I was doing a lot more sewing, but I still snuck in short blocks of knitting--can't really take the sewing machine in the truck! I had the urge to get back to basics and do some baby items (and then found out there are babies coming in the family! Since then though, they found out they're having boys). First up, a Baby Surprise Jacket!
Not much to say. I started with no plan, except to use up the purple. Which I did--had barely a few yards left over. I stuck with the pattern, but did my decreases and increases so they'd be more decorative.
I ran out of the purple earlier than I thought I would. If I had realized, then I would have done more grey sooner, or did a waste yarn cast on--which makes for nicer sewing up too. I think the purple was "Vanna's Choice" or "Impeccable". The grey I think was left over from the Rude Robot hat and the purple from the mermaid blankets. All together, it weighs in at 184gr, and I used either 5mm or 5.5mm needles. I have a bit of purple fabric from that first hobo bag and I might make a little pair of baby shoes. Trouble is, figuring what size to make. I think this is about a size six months-12months, but most baby shoe patterns only come in newborn.
I even created a little slideshow to explain how to fold this sweater. I know, there are other videos and tutorials out there, but I can't resist.
Not much to say. I started with no plan, except to use up the purple. Which I did--had barely a few yards left over. I stuck with the pattern, but did my decreases and increases so they'd be more decorative.
I ran out of the purple earlier than I thought I would. If I had realized, then I would have done more grey sooner, or did a waste yarn cast on--which makes for nicer sewing up too. I think the purple was "Vanna's Choice" or "Impeccable". The grey I think was left over from the Rude Robot hat and the purple from the mermaid blankets. All together, it weighs in at 184gr, and I used either 5mm or 5.5mm needles. I have a bit of purple fabric from that first hobo bag and I might make a little pair of baby shoes. Trouble is, figuring what size to make. I think this is about a size six months-12months, but most baby shoe patterns only come in newborn.
I even created a little slideshow to explain how to fold this sweater. I know, there are other videos and tutorials out there, but I can't resist.
Yarn In: 1586gr
Yarn Out: 184gr + 3957gr = 4141gr
Balance: 2555gr more USED than bought
Costs: $74.87/160days = $0.47/day
Yarn Out: 184gr + 3957gr = 4141gr
Balance: 2555gr more USED than bought
Costs: $74.87/160days = $0.47/day
Friday, June 03, 2016
Silent Auction!
I decided to make another drawstring backpack to donate to the silent auction at the big fundraiser dinner for the jazz bands my daughter is in. I wasn't going to do red satin again though LOL!
I had some of this texture-striped black, just enough to do the outer bag. I had this fun musical instrument fabric, but it wasn't quite enough for the inside. I also had some black twill--not really enough for the entire bag either. I've really been using up fabric lately!! So, I pieced the black twill onto the bottom of the instrument fabric--very pleased with myself for remembering to add the seam allowance to each piece to make it the right length. I placed the pocket so one side is in the side seam and one side was sewn down. However, due to the elastic around the top, it kind of pulls the side of the inner bag inwards. I think from now on, the water bottle pocket goes dead centre. Either inside or outside.
This is the bag that gave a concussion on Victoria Day (May 23). I thought I'd try do photos in my basement, since there was some natural light, and a pot light directly overhead, and I could sit on the stairs, and lean over the stairs (no railing). I was coming back up the stairs after laying it out, and went to lean out over the side of the stairs. I hadn't gone high enough, and headbutted the I-beam in the ceiling. Full throttle. My scalp is still a little tender to the touch, but I'm not getting the headaches and nausea anymore. That was a rough long weekend for injuries, but since then, I seem to be doing okay!
I had some of this texture-striped black, just enough to do the outer bag. I had this fun musical instrument fabric, but it wasn't quite enough for the inside. I also had some black twill--not really enough for the entire bag either. I've really been using up fabric lately!! So, I pieced the black twill onto the bottom of the instrument fabric--very pleased with myself for remembering to add the seam allowance to each piece to make it the right length. I placed the pocket so one side is in the side seam and one side was sewn down. However, due to the elastic around the top, it kind of pulls the side of the inner bag inwards. I think from now on, the water bottle pocket goes dead centre. Either inside or outside.
This is the bag that gave a concussion on Victoria Day (May 23). I thought I'd try do photos in my basement, since there was some natural light, and a pot light directly overhead, and I could sit on the stairs, and lean over the stairs (no railing). I was coming back up the stairs after laying it out, and went to lean out over the side of the stairs. I hadn't gone high enough, and headbutted the I-beam in the ceiling. Full throttle. My scalp is still a little tender to the touch, but I'm not getting the headaches and nausea anymore. That was a rough long weekend for injuries, but since then, I seem to be doing okay!
Tuesday, May 31, 2016
Another Hat!
I wanted to make another sunhat and this time really pay attention to how I laid the pieces on the fabric to cut out. I was at Michaels and saw their fat quarters. I was drawn to reds. I looked at one but felt it had too much white and the black I intended for the other side would show through. I looked at another one but it was "too" red. I settled on a red with small white polka dots. Cute, but not "baby". I had some black with beige flower embroidery on it for the other side.
I carefully laid out the pieces of the crown so the "stretch" would be going across. One piece of the red fat quarter seemed a little stretchier than the other. The black had less stretch because of the embroidery. I also cut the interfacing in two pieces, with a small overlap. I wanted to see if this worked on my own hat before doing it on one for someone else! I totally think it worked.
During the process, a few people mentioned it looks like Minnie Mouse. Then, when it was finished...I realized that I also have a red nightgown with white polka dots. Yup. My sun hat matches my nightgown.
I carefully laid out the pieces of the crown so the "stretch" would be going across. One piece of the red fat quarter seemed a little stretchier than the other. The black had less stretch because of the embroidery. I also cut the interfacing in two pieces, with a small overlap. I wanted to see if this worked on my own hat before doing it on one for someone else! I totally think it worked.
I sewed the red brim on first. I had pinned the 1/4 marks, and it went fine until the last 1/4 section. I ended up with more than an inch extra brim. Instead of panicking and ripping it out immediately, I set it aside and sewed the black brim on. It went on almost entirely perfect, maybe 1/2" brim left over. So I ripped off the red brimmed and tried again, had to try a few times and I think in the end I did have to take in the brim seam a little bit--1/4" from each side of the brim seam? (I left the outer edge the same, but tapered the seam towards the crown). The brim looks a little pulled in a few places. I didn't have a red thread that matched close enough, so I used white.
I did the first round of brim top stitching really close to the edge to make it easier to close the gap I left for turning. I also clipped the seam in that opening to make it lay flatter while I top stitched. I think I trimmed the entire brim edge seam before I turned it. When I went to do the second row of top stitching, I couldn't find a marking on my machine at the right distance, so the distance from the edge to the 2nd row is the same as between the 2nd and 3rd, and 3rd and 4th, etc, but the edge top stitching in between the edge and 2nd row. If that makes sense. I opted to top stitch on the crown this time instead of the brim. I thought this might look a bit smoother and prevent any tiny pleating if the brims were slightly off size. I think it looks fine. I think this might also be contributing to the smaller size. Then I remembered to add a ribbon, so I had to unpick a bit and hand stitch it in, etc. Whatever. It's done.During the process, a few people mentioned it looks like Minnie Mouse. Then, when it was finished...I realized that I also have a red nightgown with white polka dots. Yup. My sun hat matches my nightgown.
Friday, May 27, 2016
Seven Months Till Christmas!
How about some knitting content for a change? The overuse injury to my wrist in mid-March took much longer than I thought it would to fully resolve. The discomfort with using it disappeared fairly quickly, but I was still finding that if I knit for the evening, the next day my wrist felt irritated. It's feeling much better now, though there is still a lump, so I just try to vary what I'm doing.
I've been working on this stocking for awhile. It started off well enough. A bit of time with Google and Ravelry lead me to the pattern at Mary Maxim. Yay! I wouldn't have to chart it all out! I waited for one of their weekly sales, and bought their four pack of stocking pattern books for $20Cdn. This gives me a little over 50 Christmas stocking patterns!! I had already gone yarn shopping and found great matches--especially the green. The red is a bit off, but luckily, because they're done in "reverse", it's not a big issue. I got started, knitting happily away with the chart.
Once I got to the kitty's eyes, I wanted to check something, so I looked at the original stocking. Wait a minute! It didn't match what I was knitting! I looked at the chart and what I knitted--they matched. I looked at the tiny picture on the back cover of the book, and it matched the original stocking, but not the chart! WTF?! There was a chunk of white missing on the right side of the hat!!
I emailed Mary Maxim and explained the issue. My thinking was that the chart had been re-done when they entered the digital age but the pictures hadn't been updated. But why would they use a different chart? The answer came back--she didn't see any difference between the chart and the picture, and perhaps I was doing the knit rows from left to right instead of right to left.
I exhaled. This customer service rep doesn't know me from Adam. That is the number one issue new knitters make with charts. However, that wouldn't result in a totally different picture, it would just be a mirror image.
I wrote back explaining that I had over 20 years experience knitting from charts, and also charting my own designs. This was not a mirror image problem, but a totally different chart. She wrote back saying she still didn't see a problem.
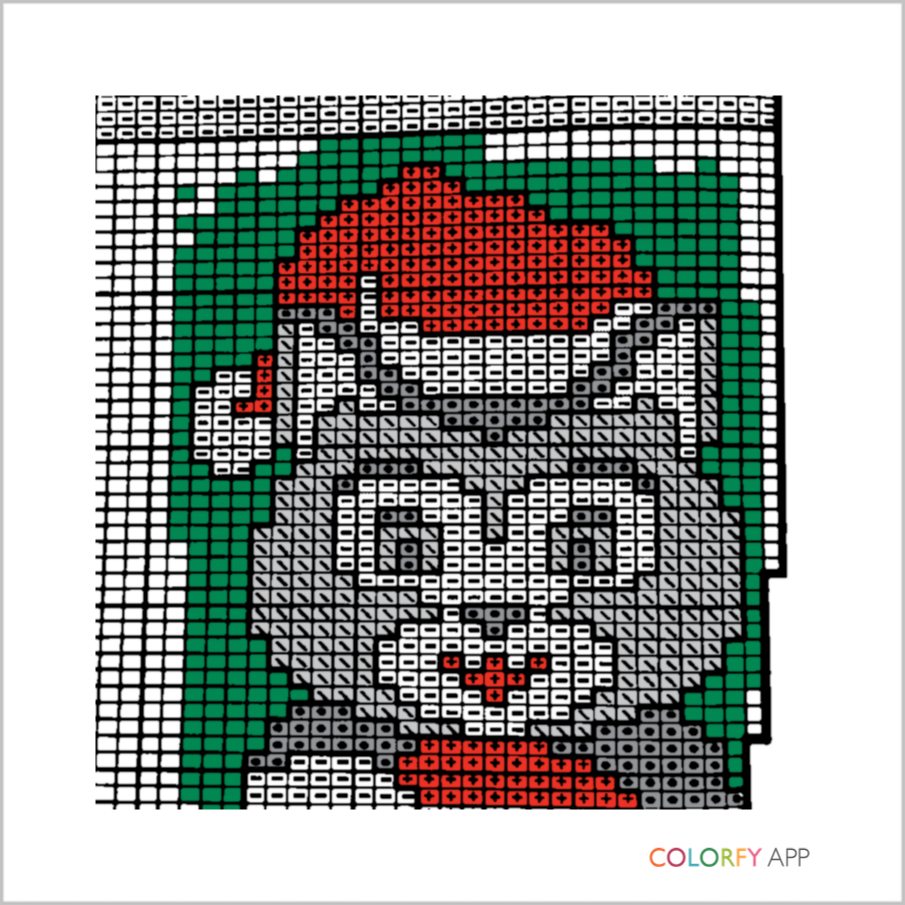
Ummm. Okay. I took a iPad photo of the chart, and used a colouring app to colour it in the correct colours. Then I took a picture of the picture of the stocking on the back of the book, and I put the two in an email for customer service. I heard back from someone different, who did confirm that the chart was changed after the first printing and I must have the newer printing. Well, fat lot of good that does me, paying $20+ for something that isn't as advertised. How many other charts don't match the pictures? There was never any mention of say, a gift certificate or a refund for my troubles. Not even a free box of mystery sock yarn. I would have gladly taken a free box of mystery sock yarn, though that would through my "Yarn In" totals quite high.
I had to rip it back to the bottom of the off-white band, and knit from the original stocking. It wasn't the greatest knitting, with twisted stitches and some wonky tension making it hard to count rows and stitches were the intarsia was. I got past what I thought was the issue area and moved back to the charts. Once done, I did see a couple of wayward stitches that I duplicate stitched over.
At some point in all of this, I took a break and mended all my handknit socks, and ended up with the wrist injury and had to stop knitting for a bit, then gradually work my way back up to long stretches. I wanted to make sure this injury healed properly, not like my toes after I dropped the weight on them and then ignored the pain and swelling for several weeks.
I finally got the stocking finished, and had to hunt for a pom pom. I couldn't find any the right size so I went bigger, and replaced the original too, trimming them both down quite a bit. I gave it some steam to smooth it out, arranged a pick up time for the next evening, and brought the two together to take a look.
And whoa. The new one was quite a bit shorter!! I had had some tensions issues and had been alternating needle sizes to try to match, and sometimes it's hard to tell the final size before seaming, washing and blocking, but there was no denying. They did not match. Panic. Exhale. I am Tracy, and this is just the way these things are. It's the True Tracy Way. I would have to do surgery, as I didn't think I had time to reknit the lower leg, ankle, and entire foot.
I did not take any photos. I know many knitters find images of cut apart knitting to be too graphic. I undid the back seam above the ankle, snipped a stitch at the edge, and proceeded to try to pick out a row. Apparently, I had been knitting from two ends since after finishing the picture, I wanted to use up the small amounts of the red that I had been already using for the background. It was kind of messy, trying to get it ripped back to one row, and get the ankle side cleaned up to one row to be ready to be grafted back.
I had already put the needles away, thought I had the right size, knit for a while when my daughter was doing her skating tests, ripped it all out, picked out bigger needles, knit for a bit, then knit a few more rows, then grafted it to the original piece. The new section was obviously bigger and looser, along the seamed edge. I ended up tightening up stitches one by one, getting some slack, bringing it to the back, and knotting it tight.
I also cut open the toe, ripped back the toe and added some more rows. It took me several tries to get the toe decreases right and the grafting. I was grafting starting in the middle of the row like with real socks, but it was wrong, I needed to graft from the end....hard to explain, it's only been a week but I don't really remember exactly.
In the end, it was much improved. I got a few photos, the customer came and was thrilled. She doesn't need to know about all the issues. She did give me a nice tip though, which was much appreciated since the original quote was on the lower end even if there hadn't been any issues.
This is something that is nice about doing custom work. Every project has a story. Not just who ordered it, and why, but rarely do the orders go entirely smoothly. Usually I'm trying to copy something, or "wing it" or working with limited supplies or questionable measurements. It keeps it interesting. I don't know that I could crochet 20 owl hats for a craft show. It might be less stress, but then what if they don't sell. What if someone wanted blue eyes instead of pink? What if...
I've been working on this stocking for awhile. It started off well enough. A bit of time with Google and Ravelry lead me to the pattern at Mary Maxim. Yay! I wouldn't have to chart it all out! I waited for one of their weekly sales, and bought their four pack of stocking pattern books for $20Cdn. This gives me a little over 50 Christmas stocking patterns!! I had already gone yarn shopping and found great matches--especially the green. The red is a bit off, but luckily, because they're done in "reverse", it's not a big issue. I got started, knitting happily away with the chart.
Once I got to the kitty's eyes, I wanted to check something, so I looked at the original stocking. Wait a minute! It didn't match what I was knitting! I looked at the chart and what I knitted--they matched. I looked at the tiny picture on the back cover of the book, and it matched the original stocking, but not the chart! WTF?! There was a chunk of white missing on the right side of the hat!!
I emailed Mary Maxim and explained the issue. My thinking was that the chart had been re-done when they entered the digital age but the pictures hadn't been updated. But why would they use a different chart? The answer came back--she didn't see any difference between the chart and the picture, and perhaps I was doing the knit rows from left to right instead of right to left.
I exhaled. This customer service rep doesn't know me from Adam. That is the number one issue new knitters make with charts. However, that wouldn't result in a totally different picture, it would just be a mirror image.
I wrote back explaining that I had over 20 years experience knitting from charts, and also charting my own designs. This was not a mirror image problem, but a totally different chart. She wrote back saying she still didn't see a problem.
Ummm. Okay. I took a iPad photo of the chart, and used a colouring app to colour it in the correct colours. Then I took a picture of the picture of the stocking on the back of the book, and I put the two in an email for customer service. I heard back from someone different, who did confirm that the chart was changed after the first printing and I must have the newer printing. Well, fat lot of good that does me, paying $20+ for something that isn't as advertised. How many other charts don't match the pictures? There was never any mention of say, a gift certificate or a refund for my troubles. Not even a free box of mystery sock yarn. I would have gladly taken a free box of mystery sock yarn, though that would through my "Yarn In" totals quite high.
| See that white band above the right ear? Missing from the chart! |
At some point in all of this, I took a break and mended all my handknit socks, and ended up with the wrist injury and had to stop knitting for a bit, then gradually work my way back up to long stretches. I wanted to make sure this injury healed properly, not like my toes after I dropped the weight on them and then ignored the pain and swelling for several weeks.
![]() |
| Can you spot the couple stitches (on the right kitty) that I duplicate stitched over? |
I finally got the stocking finished, and had to hunt for a pom pom. I couldn't find any the right size so I went bigger, and replaced the original too, trimming them both down quite a bit. I gave it some steam to smooth it out, arranged a pick up time for the next evening, and brought the two together to take a look.
And whoa. The new one was quite a bit shorter!! I had had some tensions issues and had been alternating needle sizes to try to match, and sometimes it's hard to tell the final size before seaming, washing and blocking, but there was no denying. They did not match. Panic. Exhale. I am Tracy, and this is just the way these things are. It's the True Tracy Way. I would have to do surgery, as I didn't think I had time to reknit the lower leg, ankle, and entire foot.
I did not take any photos. I know many knitters find images of cut apart knitting to be too graphic. I undid the back seam above the ankle, snipped a stitch at the edge, and proceeded to try to pick out a row. Apparently, I had been knitting from two ends since after finishing the picture, I wanted to use up the small amounts of the red that I had been already using for the background. It was kind of messy, trying to get it ripped back to one row, and get the ankle side cleaned up to one row to be ready to be grafted back.
I had already put the needles away, thought I had the right size, knit for a while when my daughter was doing her skating tests, ripped it all out, picked out bigger needles, knit for a bit, then knit a few more rows, then grafted it to the original piece. The new section was obviously bigger and looser, along the seamed edge. I ended up tightening up stitches one by one, getting some slack, bringing it to the back, and knotting it tight.
I also cut open the toe, ripped back the toe and added some more rows. It took me several tries to get the toe decreases right and the grafting. I was grafting starting in the middle of the row like with real socks, but it was wrong, I needed to graft from the end....hard to explain, it's only been a week but I don't really remember exactly.
In the end, it was much improved. I got a few photos, the customer came and was thrilled. She doesn't need to know about all the issues. She did give me a nice tip though, which was much appreciated since the original quote was on the lower end even if there hadn't been any issues.
This is something that is nice about doing custom work. Every project has a story. Not just who ordered it, and why, but rarely do the orders go entirely smoothly. Usually I'm trying to copy something, or "wing it" or working with limited supplies or questionable measurements. It keeps it interesting. I don't know that I could crochet 20 owl hats for a craft show. It might be less stress, but then what if they don't sell. What if someone wanted blue eyes instead of pink? What if...
Yarn In: 1586gr
Yarn Out: 3850gr + 107gr = 3957gr
Balance: 2371gr more USED than bought
Costs: $74.87/102days = $0.73/day
Yarn Out: 3850gr + 107gr = 3957gr
Balance: 2371gr more USED than bought
Costs: $74.87/102days = $0.73/day
Wednesday, May 18, 2016
Ultimate Cinch Sack
What's the "proper" name for these bags? I've seen cinch sacks, drawstring backpacks, and I think a few other terms.
After making my bag, and then my daughter's bag, I felt confident to get started on my niece's birthday bag. I had gone to Wal-Mart and found they had fabric that came with two co-ordinating pieces that were quite large. I first looked at one with wild animals that was a bit more childish, but then picked out this one because she's turning 10, so not a "child" but not a teen. And, let's face it...how often do the parents end up being the one that carries the child's things? I decided for this one, I was going to use one fabric on one side, and one on the other side, and a different one inside. This way, although it's not inside-out reversible, it could be back-to-front reversible and a little more mature fabric could be shown. As well as this awesomeness, I was going to enlarge the backpack by adding a 3" (or so) wide strip between the two sides. Like a gusset. I figured I would just cut one long strip and sew each side to it.
But then I thought, how does it go around the corners? So I cut out a piece for each side and the bottom, and sewed them together. But they were too long somehow. After staring at it for a bit of time, I got out my Singer "Sewing for the Home" book and looked up pillows. Indeed, they used one long strip, cut a snip at what would be the corners, and "bent" it at the corners. Since I had sewn seams, this wouldn't be easy, but since the strip was actually too long, I shifted it a bit.
On top of all that drama, I wanted a water bottle pocket on one side piece. I wasn't going to do it like I did for the purse, which was based on the car seat organizer. I was going to do it similar to what's on our "real" backpacks, except I didn't have stretchy mesh so I used a pleat. Then I thought, much of this needs to be taken up to become the "bottom" of the holder, so it needs to be taller. The scrap piece of fabric that I thought was perfect was suddenly too short. No problem, I would use the brown of the gusset, and it would be more durable. That also meant thicker though.
I went to sew it on. Realized that if I put it up on the side, it would need to have the bottom edge folded up inside and top stitched on--a little thick (I realized after a slightly different way I could have done it). Ideally, it should be sewn into that seam at the bottom corner. Then I realized, as I was about to do this, that I needed the straps to come through that brown strip, in the middle, just above the bottom edge. On the other cinch sacks, there is a seam running between the front and back and the hole for the strap is in the seam. There was no vertical seam here. I could use the vertical seam of either the front of back piece, but then would it still be reversible or would it feel funny? So, I raised the pocket up again.
Then, it really hit me. Just HOW was I gong to insert the straps into that strip? I had done so much thinking about this bag before even starting, I thought I had figured out everything. I can't believe I overlooked this detail! I was tempted to take the strip off, cut it in half so each the front and back now had a narrow brown strip, and then sew them together again, creating a vertical seam mid-strip. I realized I needed to go to bed before I started cutting!!
I came up with the idea of a button hole. How to fasten the straps inside though? I couldn't stitch the button hole slit closed like with the original bag when you sew over the straps along the seam line, on the inside. I could fold each end over to the side (inside), and stitch down, but then you would see that stitching on the outside. I made buttonholes, and kept pondering if there was something better.
After much thinking, I looked at my kids' cheapy cinch sacks, and some of them used loops sewn into the side seams, and the cords come through the loop and knotted below. I've had to replace a few of these loops. Again, I had no seam to sew the ends of the loop through, and if I placed the loop on the outside with each side spread and sewn down (picture the breast cancer ribbon, put fold each leg out flat to the side), you'd see the ends of the loop and how to make that look finished? I could put the loop through the buttonhole, and stitch down the ends...again, the stitching would show but maybe I could do it really close to the buttonhole.
I had to lengthen the buttonhole slits. One side went fine, but on the other side, I couldn't get the buttonhole attachment to work properly because of the thickness of the water bottle pocket!! If I had done the buttonholes before stitching the bag together, it would have worked fine. Or if I had the pocket up just a bit higher. At least I hadn't sewn both layers of the bag together yet!
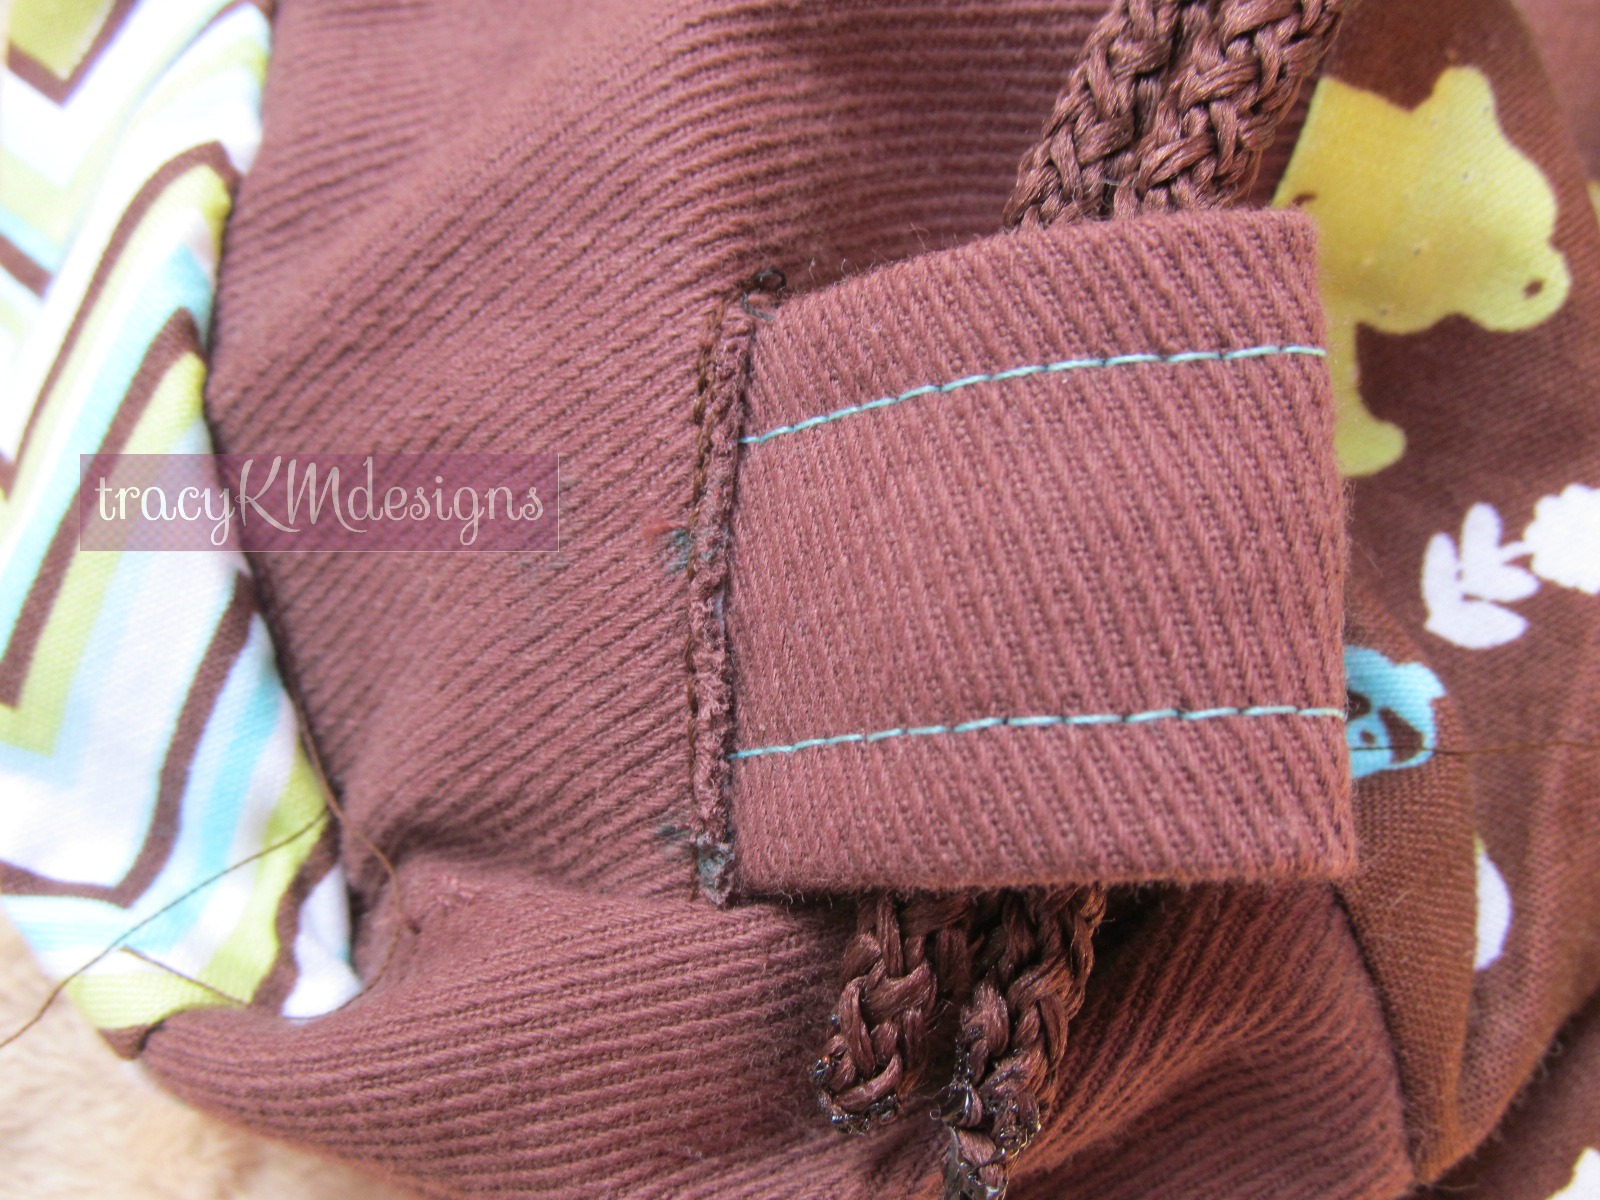
I had found two scraps of the brown twill and sewed it into a tube, turned right side out, pressed with the seam in the middle and top stitched with a contrasting colour. Mainly because I knew I was getting low on the brown thread and also because I just didn't feel like changing the thread in the machine. After inserting the liner and stitching together, I added the straps. Before closing the opening in the liner (which I had forget to leave when I stitched the liner together), I stitched the loops right along the buttonhole, and then "stitched in the ditch" of the side seams--by shear luck the strips were long enough to reach the side seams. I also stitched the loop right next to the straps so that hopefully the knot never pulls through.
The liner was not problem-free either. The pocket went fine. I was slightly more prepared for the water bottle pocket. I thought "this time I won't put it along the strip so I won't have a problem with the straps". Duh, the straps don't go through the liner. I opted to put one side in the side seam, the bottom along the bottom seam, and the other side I could stitch it first with the pocket laid out, RS to RS, next to where it was going to end up, stitch the seam, then flip the pocket over the seam and do the side and bottom with those seams. Otherwise, if I had centered it, I could do that with only one side of it, so you just top stitch pockets down. But wait a minute....looking at the pictures, the inside water bottle holder is also on the strip. I think I changed my mind about doing it that way because I couldn't get it straight, or the bottom was funny, or maybe I am so sleep deprived I actually made something else recently and I'm confusing two projects...Oh yes! I am working on another bag! Please ignore my rambling.
I also used some plain white fabric to line the liner because the zig zag side was a little see through. I lined one side of the liner and one side of the outer. Not sure why. Maybe something to do with the inside zippered pocket, or the fussing with the pockets. When I put the inner and outer layers together though, it hadn't worked out like I had planned. Either the two water bottle pockets would be on the same side, or both pieces of lining were going to end up on the same side. I can't tell from my pictures what the end result was. If I do this again, I think I will center the inside water bottle pocket, regardless if there's one on the outside. That way, it'll always be balanced.
In the end, I really like this bag. It's roomy but not huge. Functional. Totally unique. I like the fabrics I used, and I like how I turned the fabric sideways for the water bottle pockets. I chose the fabrics for the hat in the last post to co-ordinate without being too matchy and I love how it all looks together. I'm not sure I'd do it with the side pieces again. The twill is heavier and more durable than the cotton, maybe I could do "patchwork" and use twill for the bottom 1/3 of front and back pieces. Oh, just thought...what if I had sewn on strap end into each of the seams at the bottom side? Still, adding the side piece did add to the work and I don't know if the cost would be worth it. It does make a nice place for a water bottle though.
Every once in a while something good happens....like running out of bobbin thread right at the end of a seam!
I wish I had a picture of the hat and the backpack together! Maybe I can get one from my sister-in-law.
After making my bag, and then my daughter's bag, I felt confident to get started on my niece's birthday bag. I had gone to Wal-Mart and found they had fabric that came with two co-ordinating pieces that were quite large. I first looked at one with wild animals that was a bit more childish, but then picked out this one because she's turning 10, so not a "child" but not a teen. And, let's face it...how often do the parents end up being the one that carries the child's things? I decided for this one, I was going to use one fabric on one side, and one on the other side, and a different one inside. This way, although it's not inside-out reversible, it could be back-to-front reversible and a little more mature fabric could be shown. As well as this awesomeness, I was going to enlarge the backpack by adding a 3" (or so) wide strip between the two sides. Like a gusset. I figured I would just cut one long strip and sew each side to it.
But then I thought, how does it go around the corners? So I cut out a piece for each side and the bottom, and sewed them together. But they were too long somehow. After staring at it for a bit of time, I got out my Singer "Sewing for the Home" book and looked up pillows. Indeed, they used one long strip, cut a snip at what would be the corners, and "bent" it at the corners. Since I had sewn seams, this wouldn't be easy, but since the strip was actually too long, I shifted it a bit.
On top of all that drama, I wanted a water bottle pocket on one side piece. I wasn't going to do it like I did for the purse, which was based on the car seat organizer. I was going to do it similar to what's on our "real" backpacks, except I didn't have stretchy mesh so I used a pleat. Then I thought, much of this needs to be taken up to become the "bottom" of the holder, so it needs to be taller. The scrap piece of fabric that I thought was perfect was suddenly too short. No problem, I would use the brown of the gusset, and it would be more durable. That also meant thicker though.
I went to sew it on. Realized that if I put it up on the side, it would need to have the bottom edge folded up inside and top stitched on--a little thick (I realized after a slightly different way I could have done it). Ideally, it should be sewn into that seam at the bottom corner. Then I realized, as I was about to do this, that I needed the straps to come through that brown strip, in the middle, just above the bottom edge. On the other cinch sacks, there is a seam running between the front and back and the hole for the strap is in the seam. There was no vertical seam here. I could use the vertical seam of either the front of back piece, but then would it still be reversible or would it feel funny? So, I raised the pocket up again.
Then, it really hit me. Just HOW was I gong to insert the straps into that strip? I had done so much thinking about this bag before even starting, I thought I had figured out everything. I can't believe I overlooked this detail! I was tempted to take the strip off, cut it in half so each the front and back now had a narrow brown strip, and then sew them together again, creating a vertical seam mid-strip. I realized I needed to go to bed before I started cutting!!
I came up with the idea of a button hole. How to fasten the straps inside though? I couldn't stitch the button hole slit closed like with the original bag when you sew over the straps along the seam line, on the inside. I could fold each end over to the side (inside), and stitch down, but then you would see that stitching on the outside. I made buttonholes, and kept pondering if there was something better.
After much thinking, I looked at my kids' cheapy cinch sacks, and some of them used loops sewn into the side seams, and the cords come through the loop and knotted below. I've had to replace a few of these loops. Again, I had no seam to sew the ends of the loop through, and if I placed the loop on the outside with each side spread and sewn down (picture the breast cancer ribbon, put fold each leg out flat to the side), you'd see the ends of the loop and how to make that look finished? I could put the loop through the buttonhole, and stitch down the ends...again, the stitching would show but maybe I could do it really close to the buttonhole.
I had found two scraps of the brown twill and sewed it into a tube, turned right side out, pressed with the seam in the middle and top stitched with a contrasting colour. Mainly because I knew I was getting low on the brown thread and also because I just didn't feel like changing the thread in the machine. After inserting the liner and stitching together, I added the straps. Before closing the opening in the liner (which I had forget to leave when I stitched the liner together), I stitched the loops right along the buttonhole, and then "stitched in the ditch" of the side seams--by shear luck the strips were long enough to reach the side seams. I also stitched the loop right next to the straps so that hopefully the knot never pulls through.
In the end, I really like this bag. It's roomy but not huge. Functional. Totally unique. I like the fabrics I used, and I like how I turned the fabric sideways for the water bottle pockets. I chose the fabrics for the hat in the last post to co-ordinate without being too matchy and I love how it all looks together. I'm not sure I'd do it with the side pieces again. The twill is heavier and more durable than the cotton, maybe I could do "patchwork" and use twill for the bottom 1/3 of front and back pieces. Oh, just thought...what if I had sewn on strap end into each of the seams at the bottom side? Still, adding the side piece did add to the work and I don't know if the cost would be worth it. It does make a nice place for a water bottle though.
Every once in a while something good happens....like running out of bobbin thread right at the end of a seam!
I wish I had a picture of the hat and the backpack together! Maybe I can get one from my sister-in-law.
Thursday, May 12, 2016
Summer!
Finally, it feels like we might have a summer. If it stays just slightly warmer than it is now, I'll be happy. Weather like this calls for a floppy sun hat!
This was made for my niece's 10th birthday coming up. She's very active, hiking and living in New Mexico, summer camp in Ontario. A hat that travels well is perfect for her. I chose this fabric because it was young but not childish and the colours work well with her blue eyes and with the other gift I made her that I'll blog about later. It's two fat quarters from Wal-Mart! I've never really looked at fat quarters, but I see how people get addicted to them!
The inside of the hat is another fat quarter. I'm not keen on green for the inside, I'm afraid it will reflect off the skin and make the wearer look odd. But there's also pink in there.
As soon as I laid out the first pattern piece on this fabric, I discovered a big issue. The hearts were just slightly bigger than the pattern piece, and when you take into account the seam allowances, it would be hard to tell it 's a heart :( I can "pattern match" at the seams, right?
Well. Apparently pattern matching works only for straight seams!
I did the best I could, trying to match up the top parts of the hearts. I knew there would be no way I could match up piece six with piece one, so I didn't even try (below). I had trouble sewing the pieces together--I had labelled each edge A/B, B/C, C/D, D/E, E/A. Except....there are six pieces!! I got that sorted out as best as I could.
The sixth piece. Well. Due to the very large repeat, and the hearts being in rows of one row upright, one row upside down, I couldn't get the last piece to fit anywhere where it could match up with piece 5. I couldn't even get it to fit somewhere so the heart would be at about the same level as the rest of the hat! I decided to piece the last piece. That took some trial and error, and the top of the section (below) worked better than the bottom corner (above).
I was a little disappointed in how the top lined up. It's not too noticeable with all the print, so I left it.
The green gave me no troubles, in the cutting and sewing together. Until it came time to sew the brim on. The blue side went together pretty well, it was just off a little bit. The green?
Ugh. I eased it, I stretched it, I finally restitched the seam. I was just too big. The whole hat feels a bit smaller than mine. I think what happened is that the green pieces were placed crosswise to what they should be. There's no grain line on the pattern. You'd think, small pieces, it's just a hat with cotton....it doesn't matter. But one direction, the fabric has a bit of natural stretch. And I guess I got it wrong! Hopefully it still fits. She has a big head, but much of that is hair, LOL! I added a pink ribbon and the white slide lock from my hat.
I really like the pattern and the end result, though it really eats fabric for the brim!! I bought a meter of the stiff interfacing (maybe it should be woven interfacing instead of non-woven), and I'll be able to get only two hats (with some left over). I wonder if I can cut the pattern piece in half, slightly overlapped, and do that. I am going to take about 1/4" off the brim length (each side, so 1/2"). Three out of four brims have been too large, so I think it needs it.
This was made for my niece's 10th birthday coming up. She's very active, hiking and living in New Mexico, summer camp in Ontario. A hat that travels well is perfect for her. I chose this fabric because it was young but not childish and the colours work well with her blue eyes and with the other gift I made her that I'll blog about later. It's two fat quarters from Wal-Mart! I've never really looked at fat quarters, but I see how people get addicted to them!
The inside of the hat is another fat quarter. I'm not keen on green for the inside, I'm afraid it will reflect off the skin and make the wearer look odd. But there's also pink in there.
As soon as I laid out the first pattern piece on this fabric, I discovered a big issue. The hearts were just slightly bigger than the pattern piece, and when you take into account the seam allowances, it would be hard to tell it 's a heart :( I can "pattern match" at the seams, right?
Well. Apparently pattern matching works only for straight seams!
I did the best I could, trying to match up the top parts of the hearts. I knew there would be no way I could match up piece six with piece one, so I didn't even try (below). I had trouble sewing the pieces together--I had labelled each edge A/B, B/C, C/D, D/E, E/A. Except....there are six pieces!! I got that sorted out as best as I could.
The sixth piece. Well. Due to the very large repeat, and the hearts being in rows of one row upright, one row upside down, I couldn't get the last piece to fit anywhere where it could match up with piece 5. I couldn't even get it to fit somewhere so the heart would be at about the same level as the rest of the hat! I decided to piece the last piece. That took some trial and error, and the top of the section (below) worked better than the bottom corner (above).
I was a little disappointed in how the top lined up. It's not too noticeable with all the print, so I left it.
The green gave me no troubles, in the cutting and sewing together. Until it came time to sew the brim on. The blue side went together pretty well, it was just off a little bit. The green?
Ugh. I eased it, I stretched it, I finally restitched the seam. I was just too big. The whole hat feels a bit smaller than mine. I think what happened is that the green pieces were placed crosswise to what they should be. There's no grain line on the pattern. You'd think, small pieces, it's just a hat with cotton....it doesn't matter. But one direction, the fabric has a bit of natural stretch. And I guess I got it wrong! Hopefully it still fits. She has a big head, but much of that is hair, LOL! I added a pink ribbon and the white slide lock from my hat.
I really like the pattern and the end result, though it really eats fabric for the brim!! I bought a meter of the stiff interfacing (maybe it should be woven interfacing instead of non-woven), and I'll be able to get only two hats (with some left over). I wonder if I can cut the pattern piece in half, slightly overlapped, and do that. I am going to take about 1/4" off the brim length (each side, so 1/2"). Three out of four brims have been too large, so I think it needs it.
Wednesday, May 04, 2016
Sun!
Winter got to a late start, and really didn't make much of an appearance this year. Spring has been even slower. So much so that even on May 1 we were still wearing winter coats in the middle of the day! I finished this hat a week or more ago, and haven't even had a chance to try it out until yesterday!
If you want to check out a picture of me in it, see either my facebook page or Instagram page. And while you're there, maybe hit the "like" or "follow" button?
I got the pattern from Craftsy. I don't remember if it was one of their emails or on Facebook. The actual pattern can be found at http://blog.lorennabuck.com/p/patterns-and-tutorials.html. The pattern is very good, though myself, and others on line did find the brim was a tad big when sewing onto the crown. In my own case, it could be because there were no grain lines on the pieces, so I didn't pay much attention to that when laying out the pieces, and I might have had some stretching.
Also, I didn't have heavy fusible interfacing. I figured I could use the sewn in stuff I had. Then I had an idea to use the lightweight stuff on the other side of the brim, and for some odd reason thought I'd be able to iron it to the sewn in stuff. Well, yeah, I could fuse them together...but then it still needs to be sewn in. I had some fusible webbing but not enough to do the whole brim. In retrospect, I could have used the light stuff on each brim piece.
I used a 50-50 poly/cotton sheet I had bought at Value Village a while ago. For $5, it's a LOT of fabric and although not as heavy as what Lorenna recommends for one layer, it's still good choice. The inside is a quilting cotton. I chose it so the soft pink would reflect onto my face and make me look good :)
I read a blog after I finished mine, that suggested topstitching each time you sew top pieces together, rather than after. I'll try that next time.
I was really impressed with myself, until time to sew the brim on. The first time, it was much too big. So I folded it in quarters and did that method, and the first three quarters worked well, but the last one was still giving me troubles. I eased it in as best as I could. And then topstitching. I was going to do more rounds along the outer brim, but it was starting to wrinkle. But I'm okay with it, for my FIRST sewn hat!! The ribbon and the slider lock were in my sewing desk. I keep all those little notions when taking apart wrecked backpacks! It's been so nice making things entirely from my stash of fabric and supplies. However....a certain young girl is having a birthday soon and that required a fabric shopping trip!!
If you want to check out a picture of me in it, see either my facebook page or Instagram page. And while you're there, maybe hit the "like" or "follow" button?
I got the pattern from Craftsy. I don't remember if it was one of their emails or on Facebook. The actual pattern can be found at http://blog.lorennabuck.com/p/patterns-and-tutorials.html. The pattern is very good, though myself, and others on line did find the brim was a tad big when sewing onto the crown. In my own case, it could be because there were no grain lines on the pieces, so I didn't pay much attention to that when laying out the pieces, and I might have had some stretching.
Also, I didn't have heavy fusible interfacing. I figured I could use the sewn in stuff I had. Then I had an idea to use the lightweight stuff on the other side of the brim, and for some odd reason thought I'd be able to iron it to the sewn in stuff. Well, yeah, I could fuse them together...but then it still needs to be sewn in. I had some fusible webbing but not enough to do the whole brim. In retrospect, I could have used the light stuff on each brim piece.
I used a 50-50 poly/cotton sheet I had bought at Value Village a while ago. For $5, it's a LOT of fabric and although not as heavy as what Lorenna recommends for one layer, it's still good choice. The inside is a quilting cotton. I chose it so the soft pink would reflect onto my face and make me look good :)
I read a blog after I finished mine, that suggested topstitching each time you sew top pieces together, rather than after. I'll try that next time.
I was really impressed with myself, until time to sew the brim on. The first time, it was much too big. So I folded it in quarters and did that method, and the first three quarters worked well, but the last one was still giving me troubles. I eased it in as best as I could. And then topstitching. I was going to do more rounds along the outer brim, but it was starting to wrinkle. But I'm okay with it, for my FIRST sewn hat!! The ribbon and the slider lock were in my sewing desk. I keep all those little notions when taking apart wrecked backpacks! It's been so nice making things entirely from my stash of fabric and supplies. However....a certain young girl is having a birthday soon and that required a fabric shopping trip!!
Saturday, April 30, 2016
Special Gift
My 13 year old, Lucy, was going on her first band trip this past month. And not just to Ottawa or something. They were going, by plane, to Colorado! She is in the Durham Jazz Band. This is actually 3 bands (plus a "combo"), of students from mainly grade 7-12, for the Durham Region (east of Toronto). Students must audition each year, and there are only about 15 spots in each band. Lucy was encouraged to try out last year, but wasn't sure she was ready. Then the kids came back from their trip to New York City, and Lucy had musician's regret, LOL. She's never shown a particular fondness for jazz--she was in the school jazz band for the last few months of grade 6, and all of grade 7, but her music teacher is the conductor for the senior jazz band, and really, there's not much else for musicians her age. So, jazz it is!
Since they were spending a lot of time on a bus, in change-able weather, I figured a nice day pack would be handy. At first I thought I could do it as a surprise, but, well, this is Lucy. She's not all that big on surprises. I knew I needed her input if I wanted her to get any use out of it. My idea was a black drawstring backpack, with a lighter coloured inside, and the DJB logo embroidered on the outside by my friend at Small World Embroidery (she did the "Rude Robot" hat, and luckily, since then, has moved to just behind the kids' school!). She was happy for the chance to practice her scanning and digitizing.
Lucy picked out red satin for the inside. What?! Satin would not have been my choice. I didn't want to do a zippered pocket in satin, so I did a hanging pocket, but she said it didn't work because it kept flipping out. I probably could have used fusible interfacing to do the zipper. Next time.
I also sewed a couple loops of elastic in one of the inside seams to slide the water bottle in, to keep it upright. She said she never tried it.
The cord straps were rescued from a cheapie drawstring backpack that had been a give-away promotion and fell apart.
She received quite a few compliments on it, and it sounds like a number of kids would be interested in having one. Getting the embroidery done is probably not as cheap as having it screen printed (or whatever is the current technology) but I felt it looked really custom, and supported someone local. I think I might make one (with a different inside fabric!) for their upcoming dinner and dance fundraiser!
Since they were spending a lot of time on a bus, in change-able weather, I figured a nice day pack would be handy. At first I thought I could do it as a surprise, but, well, this is Lucy. She's not all that big on surprises. I knew I needed her input if I wanted her to get any use out of it. My idea was a black drawstring backpack, with a lighter coloured inside, and the DJB logo embroidered on the outside by my friend at Small World Embroidery (she did the "Rude Robot" hat, and luckily, since then, has moved to just behind the kids' school!). She was happy for the chance to practice her scanning and digitizing.
Lucy picked out red satin for the inside. What?! Satin would not have been my choice. I didn't want to do a zippered pocket in satin, so I did a hanging pocket, but she said it didn't work because it kept flipping out. I probably could have used fusible interfacing to do the zipper. Next time.
I also sewed a couple loops of elastic in one of the inside seams to slide the water bottle in, to keep it upright. She said she never tried it.
The cord straps were rescued from a cheapie drawstring backpack that had been a give-away promotion and fell apart.
She received quite a few compliments on it, and it sounds like a number of kids would be interested in having one. Getting the embroidery done is probably not as cheap as having it screen printed (or whatever is the current technology) but I felt it looked really custom, and supported someone local. I think I might make one (with a different inside fabric!) for their upcoming dinner and dance fundraiser!
Wednesday, April 27, 2016
One More Bag!
I enjoyed sewing Megan's slouch bag and could see many ways to customize it. My mother usually carries a larger black leather-look purse and stuffs it with a lot. I thought it might be nice for her to have something different. Still large and stuffable, but just to change it up once in a while.
I went through my fabrics, and picked out this rayon wrap skirt with dragonflies. For the bottom of the gusset, I wanted something that would be durable and not show dirt too quickly. This side is a textured black; the texture is striping. In order to get the stripes to go across the straps, I had to piece it, but with so much else going on, that's not a problem.
I decided I wanted to add a water bottle pocket on this side. I used the pattern pieces from the seat organizers. That pattern has it topstitched to the organizer, so I had to use my brain to make it lined, sewn into the side seams, and with an elastic at the top. Luckily, the gusset piece is the perfect width. It doesn't hold a large water bottle, but my mom usually goes out with a small one. It does seem a bit bulky, but I think with the purse filled, it'll feel better. Also, since this is reversible, this will keep the water bottle upright inside the bag when worn the other way. Bonus--I think this way (elastic at the top) will be a great way to make my water bottle holders more adjustable!
For the inside, I chose to recycle a test muslin. I couldn't get a piece large enough after taking it apart, but I don't think the seam is bad. Rob thought it felt a bit "old ladyish", but um, Mom isn't young, and is an award-winning gardener! I went subtle with the zipper, luckily it was also in my stash. For the bottom of the gusset, I went with a brown cord. I actually had two brown cords (and a brown twill) to choose from! I also had a pale pink cord that looked lovely with it, but not too practical. The top of the strap is a beige crinkle fabric, which once upon a time had been a babywearing wrap. Megan and I picked a lot of wild blackberries with that wrap!
The side has a narrow pocket on the gusset.
The inside of the pocket is also a little more subdued this time.
I made the straps the length the pattern suggests for an adult, but my ends weren't very good, and even cross body, they were way too long. I cut them down, tapered the ends a bit (I've seen another hobo bag pattern where the strap narrows in where the knot is to be tied). I've been thinking about adding snaps to the straps to keep those ends down. But...how many?
Even though Megan's bag went to together easy-peasy, this one didn't. I don't know if it was because the rayon was slippery and the cutting wasn't accurate, or what, but the joins of the curved tip of the body to the strap, took quite a few attempts, and even re-cutting of the black fabric. And of course, once or twice I managed to not have pulled the surrounding fabric out of the way and it got stitched in! Ooops. I really took my time with this, thinking the process through, and the little extra features. I think it paid off!
I went through my fabrics, and picked out this rayon wrap skirt with dragonflies. For the bottom of the gusset, I wanted something that would be durable and not show dirt too quickly. This side is a textured black; the texture is striping. In order to get the stripes to go across the straps, I had to piece it, but with so much else going on, that's not a problem.
I decided I wanted to add a water bottle pocket on this side. I used the pattern pieces from the seat organizers. That pattern has it topstitched to the organizer, so I had to use my brain to make it lined, sewn into the side seams, and with an elastic at the top. Luckily, the gusset piece is the perfect width. It doesn't hold a large water bottle, but my mom usually goes out with a small one. It does seem a bit bulky, but I think with the purse filled, it'll feel better. Also, since this is reversible, this will keep the water bottle upright inside the bag when worn the other way. Bonus--I think this way (elastic at the top) will be a great way to make my water bottle holders more adjustable!
For the inside, I chose to recycle a test muslin. I couldn't get a piece large enough after taking it apart, but I don't think the seam is bad. Rob thought it felt a bit "old ladyish", but um, Mom isn't young, and is an award-winning gardener! I went subtle with the zipper, luckily it was also in my stash. For the bottom of the gusset, I went with a brown cord. I actually had two brown cords (and a brown twill) to choose from! I also had a pale pink cord that looked lovely with it, but not too practical. The top of the strap is a beige crinkle fabric, which once upon a time had been a babywearing wrap. Megan and I picked a lot of wild blackberries with that wrap!

The inside of the pocket is also a little more subdued this time.
I made the straps the length the pattern suggests for an adult, but my ends weren't very good, and even cross body, they were way too long. I cut them down, tapered the ends a bit (I've seen another hobo bag pattern where the strap narrows in where the knot is to be tied). I've been thinking about adding snaps to the straps to keep those ends down. But...how many?
Even though Megan's bag went to together easy-peasy, this one didn't. I don't know if it was because the rayon was slippery and the cutting wasn't accurate, or what, but the joins of the curved tip of the body to the strap, took quite a few attempts, and even re-cutting of the black fabric. And of course, once or twice I managed to not have pulled the surrounding fabric out of the way and it got stitched in! Ooops. I really took my time with this, thinking the process through, and the little extra features. I think it paid off!
Saturday, April 23, 2016
Getting in the Groove
I never seem to have the right bag for the outing. I've been wanting to sew bags, and this time resting my wrist has been great for my sewing mojo! I decided a drawstring backpack would be good. They didn't look hard, no real special hardware needed. I started googling. Mmmm. Could it be made reversible? I hate how crumbs get stuck in the raw seams of bags....I couldn't find a pattern to make it reversible, but I did find a pattern for making a lined version. I used one we already had to base the size on, which was 16"x20".
I picked out this loooonnnngggg piece of heavier decorator cotton. I've had it for awhile. I bought it thinking it was a sheet, but it turned out to be a window topper, so it's not very wide. But there's lots of it! And, it even had a hem that I thought would work for passing the ties through. Which of course meant I had to adjust the size of the inner piece to account for needing to fold over the casement.
The other edge was a folded over hem, which I thought I could cut off, zig zag down the edge, and make into the straps.
This inside would be this blue fabric I found in my bin. I have no idea where it came from. It might have come from my aunt, who lived in Africa for awhile when I was young, and a few years ago she gave me some African fabric she had brought back but never used.
The "Made in..." was stamped with a gold foil. I thought it would be cool if it showed on some future project, but unfortunately, it could be scraped off with my nail. I don't know the fabric content, but when I ironed it---it stank really bad!
I decided I wanted an inside pocket. When the weather is warmer I'm going to be walking to work, and I'd like a place for my keys, phone and mp3 player. Well, now we have a new door lock with a number pad, so I don't need the key, but if we're hiking or something, it'll be good. I used the tutorial here which worked very well, even though I wasn't placing it 1" below the top and I used a different sized zipper, one just pulled from my stash. I buy bags of random zippers at Value Village once in awhile. Great way to have random colours for projects like this.
This is the outside of the pocket fabric. Just chose a random bit of fabric from my bins!
This is the inside of the pocket. I don't like dark fabrics in bags!
I went outside to take pictures, and over the course of the morning, the local robins built this much of a nest, right beside our back door!
This is a close up of the strap. I spent a bit of time trimming off loose threads. However, I did it with the bag loose, and when I tightened it to use it....there were a lot more threads that needed trimming!
So here's the final result. I'm quite pleased. It's substantial enough without being heavy. My knitting needles don't poke through. The opening has some heft to it so it doesn't collapse when trying to put things in. Large enough for my snowpants and safety vest for work. It's nice to have something practical, pretty, and unique!
I picked out this loooonnnngggg piece of heavier decorator cotton. I've had it for awhile. I bought it thinking it was a sheet, but it turned out to be a window topper, so it's not very wide. But there's lots of it! And, it even had a hem that I thought would work for passing the ties through. Which of course meant I had to adjust the size of the inner piece to account for needing to fold over the casement.
The other edge was a folded over hem, which I thought I could cut off, zig zag down the edge, and make into the straps.
The "Made in..." was stamped with a gold foil. I thought it would be cool if it showed on some future project, but unfortunately, it could be scraped off with my nail. I don't know the fabric content, but when I ironed it---it stank really bad!
I decided I wanted an inside pocket. When the weather is warmer I'm going to be walking to work, and I'd like a place for my keys, phone and mp3 player. Well, now we have a new door lock with a number pad, so I don't need the key, but if we're hiking or something, it'll be good. I used the tutorial here which worked very well, even though I wasn't placing it 1" below the top and I used a different sized zipper, one just pulled from my stash. I buy bags of random zippers at Value Village once in awhile. Great way to have random colours for projects like this.
This is the outside of the pocket fabric. Just chose a random bit of fabric from my bins!
This is the inside of the pocket. I don't like dark fabrics in bags!
I went outside to take pictures, and over the course of the morning, the local robins built this much of a nest, right beside our back door!
This is a close up of the strap. I spent a bit of time trimming off loose threads. However, I did it with the bag loose, and when I tightened it to use it....there were a lot more threads that needed trimming!
So here's the final result. I'm quite pleased. It's substantial enough without being heavy. My knitting needles don't poke through. The opening has some heft to it so it doesn't collapse when trying to put things in. Large enough for my snowpants and safety vest for work. It's nice to have something practical, pretty, and unique!
Subscribe to:
Posts (Atom)